FS's Build thread... lots of pics!
 06-07-2006, 11:31 PM
#1
50 Watt CAFz'r
Thread Starter

Join Date: Aug 2003
Posts: 221
FS's Build thread... lots of pics!
Here we go, copying it over from another forum just for you guys. There will be the odd non-stereo related thing from time to time, but I'm sure you can live with it. It starts with suspension stuff, then goes into the stereo in a few posts 
Well, here goes nothing. Another summer is upon us, and I have decided to get off my lazy butt and start putting some time and money into the car.
A bit of info about myself, I'm a 20 year old, mechanical engineering student. I'm a stereo installer in my free time and I'm currently working as an HVAC system designer for the summer. I've been installing stereos for about 5 years now and finally decided it was time to do my own car! What had stopped me before? Well, I was working full time as a stereo installer and after working on other people's cars all day long I really really didn't feel like working on my own..
I will get into the stereo tomorow. Coming from me, expect nothing short of perfection and one of most unique stereo installs ever done in a fiero... I think there are a couple things atleast that I have personally never seen done
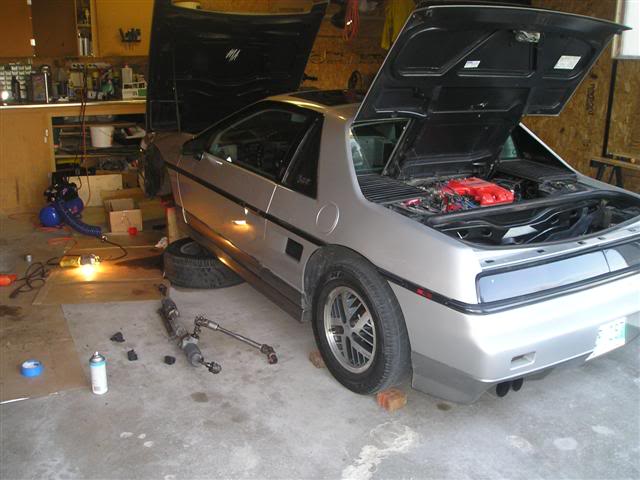
Day 1 after about 3 hour's work: HUGE thanks to Olaf.
 '
'

Well, here goes nothing. Another summer is upon us, and I have decided to get off my lazy butt and start putting some time and money into the car.
A bit of info about myself, I'm a 20 year old, mechanical engineering student. I'm a stereo installer in my free time and I'm currently working as an HVAC system designer for the summer. I've been installing stereos for about 5 years now and finally decided it was time to do my own car! What had stopped me before? Well, I was working full time as a stereo installer and after working on other people's cars all day long I really really didn't feel like working on my own..
I will get into the stereo tomorow. Coming from me, expect nothing short of perfection and one of most unique stereo installs ever done in a fiero... I think there are a couple things atleast that I have personally never seen done
Day 1 after about 3 hour's work: HUGE thanks to Olaf.
'

 06-07-2006, 11:33 PM
#3
50 Watt CAFz'r
Thread Starter
Join Date: Aug 2003
Posts: 221
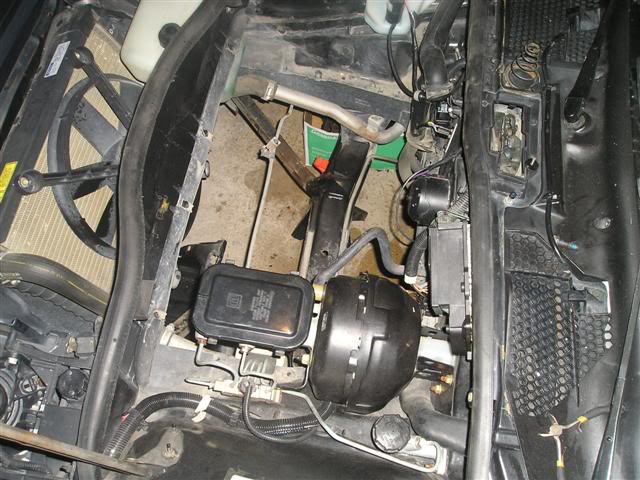
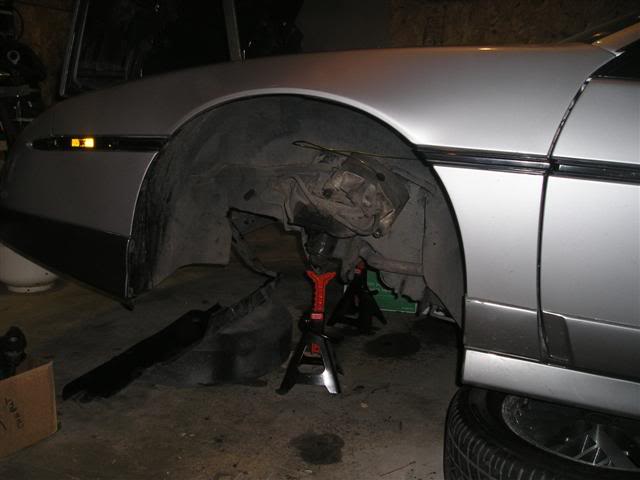
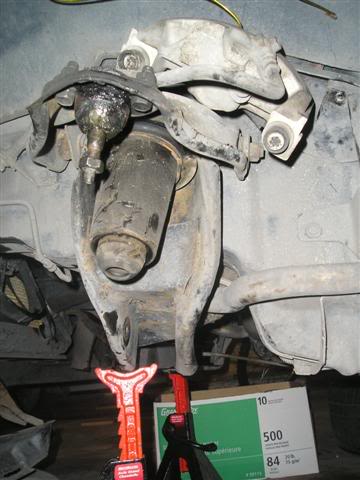
Day 3: Going back together and all finished
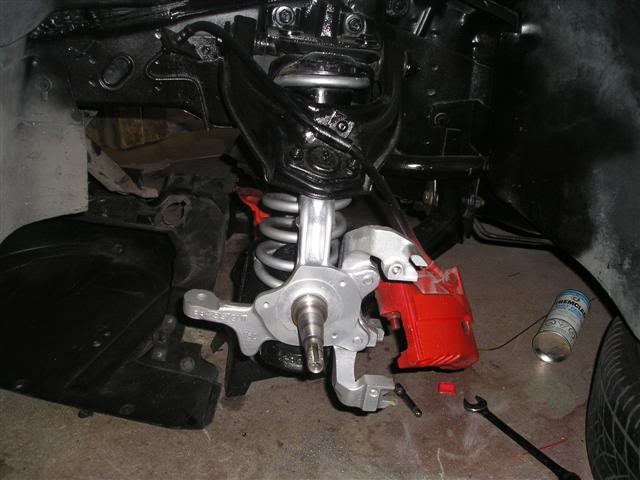
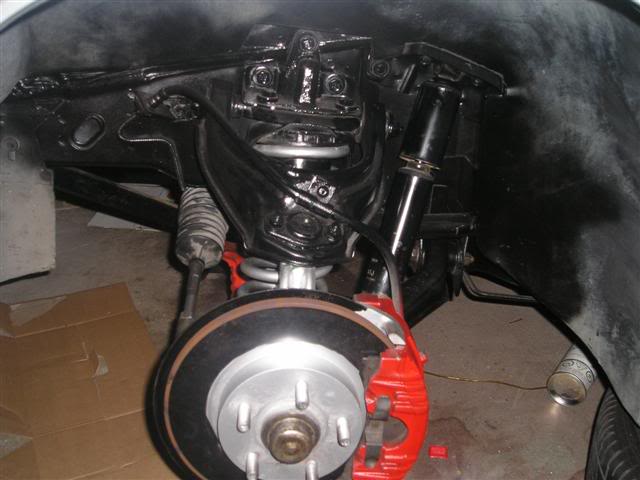
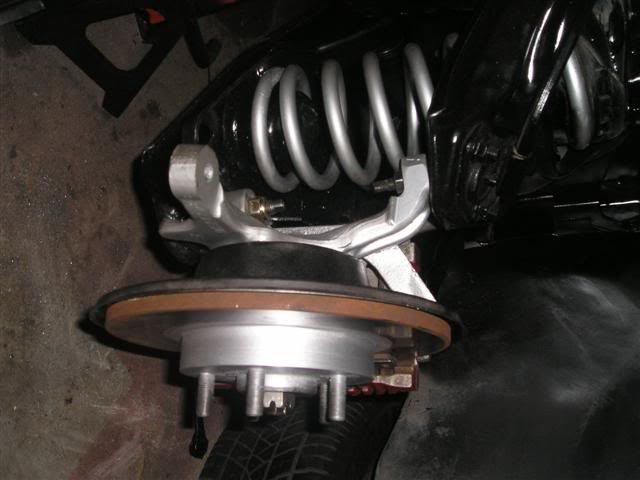
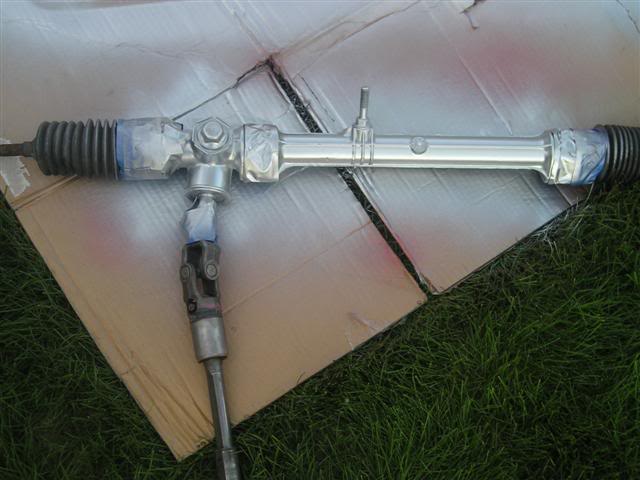
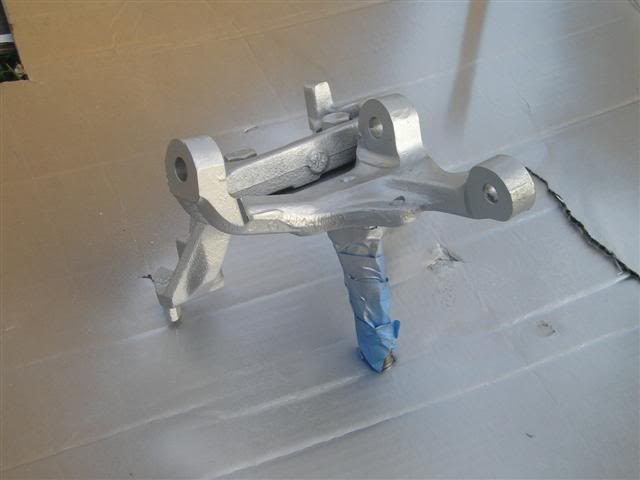
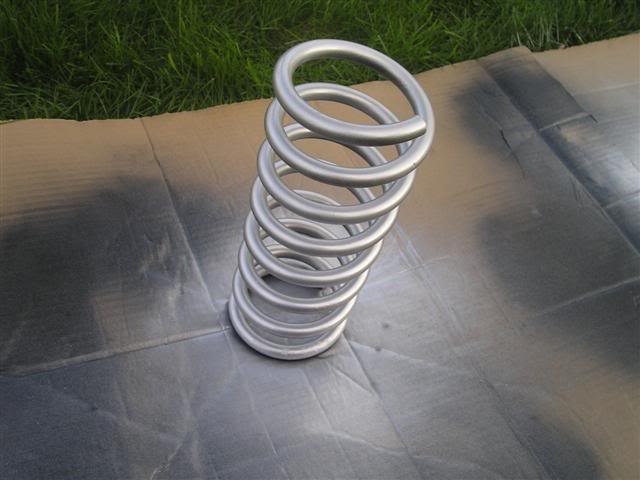
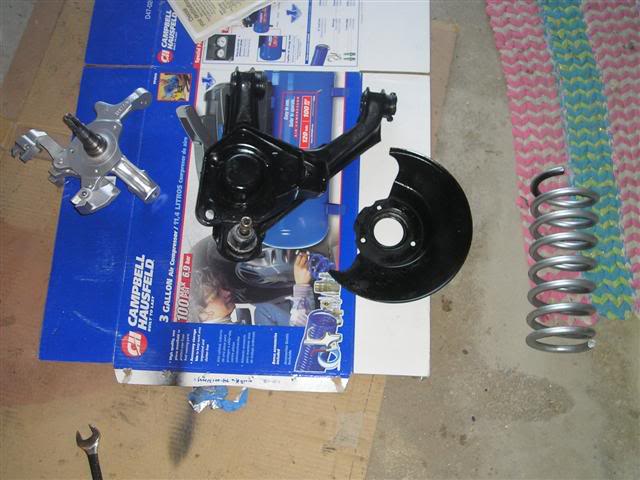
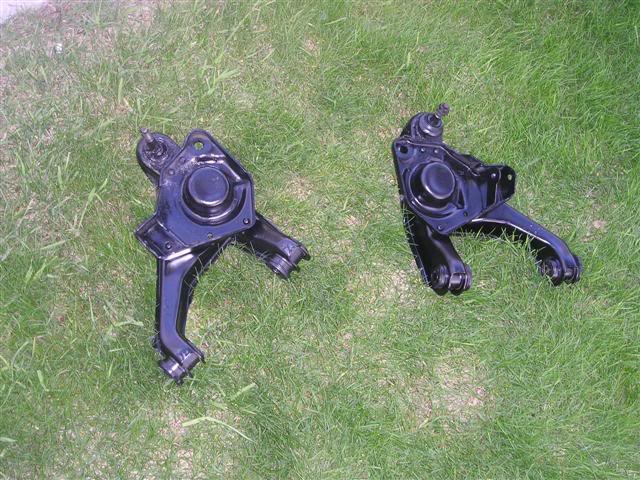
Now has 4 new tie rod ends and 4 new ball joints, as well as the bumpstops were shortened about 1".
Overall reaction so far is that it rides a heck of a lot better! On large bumps on uneven roads the front bumper will scrape. Or on uneven roads under heavy breaking the front bumper will scrape the ground... I think this has to do with needing new shocks though. KYBs are coming soon!
 06-07-2006, 11:35 PM
#5
50 Watt CAFz'r
Thread Starter
Join Date: Aug 2003
Posts: 221
Well, onto the stereo..
Special thanks to:
Dorian @ Brian Reimer Audio
Chris @ Mitek
Kyle
Here is what is going in the car:
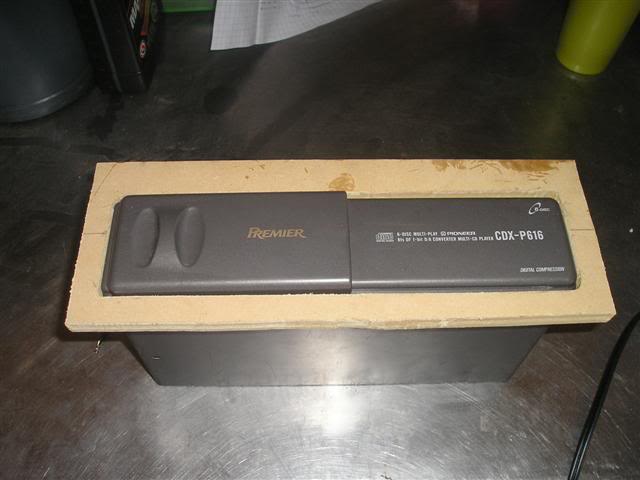
Head Unit: Pioneer Premier DEH-P880PRS
I still have to buy this unit, should be here in a couple weeks.
www.pioneerelectronics.com
Front Speakers: Diamond Audio M6 5.25" Component speakers
www.diamondaudio.com
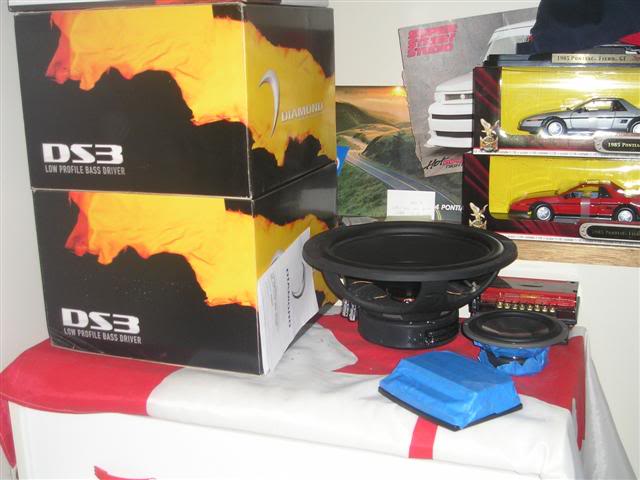
Subs: 2x Diamond Audio DS312D4 12" shallow mount subwoofers
www.diamondaudio.com
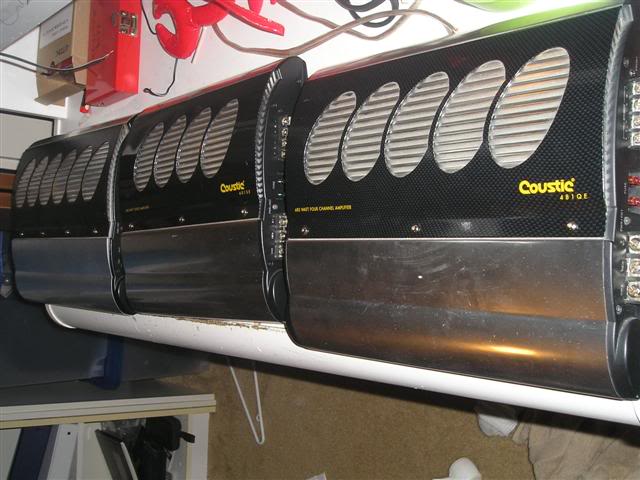
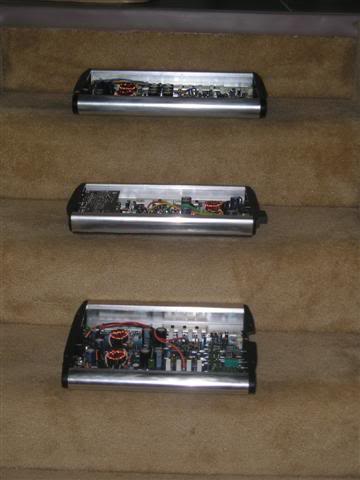
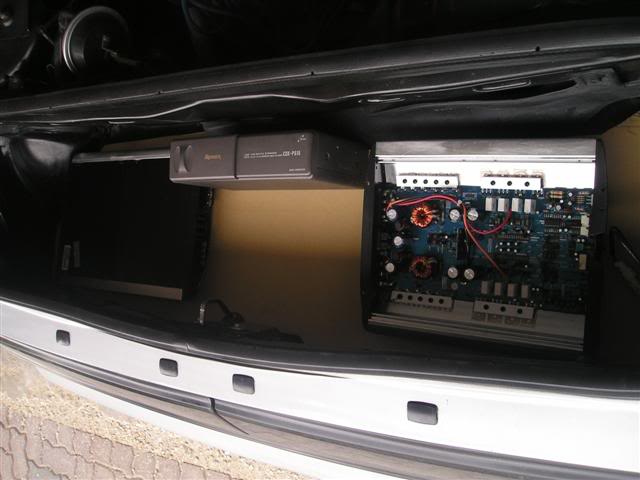
Amps:
-Front speaker amp: Coustic 481QE bridged to 2 channels. 240 watts RMS to each front side
-Subwoofer amp: Coustic 601SE. 300 watts RMS to each sub
-Rear/Trunk speaker amp: Coustic 401SE. 200 watts RMS x2
I'm still not sure what I'm using the Rear/Trunk amp for... I don't plan on running rear speakers. This is a sound quality setup, and the sound should be coming from the front of the car not the back... I think with that amp I'll have it wired to the headrest speakers for highway cruising, but have a switch to turn it on/off at will... Also, I will maybe have a set of speakers mounted in the trunk or front compartment for at shows, the amp will switch from the seat speakers to the front compartment or trunk speakers at will... Or maybe I just won't use that amp, really undecided as of yet.
EDIT: June 7: Amps are not 100% certain yet, I just looked at a pair of Coustic 801DBs to power the subs instead... That way I have the power there already should I want to upgrade in the future.... Which I most likely will.
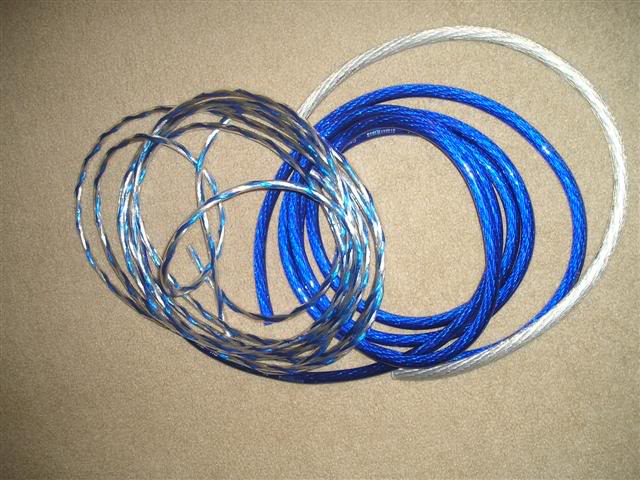
Wiring: All Streetwires wiring. 12g for the speakers and subs, fused distro block, machined battery terminals, 0awg primary wire, 4awg power and ground for each amp.
On to the pics of some of the gear I have so far, sorry everything is dirty or covered in masking tape to protect it during installation:
Some of the wire, it looks small in the pics, but has a diameter of about 1"
The amps and a hint of what to come:
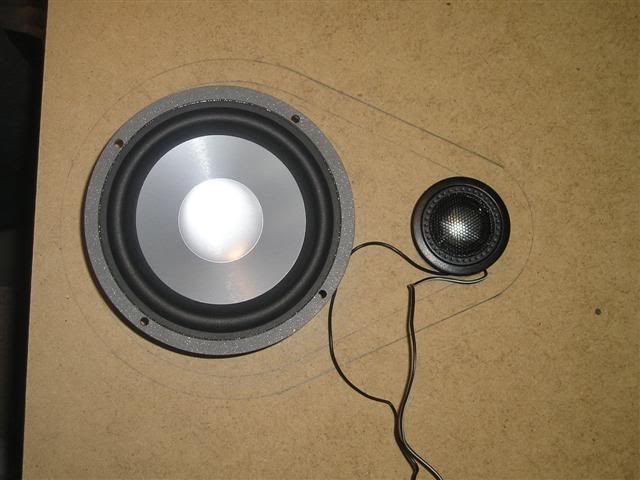
Quick shot of the components:
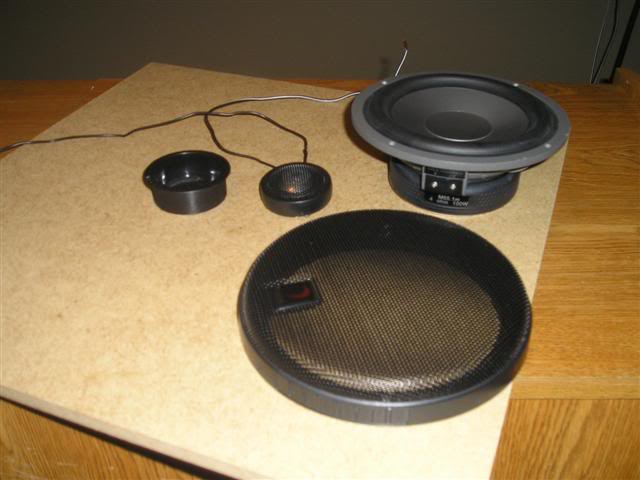
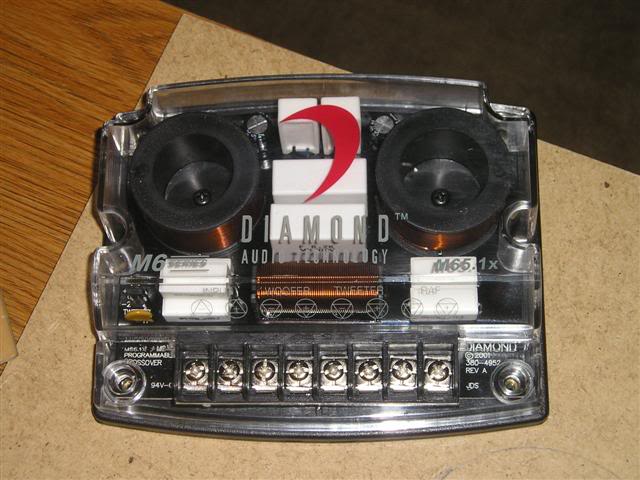
One of the massive, very nice looking Diamond crossovers for the components:
One of the subs, it's twin is in one of the boxes to the left. Crossover covered in tape as well as a mid range speaker in that pic. Also not the fiero related items in the general area:
Special thanks to:
Dorian @ Brian Reimer Audio
Chris @ Mitek
Kyle
Here is what is going in the car:
Head Unit: Pioneer Premier DEH-P880PRS
I still have to buy this unit, should be here in a couple weeks.
www.pioneerelectronics.com
Front Speakers: Diamond Audio M6 5.25" Component speakers
www.diamondaudio.com
Subs: 2x Diamond Audio DS312D4 12" shallow mount subwoofers
www.diamondaudio.com
Amps:
-Front speaker amp: Coustic 481QE bridged to 2 channels. 240 watts RMS to each front side
-Subwoofer amp: Coustic 601SE. 300 watts RMS to each sub
-Rear/Trunk speaker amp: Coustic 401SE. 200 watts RMS x2
I'm still not sure what I'm using the Rear/Trunk amp for... I don't plan on running rear speakers. This is a sound quality setup, and the sound should be coming from the front of the car not the back... I think with that amp I'll have it wired to the headrest speakers for highway cruising, but have a switch to turn it on/off at will... Also, I will maybe have a set of speakers mounted in the trunk or front compartment for at shows, the amp will switch from the seat speakers to the front compartment or trunk speakers at will... Or maybe I just won't use that amp, really undecided as of yet.
EDIT: June 7: Amps are not 100% certain yet, I just looked at a pair of Coustic 801DBs to power the subs instead... That way I have the power there already should I want to upgrade in the future.... Which I most likely will.
Wiring: All Streetwires wiring. 12g for the speakers and subs, fused distro block, machined battery terminals, 0awg primary wire, 4awg power and ground for each amp.
On to the pics of some of the gear I have so far, sorry everything is dirty or covered in masking tape to protect it during installation:
Some of the wire, it looks small in the pics, but has a diameter of about 1"
The amps and a hint of what to come:
Quick shot of the components:
One of the massive, very nice looking Diamond crossovers for the components:
One of the subs, it's twin is in one of the boxes to the left. Crossover covered in tape as well as a mid range speaker in that pic. Also not the fiero related items in the general area:
06-07-2006, 11:36 PM
#6
50 Watt CAFz'r
Thread Starter
Join Date: Aug 2003
Posts: 221
Starting on the trunk:
Hmm, I wonder if this will fit with all the amps:
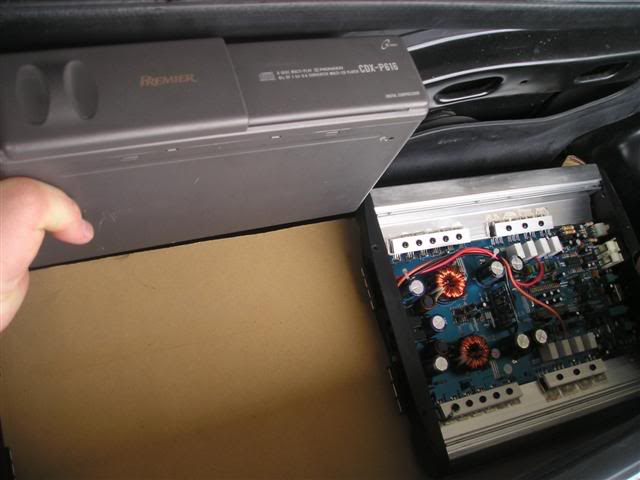
Nope... It will have to go elsewhere
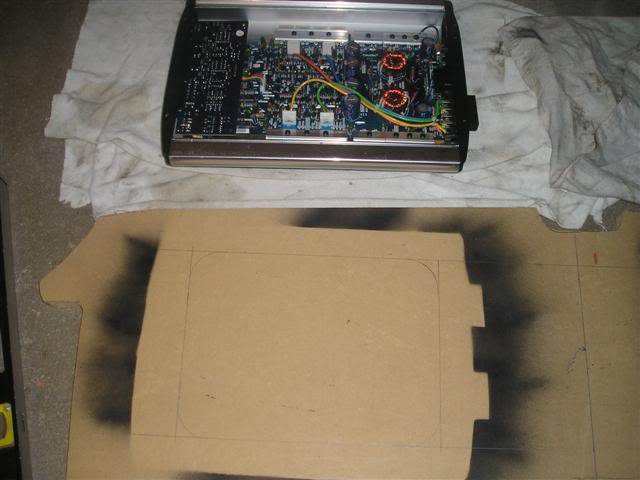
Lazyman's way do do amp outlines.. (no I didn't spray paint the amps, I made cardboard templates, then sprayed over the template)
Starting to draw out some shapes on the trunk board, wonder what those will be for......
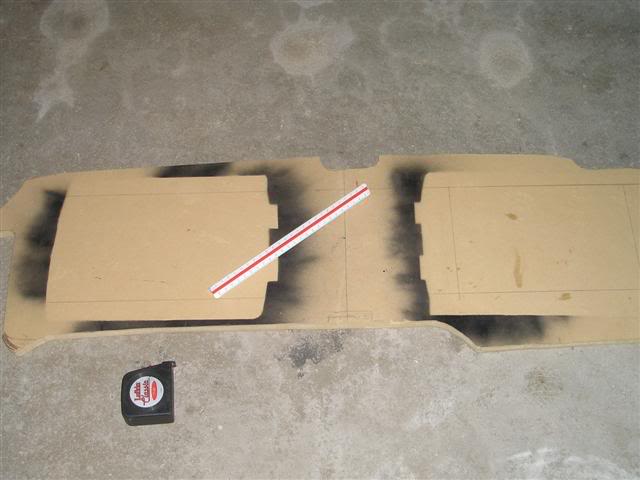
A little hint
Hmm, I wonder if this will fit with all the amps:
Nope... It will have to go elsewhere
Lazyman's way do do amp outlines.. (no I didn't spray paint the amps, I made cardboard templates, then sprayed over the template)
Starting to draw out some shapes on the trunk board, wonder what those will be for......
A little hint
06-07-2006, 11:37 PM
#7
50 Watt CAFz'r
Thread Starter
Join Date: Aug 2003
Posts: 221
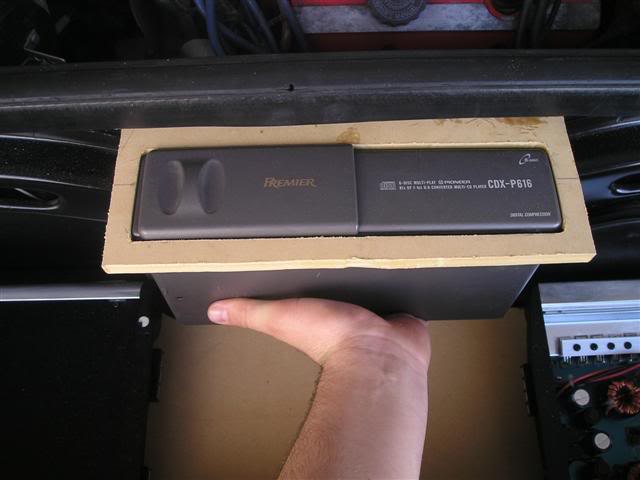
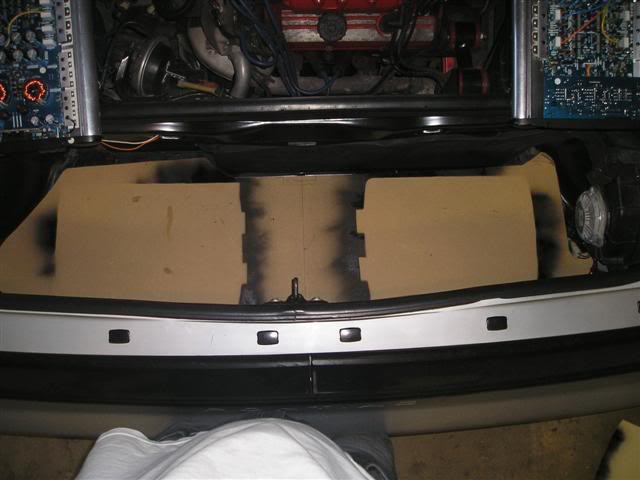
What's going on here, there seems to be a bump in the carpet...
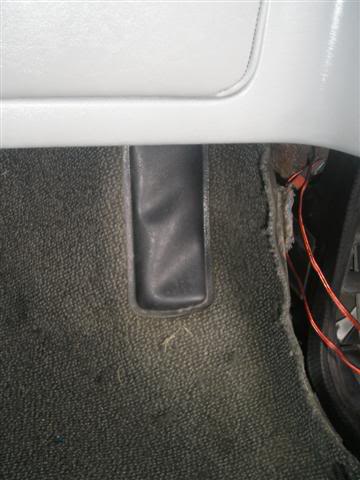
It fits!
Drawing out the baffle.. Not sure if I'll keep the one piece design, or go to a 2 piece. That will depend on how it all fits in the car.
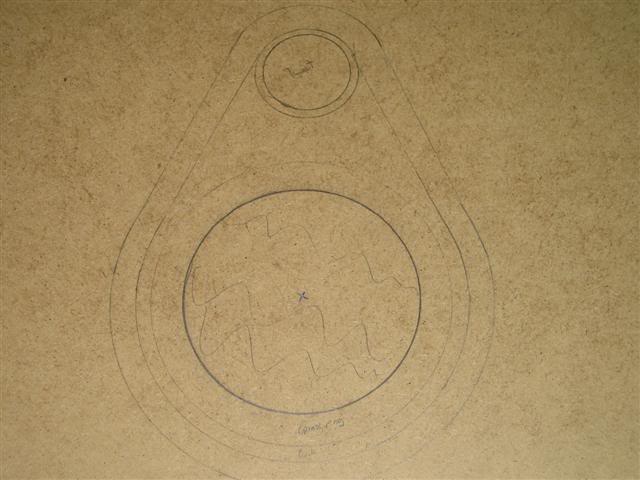
June 7 EDIT: Probably going 2 piece....
It fits!
Drawing out the baffle.. Not sure if I'll keep the one piece design, or go to a 2 piece. That will depend on how it all fits in the car.
June 7 EDIT: Probably going 2 piece....
06-07-2006, 11:38 PM
#8
50 Watt CAFz'r
Thread Starter
Join Date: Aug 2003
Posts: 221
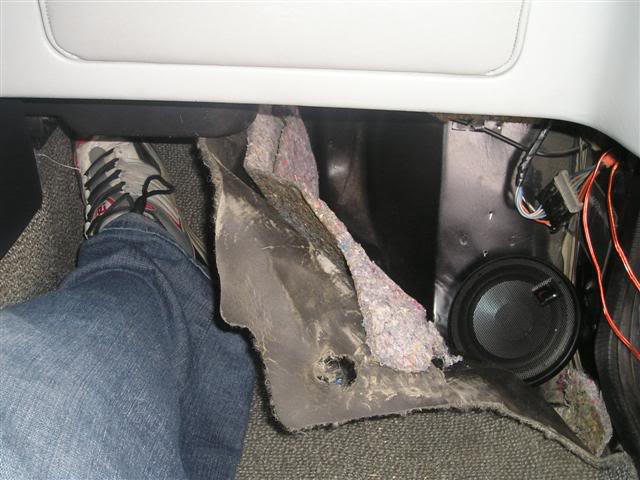
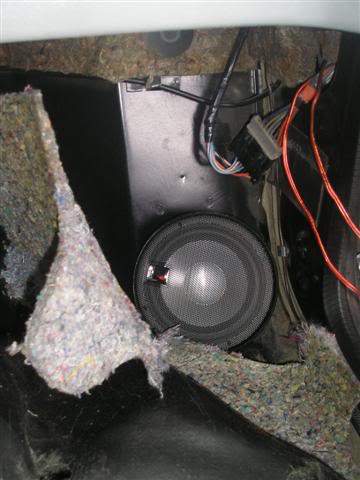
You notice wierd things when working on a stereo... Like how the trunk latch isn't centered in the trunk:

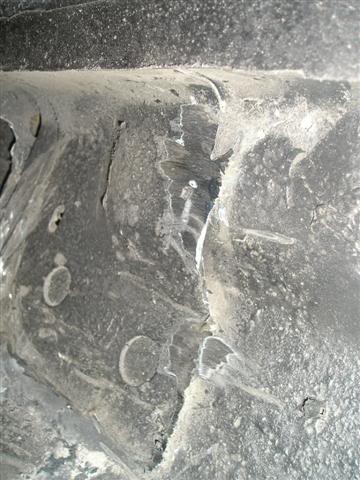
Well, a bit more progress today in a couple hours. Cutting out the firewall:
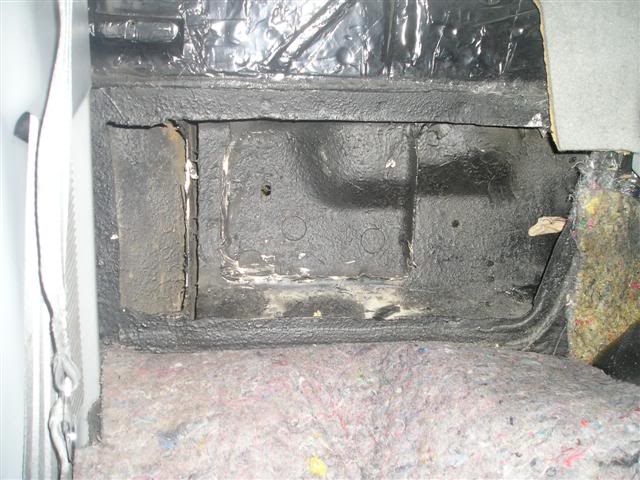
I may be cutting all the way through and re-working the firewall for a bit more depth... Will see Saturday morning how much room there is to go back.
Also picked up my fiberglass resin, hardner, metering pumps, cloth, matt ect today for a total of $280.
Well, a bit more progress today in a couple hours. Cutting out the firewall:
I may be cutting all the way through and re-working the firewall for a bit more depth... Will see Saturday morning how much room there is to go back.
Also picked up my fiberglass resin, hardner, metering pumps, cloth, matt ect today for a total of $280.
06-07-2006, 11:38 PM
#9
50 Watt CAFz'r
Thread Starter
Join Date: Aug 2003
Posts: 221
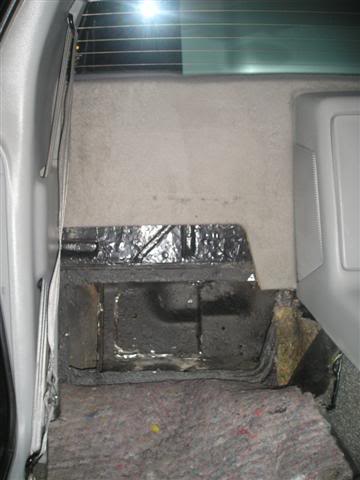
Well, it's raining and hailing right now so here is an update from yesterday's progress:
I smell some fiberglass happening this afternoon... Well actually I don't smell anything; The resin and hardner I bought has NO smell at all, no fumes, no headache, no trouble breathing after using it
At $160/gal for the resin and hardner it's a bit steep, but after working with it one time I've NEVER gone back to the $30/gal shitty stinky stuff! :hellya
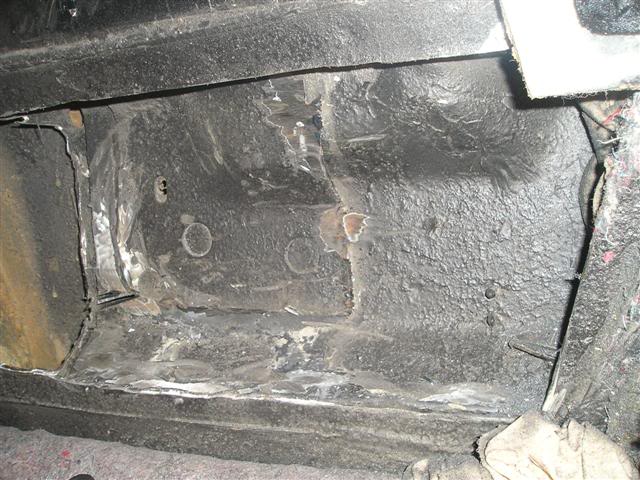
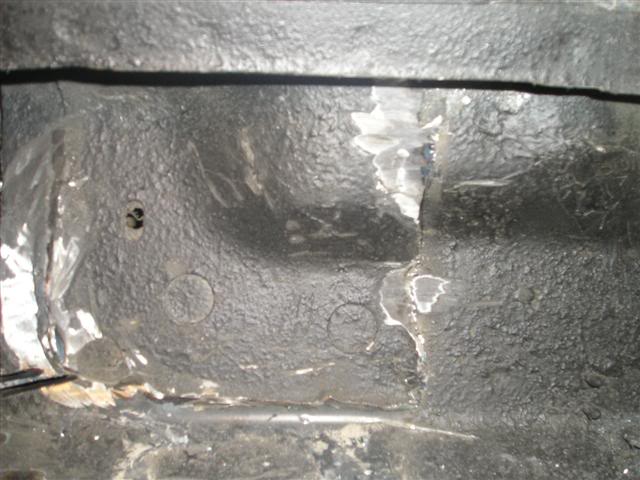
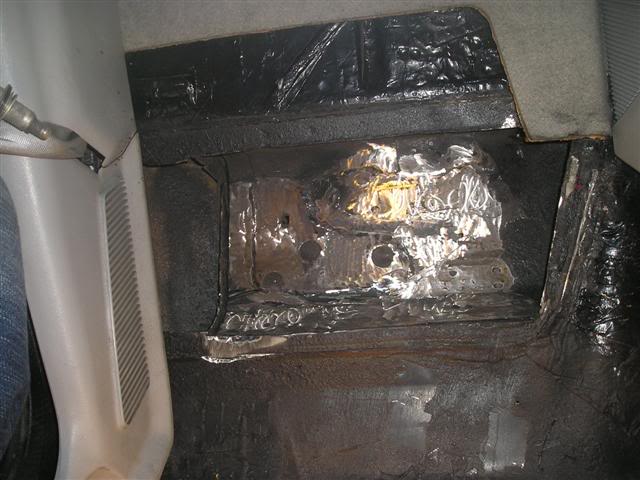
And that fire wall looks a hell of a lot better right now too. Removed a bit of un-needed bracketry and started cleaning everything up and smoothing everything out for the glass
Just have to run to Home Depo and pick of some expanding foam to fill in a few voids and then I start glassin.
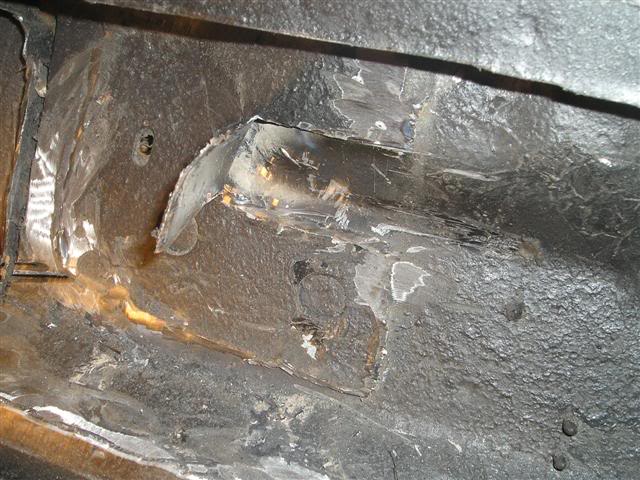
I made lots of sparks today:
This is where I'm at right now. I managed to cut down that hump quite significantly by grinding off more of the bracket. I'm still not sure if I will cut right through and re-weld the firewall a couple inches back or not. Going out to do a test fit right now and see how much seat travel I loose with the current cutout.
I smell some fiberglass happening this afternoon... Well actually I don't smell anything; The resin and hardner I bought has NO smell at all, no fumes, no headache, no trouble breathing after using it
At $160/gal for the resin and hardner it's a bit steep, but after working with it one time I've NEVER gone back to the $30/gal shitty stinky stuff! :hellya
And that fire wall looks a hell of a lot better right now too. Removed a bit of un-needed bracketry and started cleaning everything up and smoothing everything out for the glass
Just have to run to Home Depo and pick of some expanding foam to fill in a few voids and then I start glassin.
I made lots of sparks today:
This is where I'm at right now. I managed to cut down that hump quite significantly by grinding off more of the bracket. I'm still not sure if I will cut right through and re-weld the firewall a couple inches back or not. Going out to do a test fit right now and see how much seat travel I loose with the current cutout.
06-07-2006, 11:39 PM
#10
50 Watt CAFz'r
Thread Starter
Join Date: Aug 2003
Posts: 221
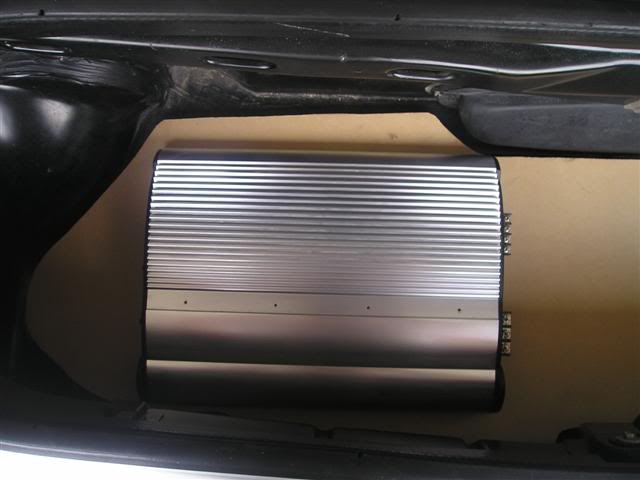
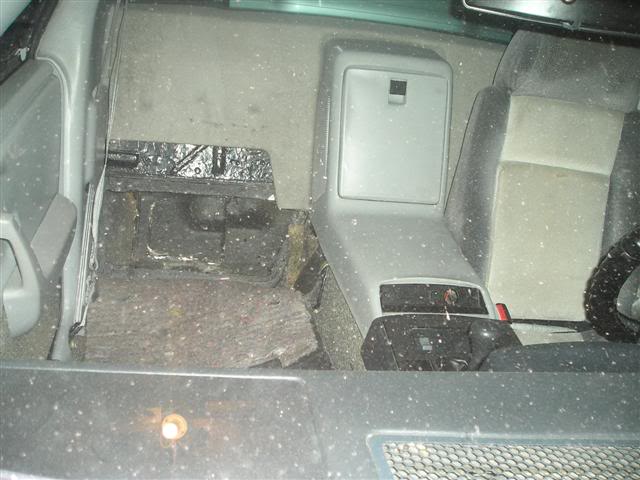
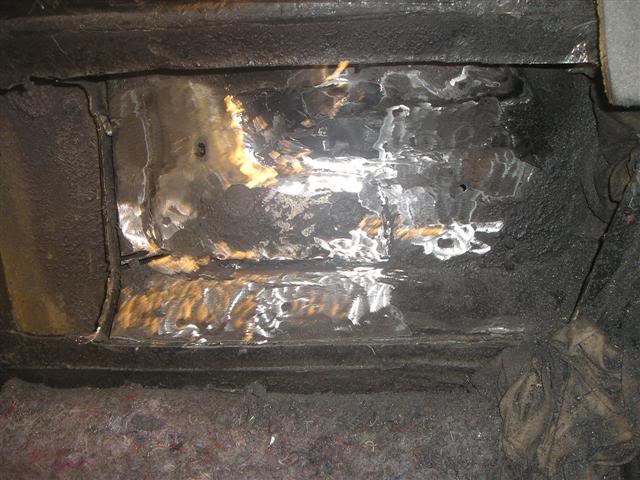
Well, did the test fit with the sub.. I have about 1.75" between the sub and seat. Will have about 1/4" of glass on the firewall, 3/4" space behind the sub and .75 left behind the seat once everything is said and done. I loose only the last notch on the rail.
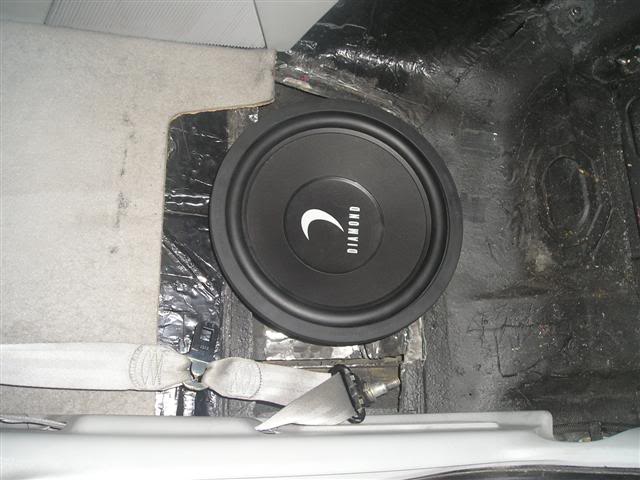
Yes, the sub is covered in masking tape.. The last thing I want to for little metal shavings to get inside the sub
This is good for me because my drivers seat is always in the 3rd last notch, so this will fit fine. No welding for this part
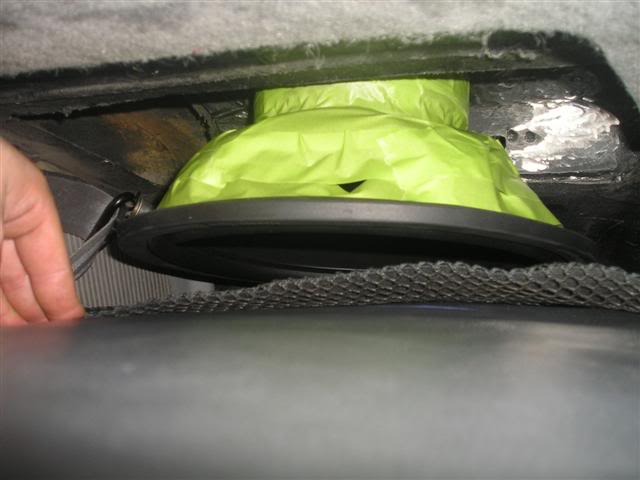
Expanding foam time for a bit of shape:
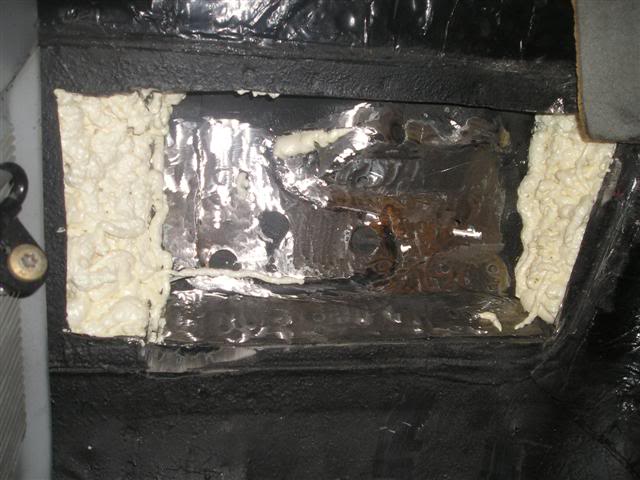
And now to go back outside and hope I didn't use too much foam
Yes, the sub is covered in masking tape.. The last thing I want to for little metal shavings to get inside the sub
This is good for me because my drivers seat is always in the 3rd last notch, so this will fit fine. No welding for this part
Expanding foam time for a bit of shape:
And now to go back outside and hope I didn't use too much foam


