
DIY: Tweeter and speaker pods for my SR components

Thread Starter
50 Watt CAFz'r
Joined: Oct 2007
Posts: 69
DIY: Tweeter and speaker pods for my SR components
Hey guys,
As you may or may not know, I've been working on making tweeter and speaker pods for my SR components for the last 3 days. I finished everything yesterday morning, but I didn't want to post anything until I listened to them for a while first.
This is my first attempt at making something like this, so the outcome wasn't the greatest but considering the circumstances, I'm still pleased with the way it turned out.
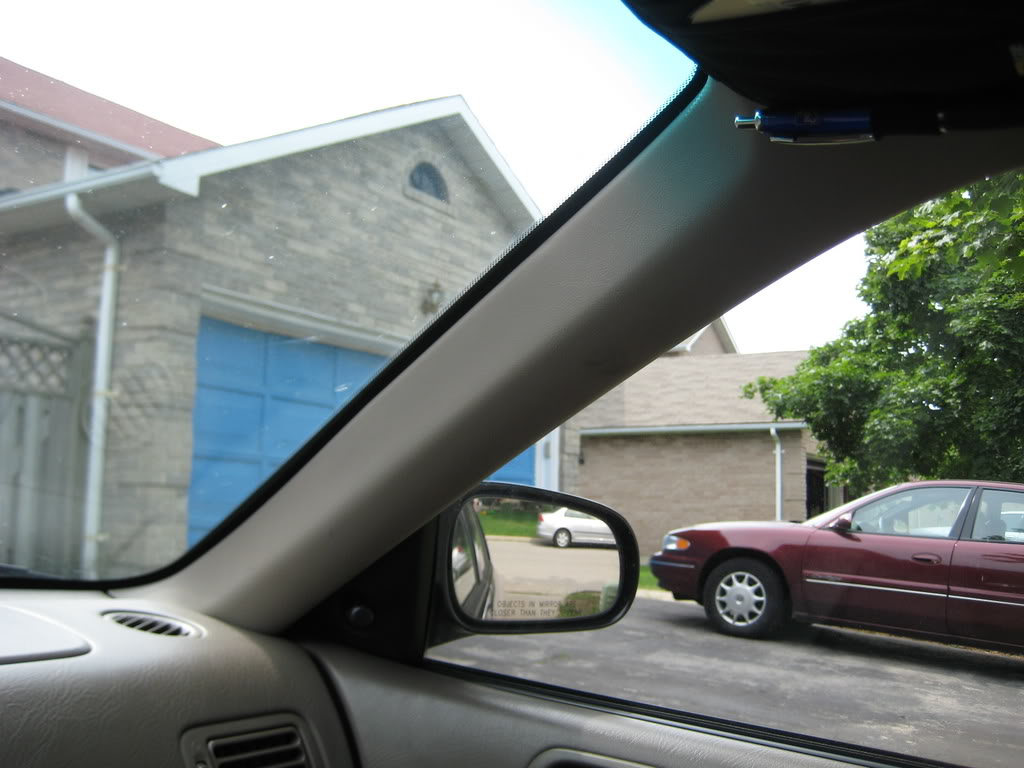
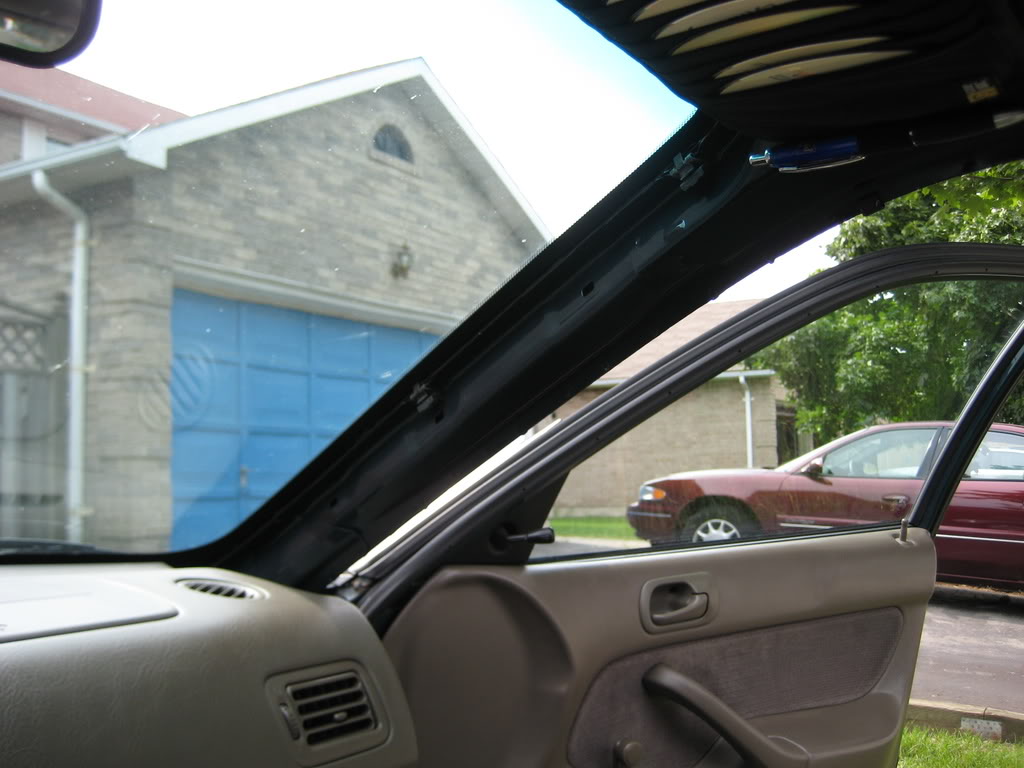
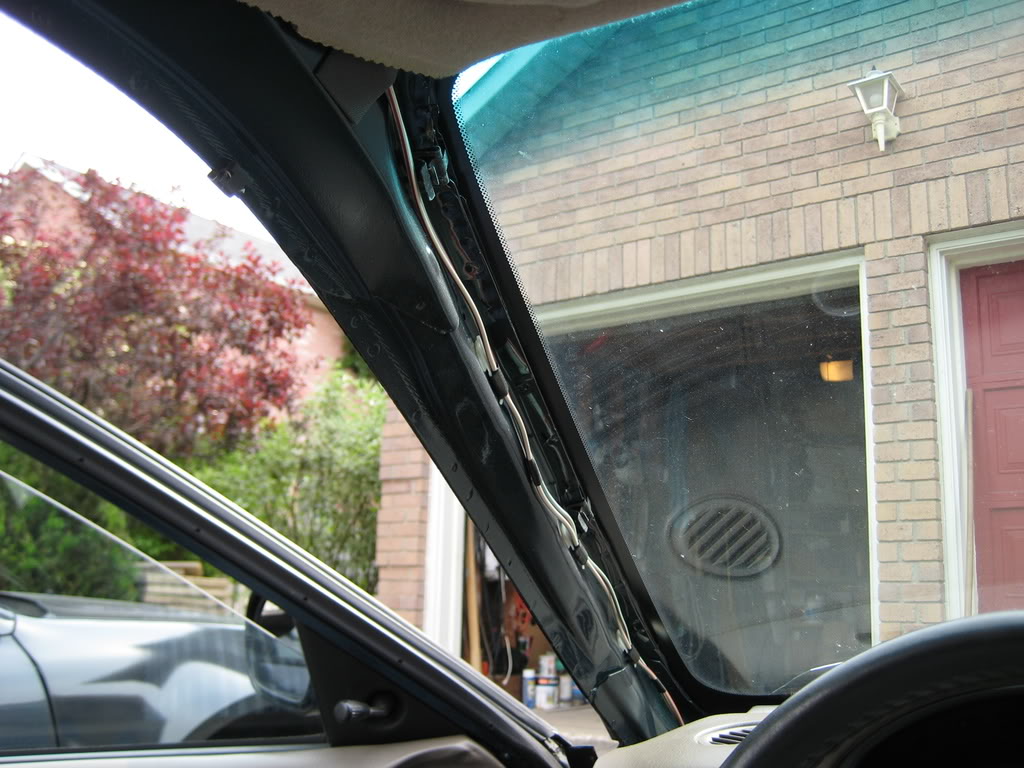
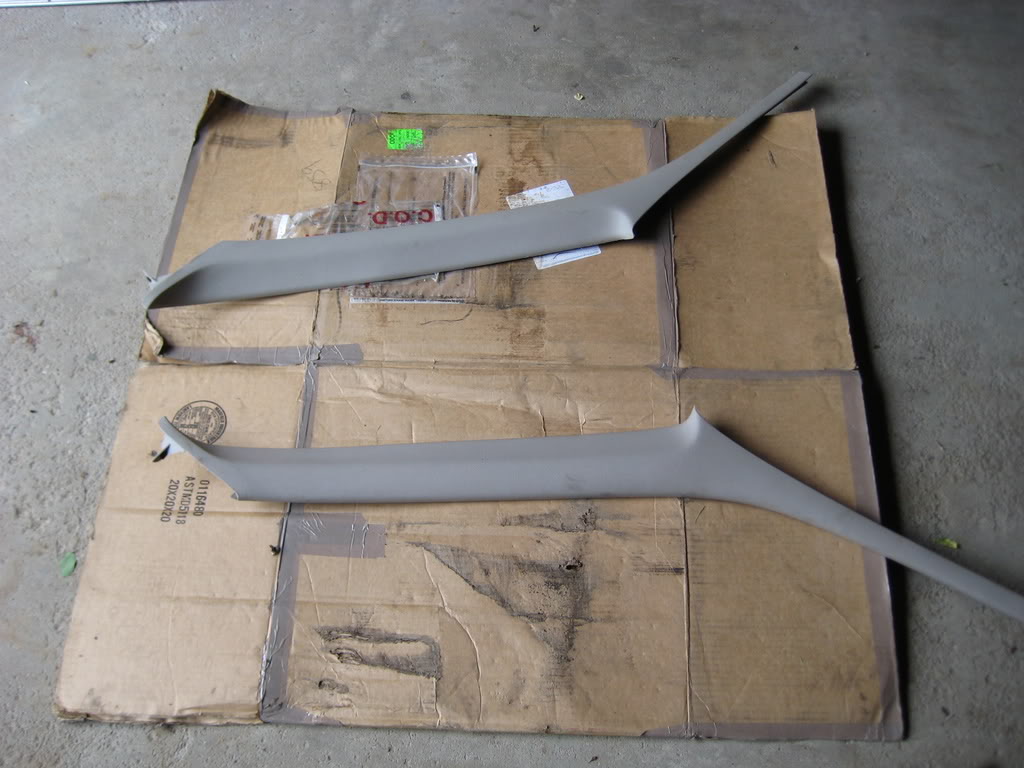
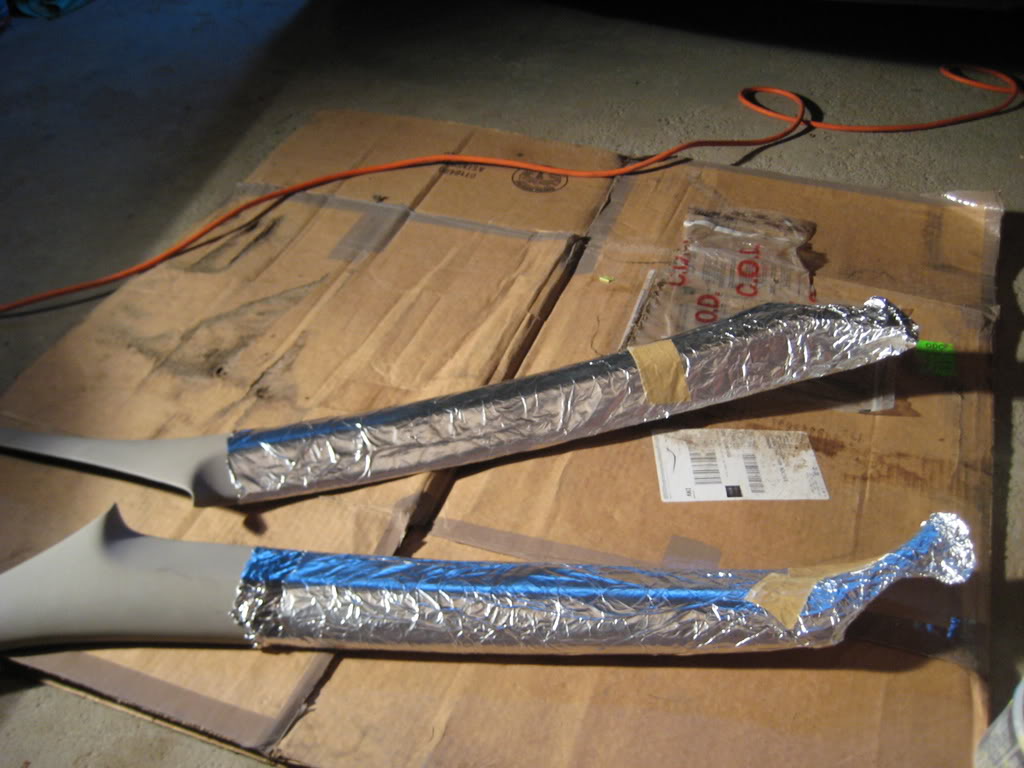
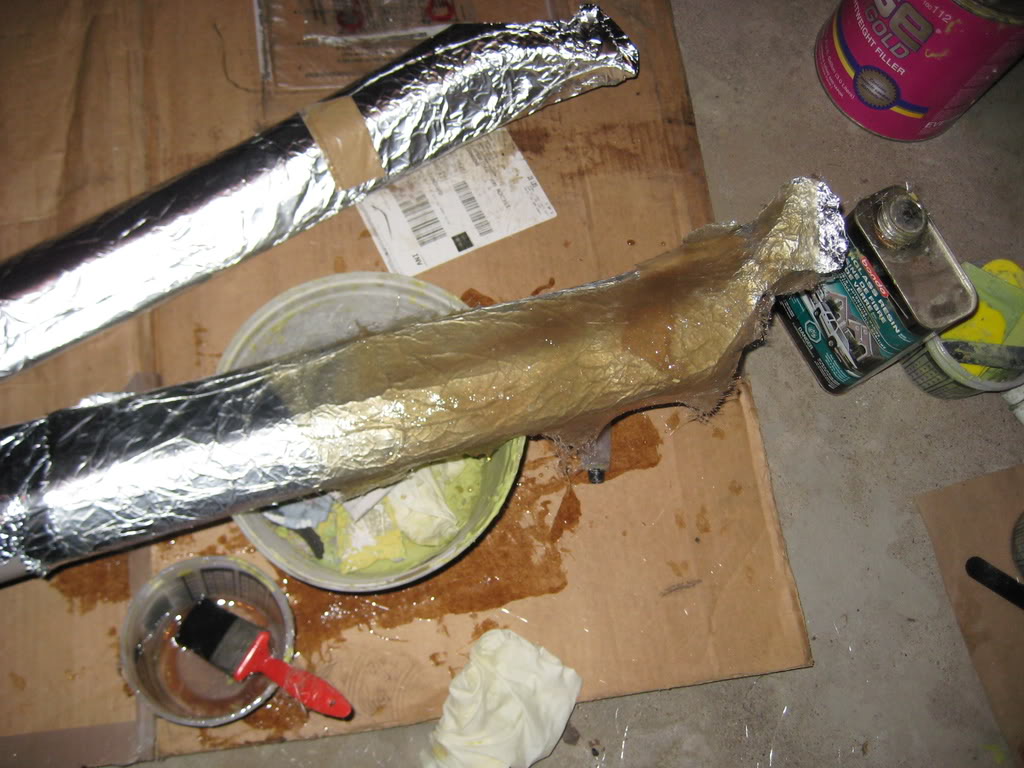
I'll First I had to take out the a-pillars
Then I had to make a mold of them for the tweeter pods:
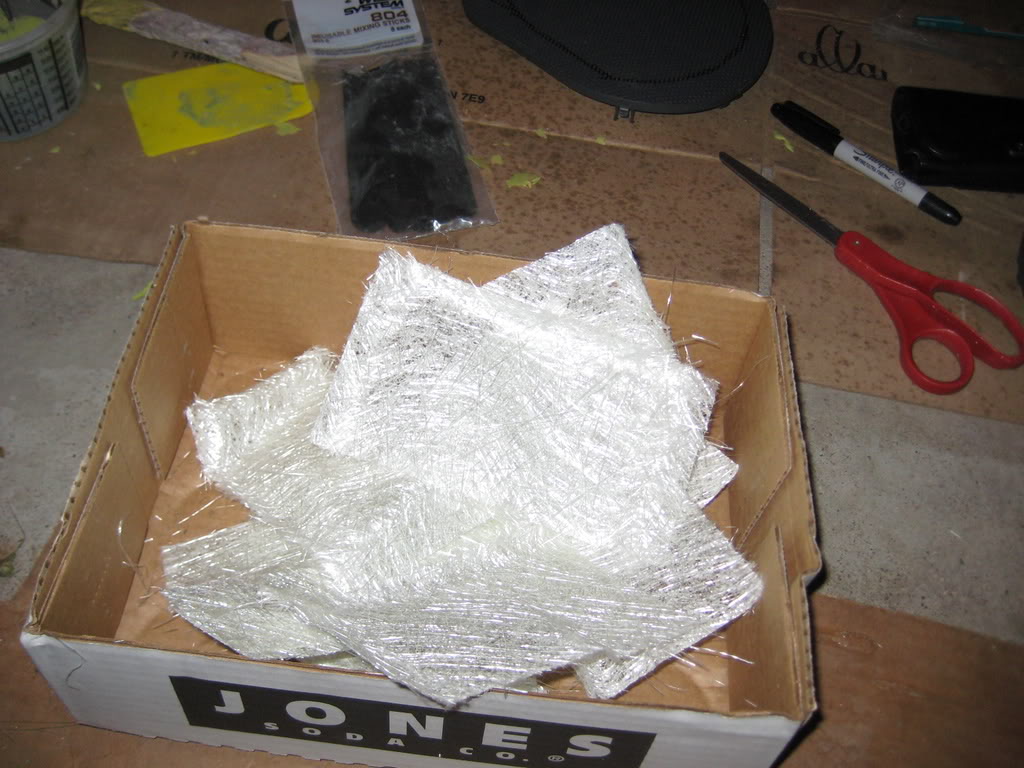
I started making the mold using fiberglass. I just followed the instructions by mixing the hardener and resin and then I applied 3 layers of fiberglass matting:
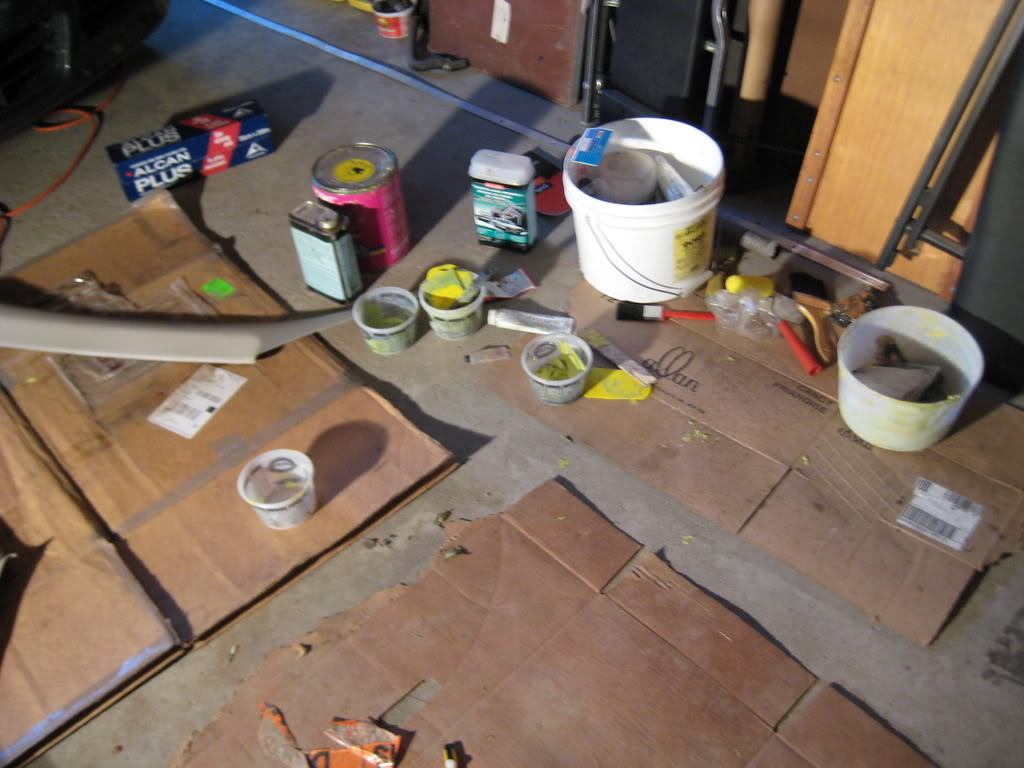
While you are waiting for the fiberglass to cure, I went to admire my SR components:
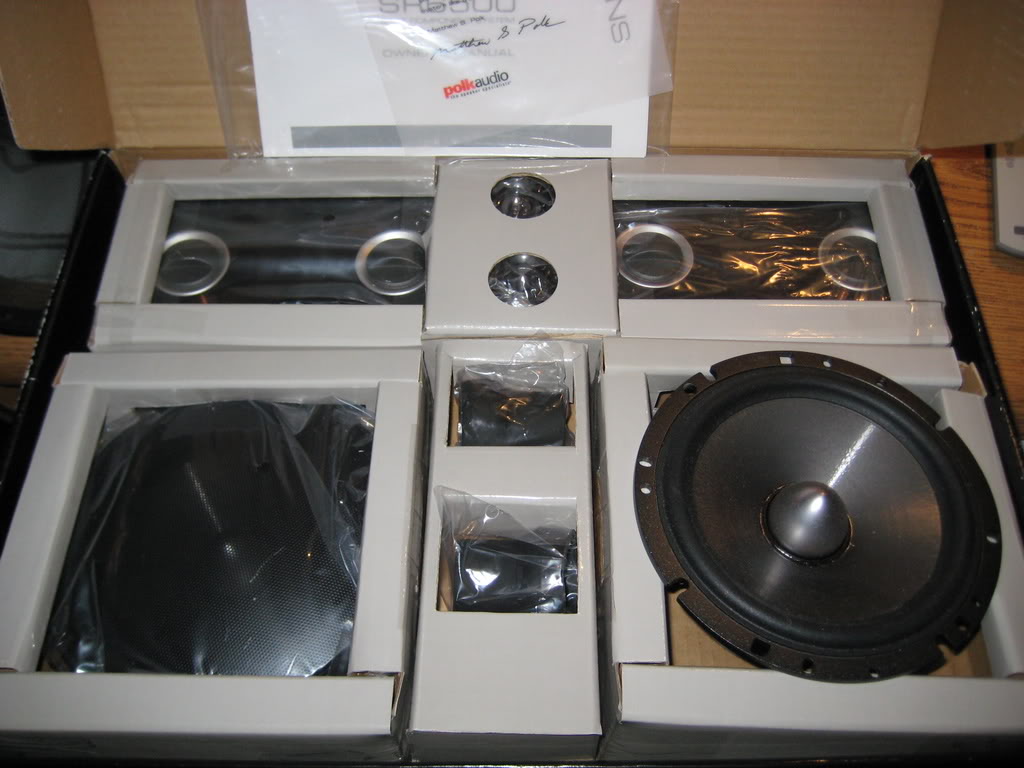
*drool*
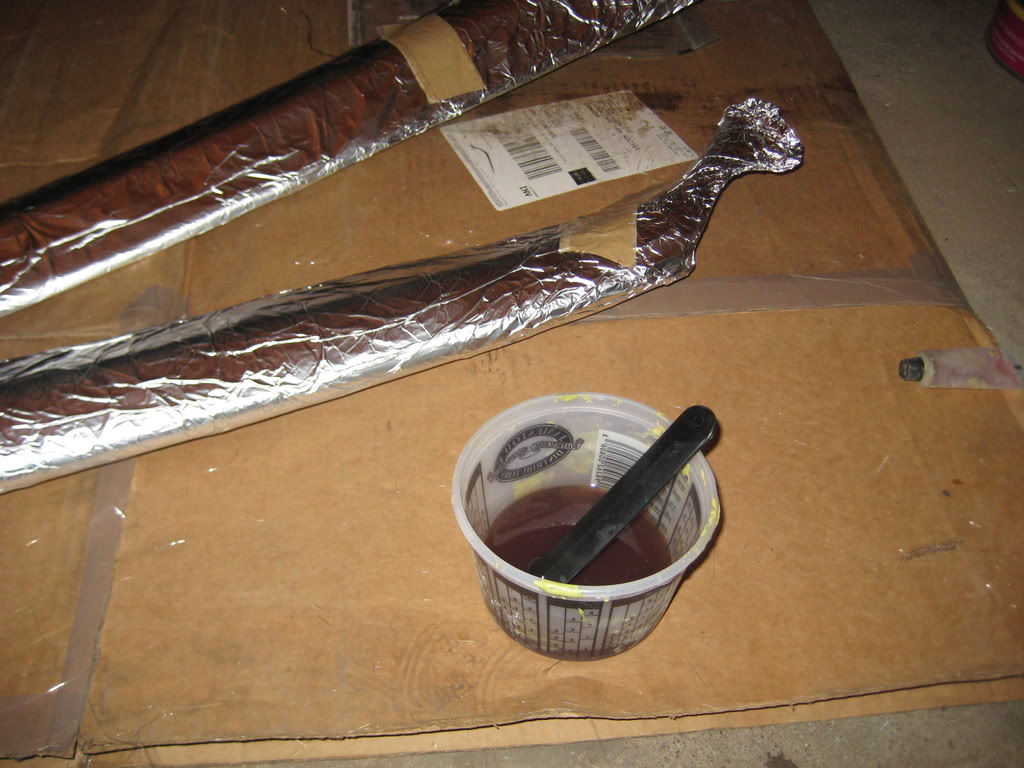
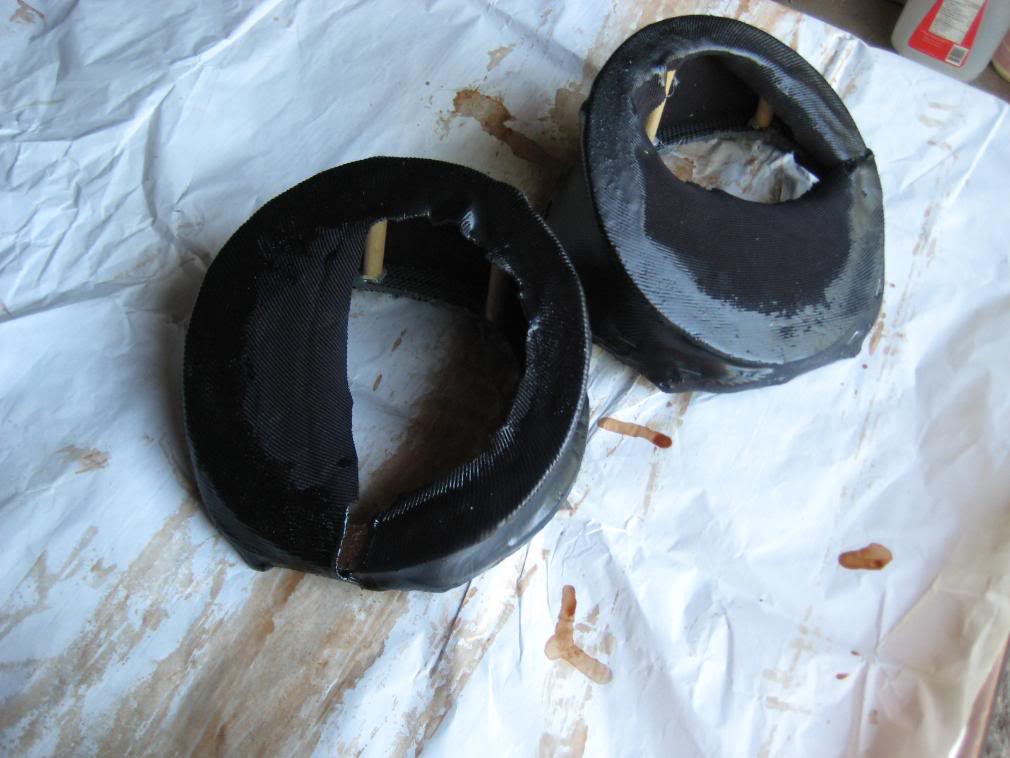
I waited until the next morning. I took the mold off the a-pillars and cut them to my desired size. As you can tell from the pictures, I used a lot of resin.
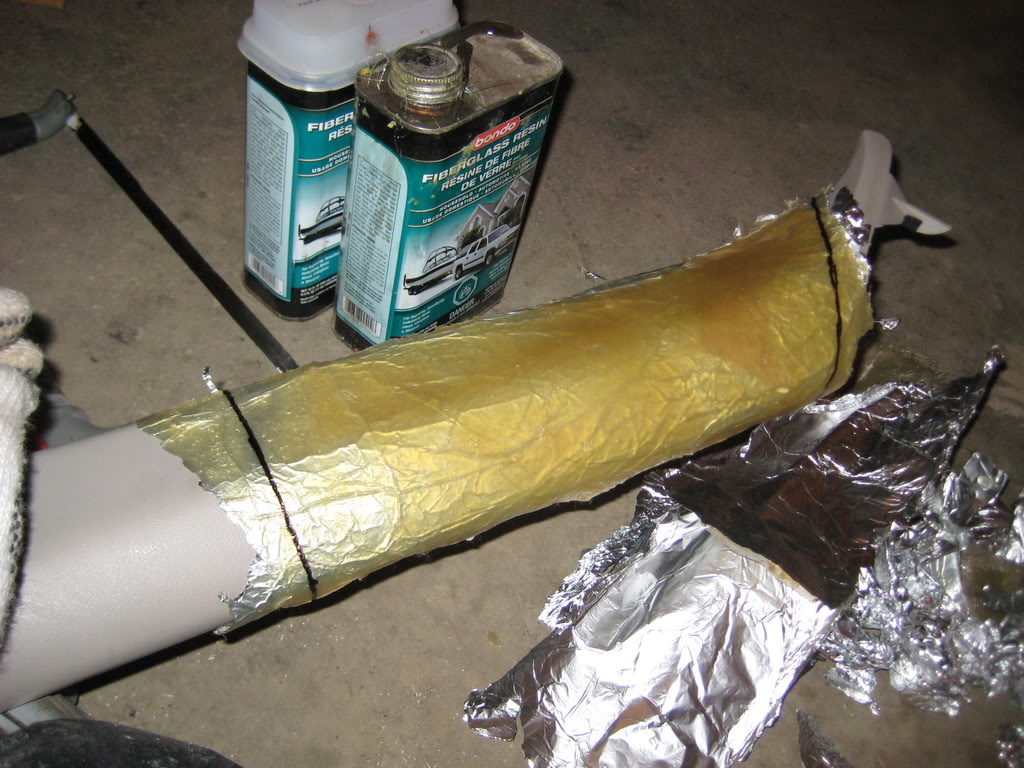
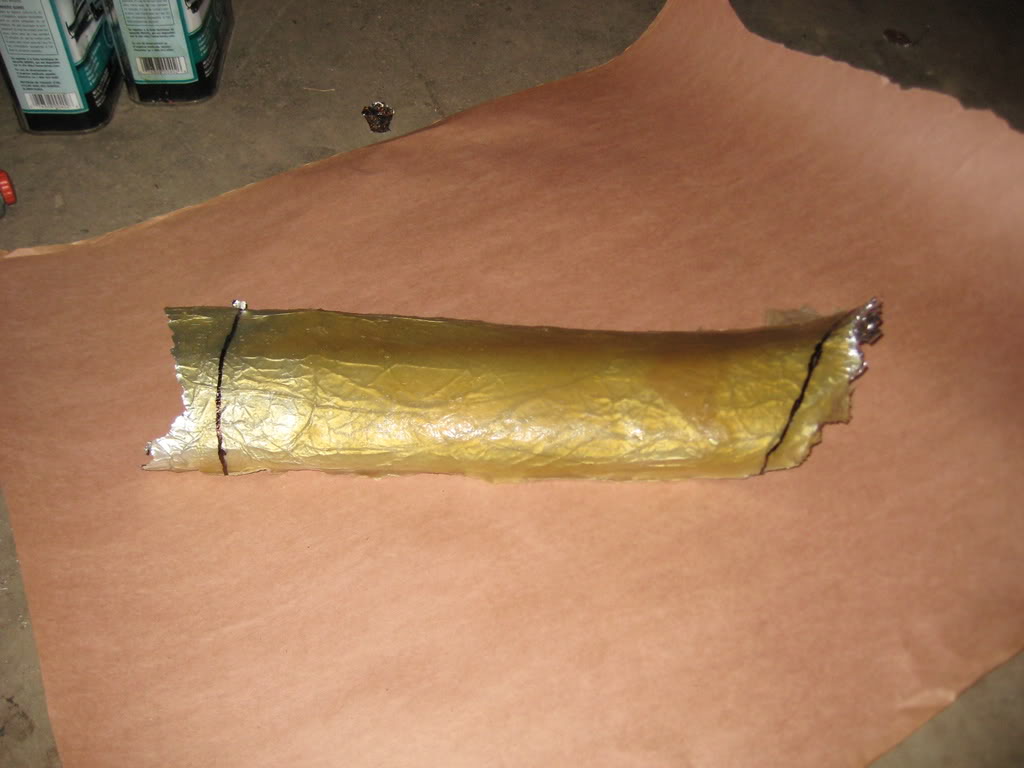
Then I mixed body filler and fiberglass resin/hardener to apply over the now cured fiberglass
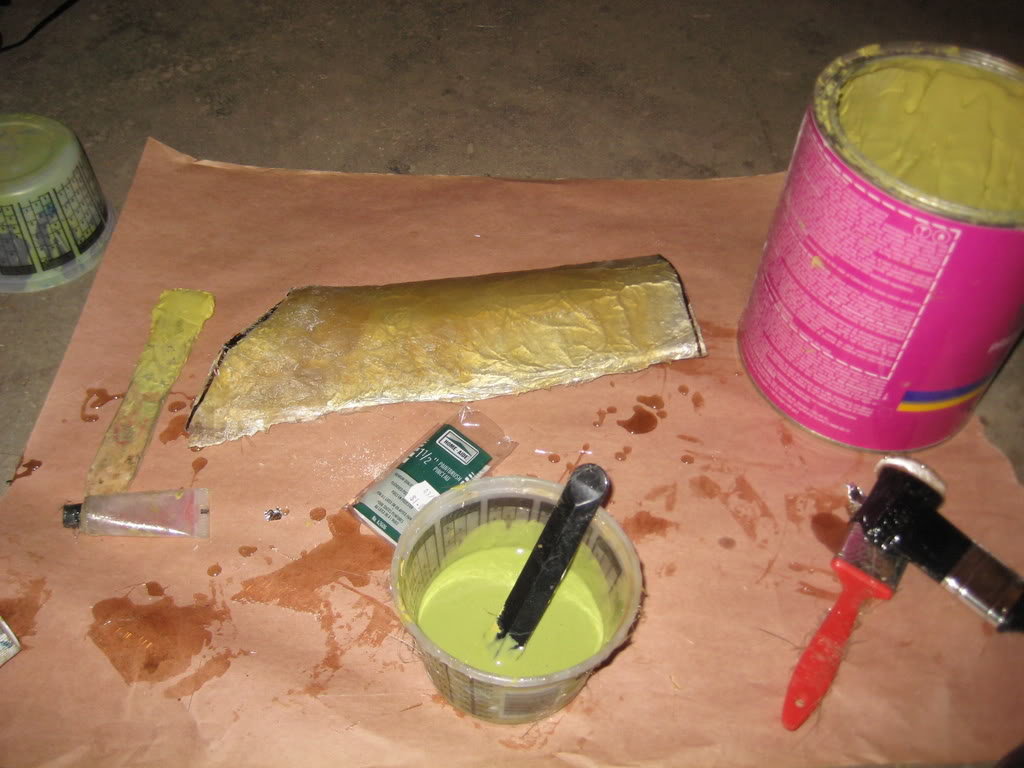

I did the same to both a-pillars:
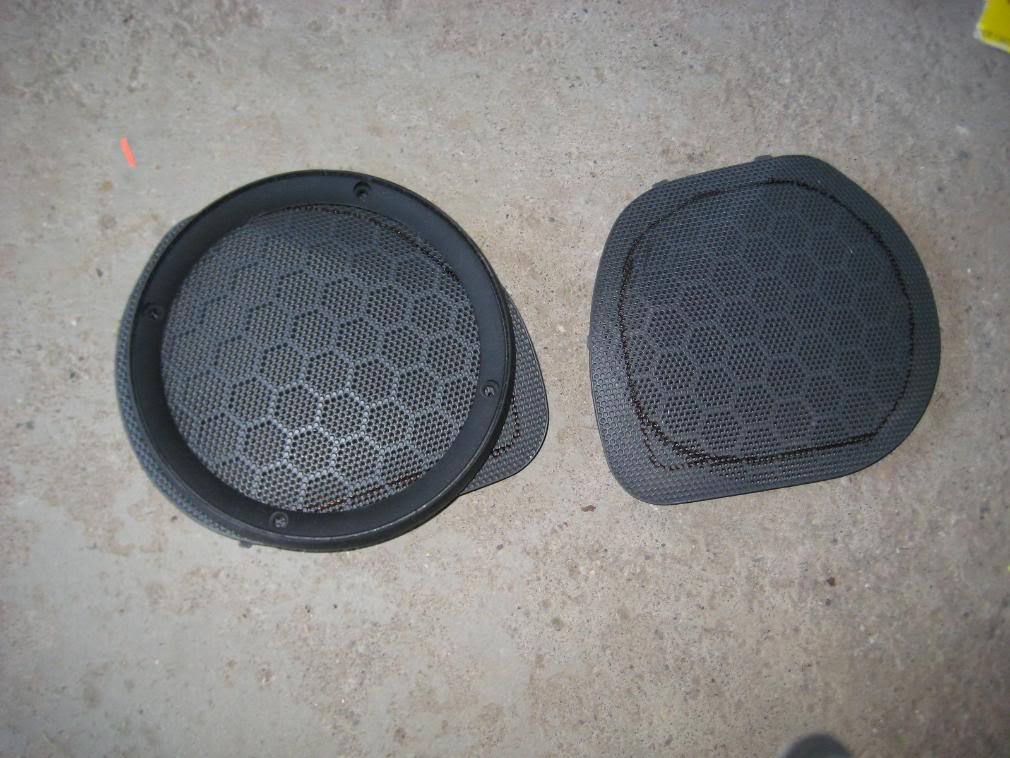
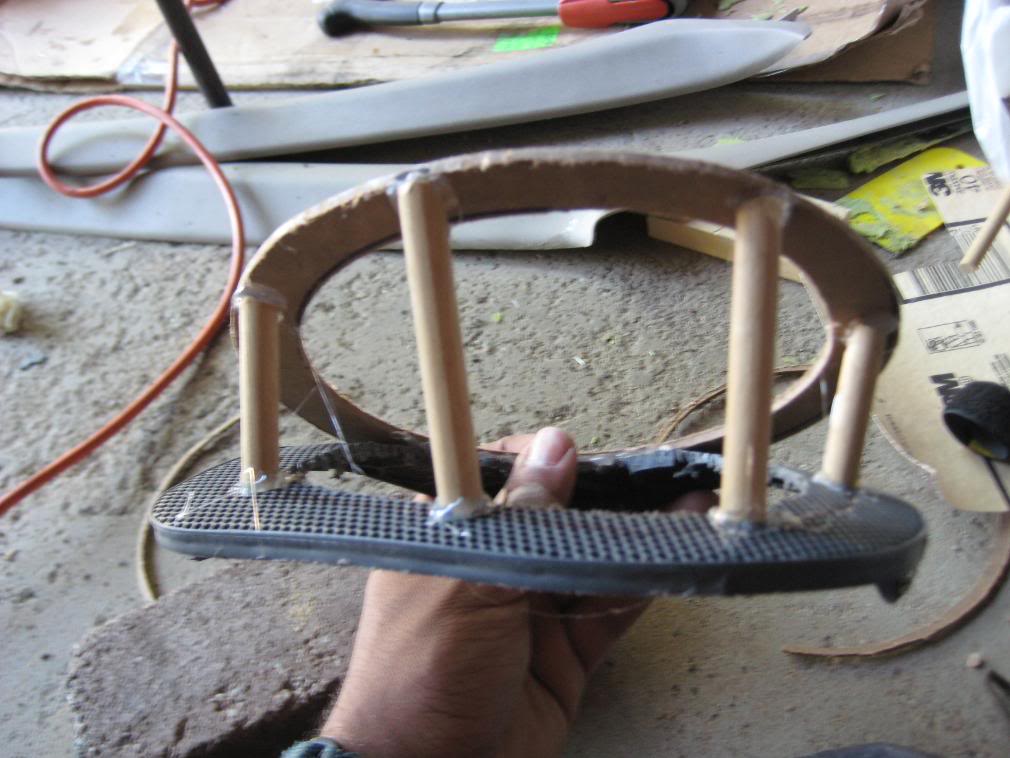
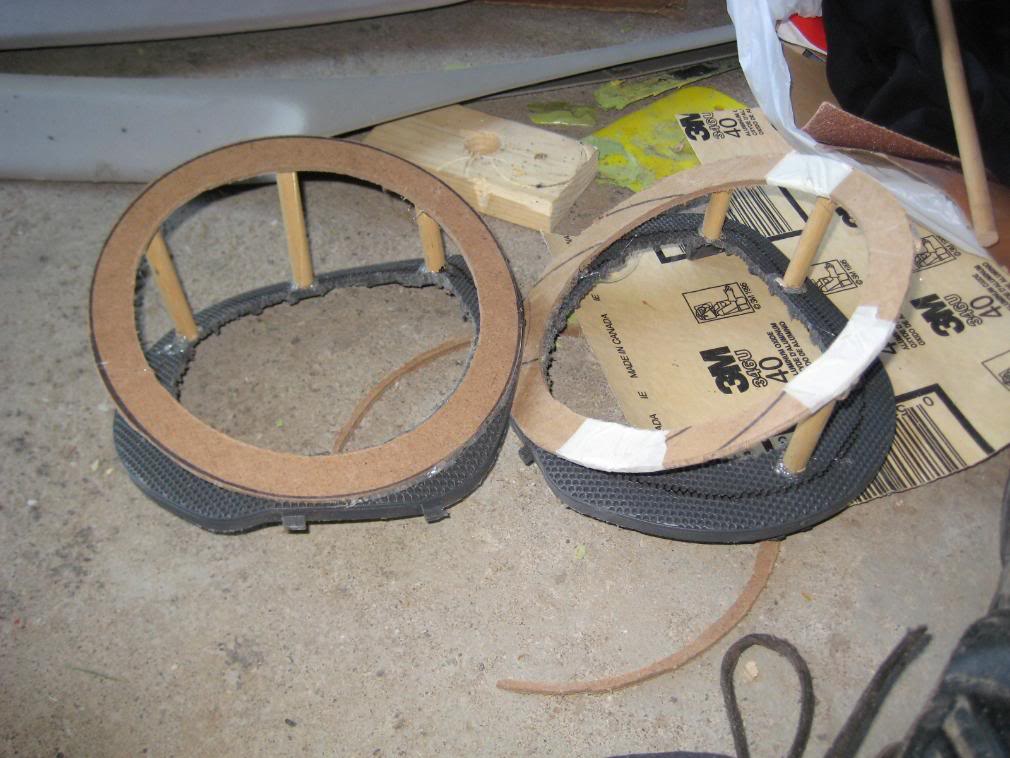
While I was waiting for the mixture to dry, I started the speaker pods. I bought an extra pair of speaker grills for my Civic in case I ever wanted to go back to stock. I started by making sure they fit and cutting a small adapter for the drivers.
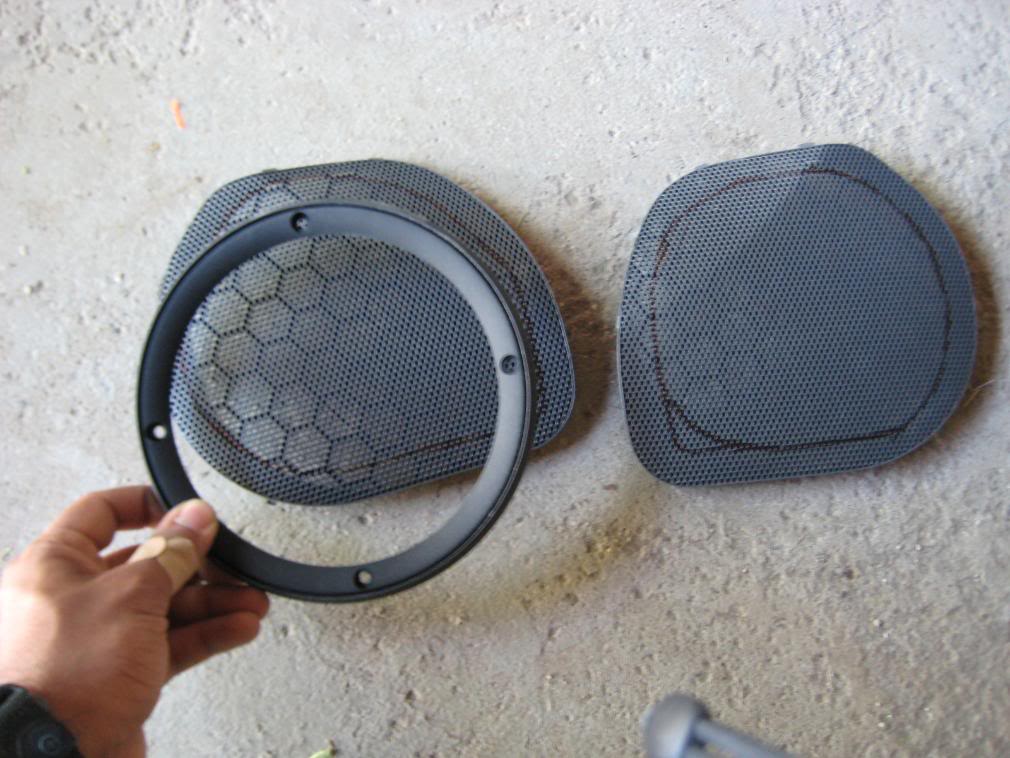
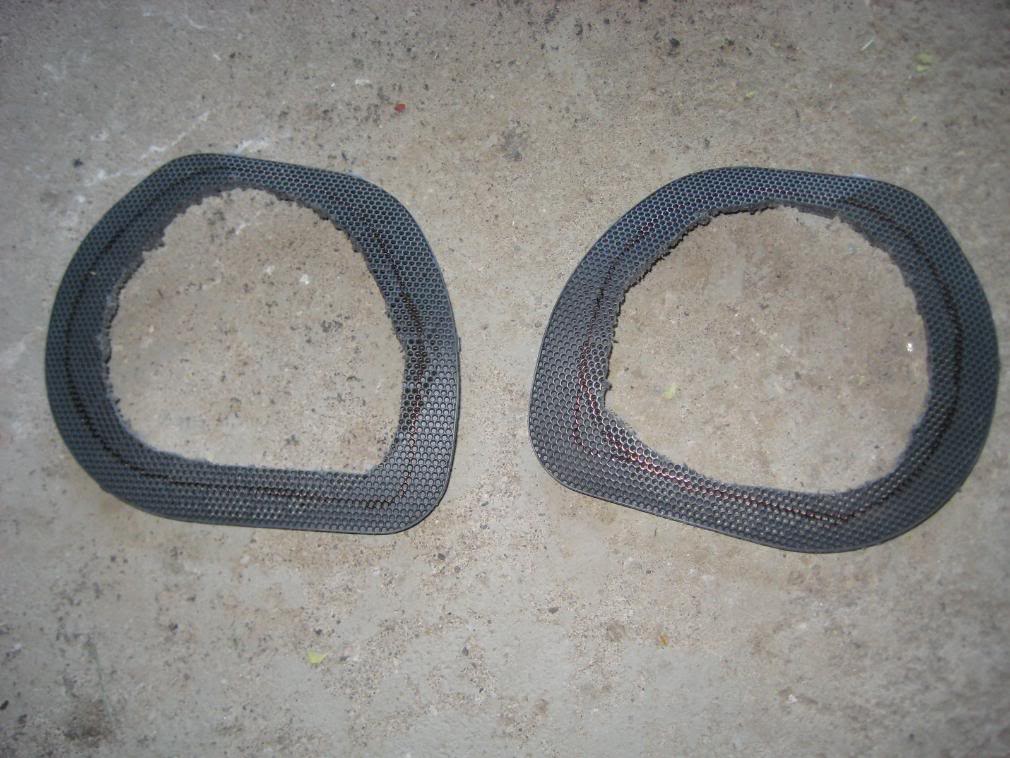
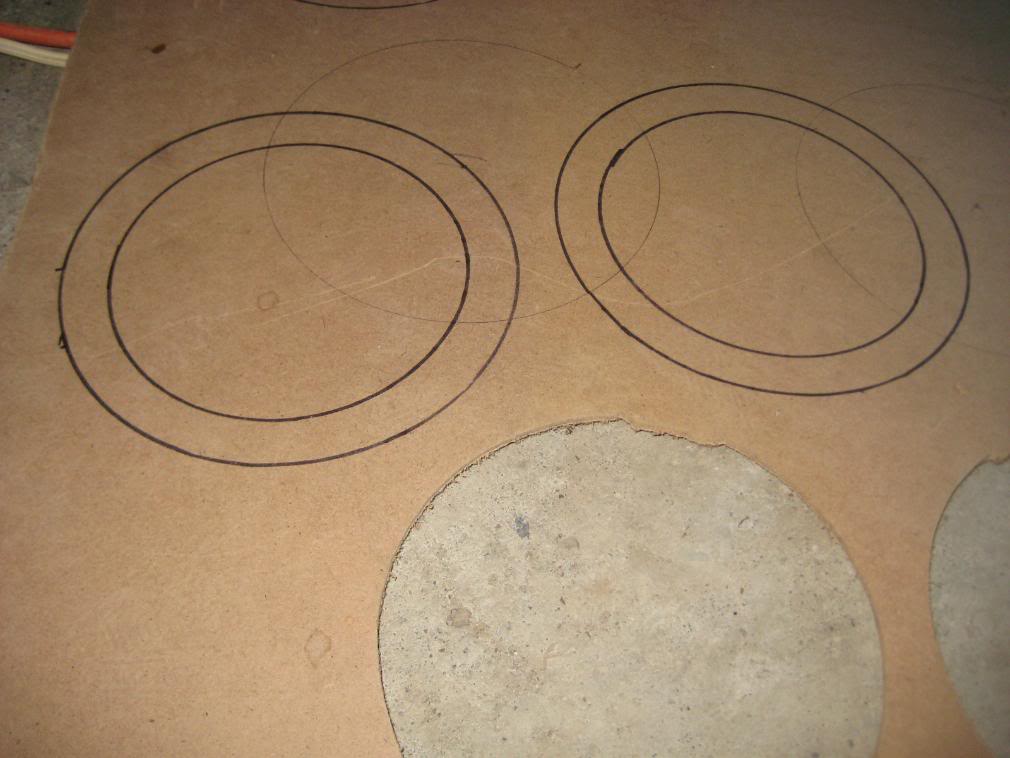
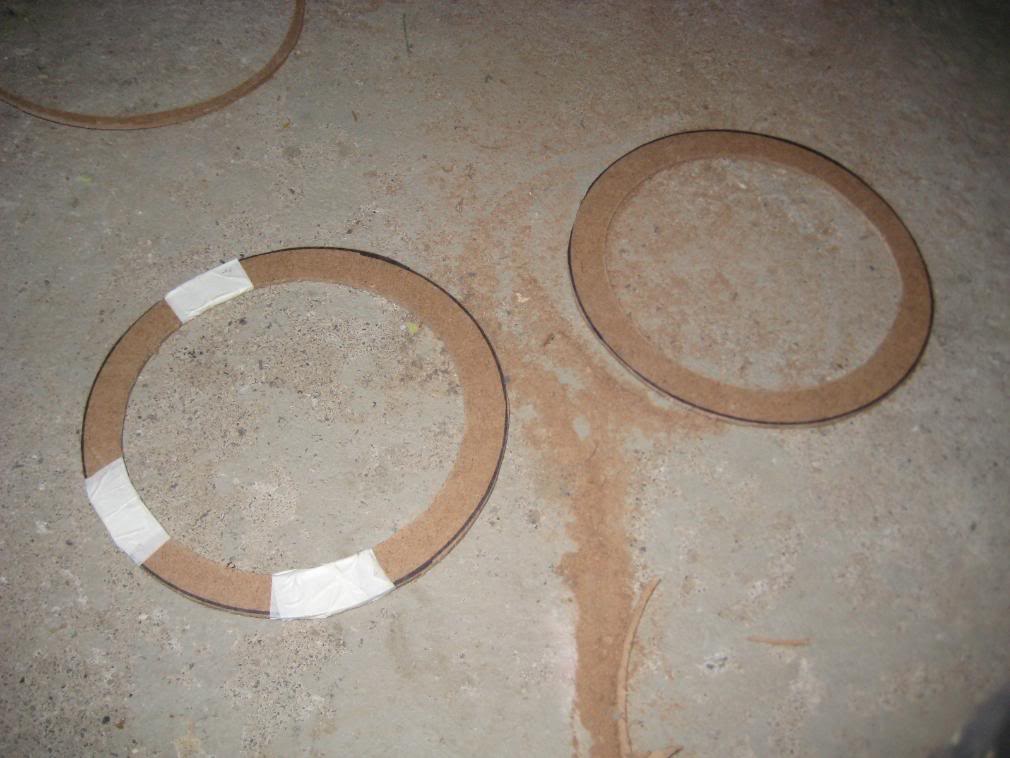
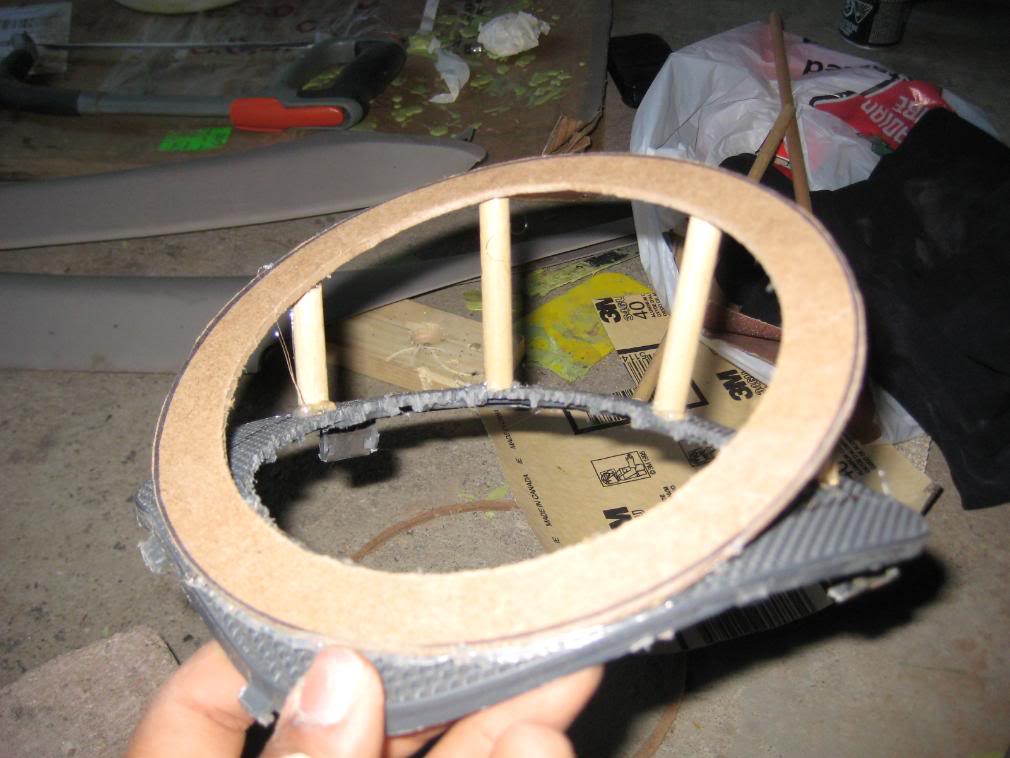
Next, I began gluing the adapter to the speaker grill which I cut out to fit the drivers. I had to test the location of the speakers in different places until I found the right position. After I found the right position, I used tape and glue to hold it in place. Then I used some small wooden supports and glued everything to place.
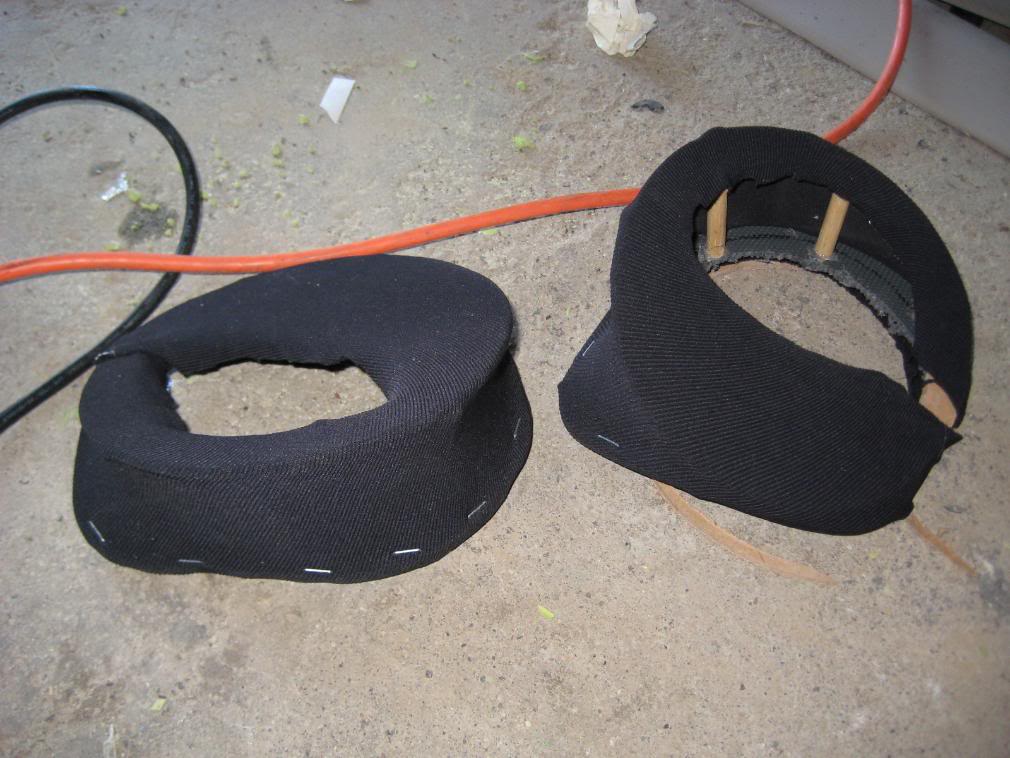
Then I used a stretchy cloth to cover the speaker pods. I didn't cover the middle since I was going to be cutting it out anyways (for the driver):

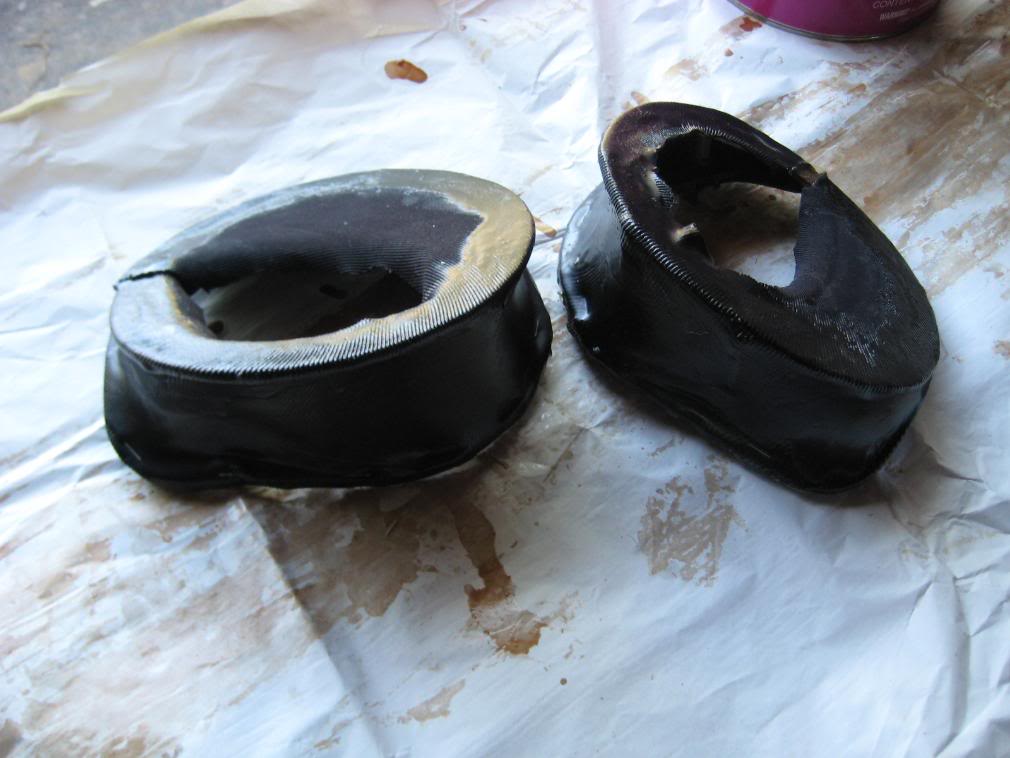
Next, I applied the resin/hardener mix to the cloth. I applied 2 or 3 layers and waited for it to harden:
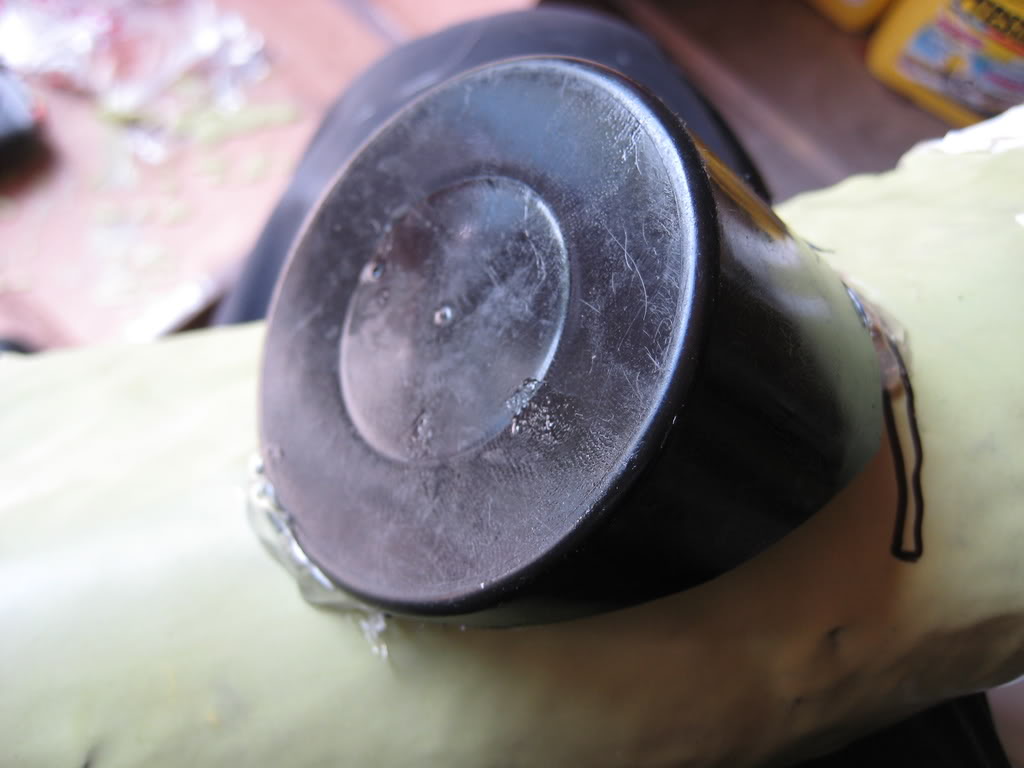
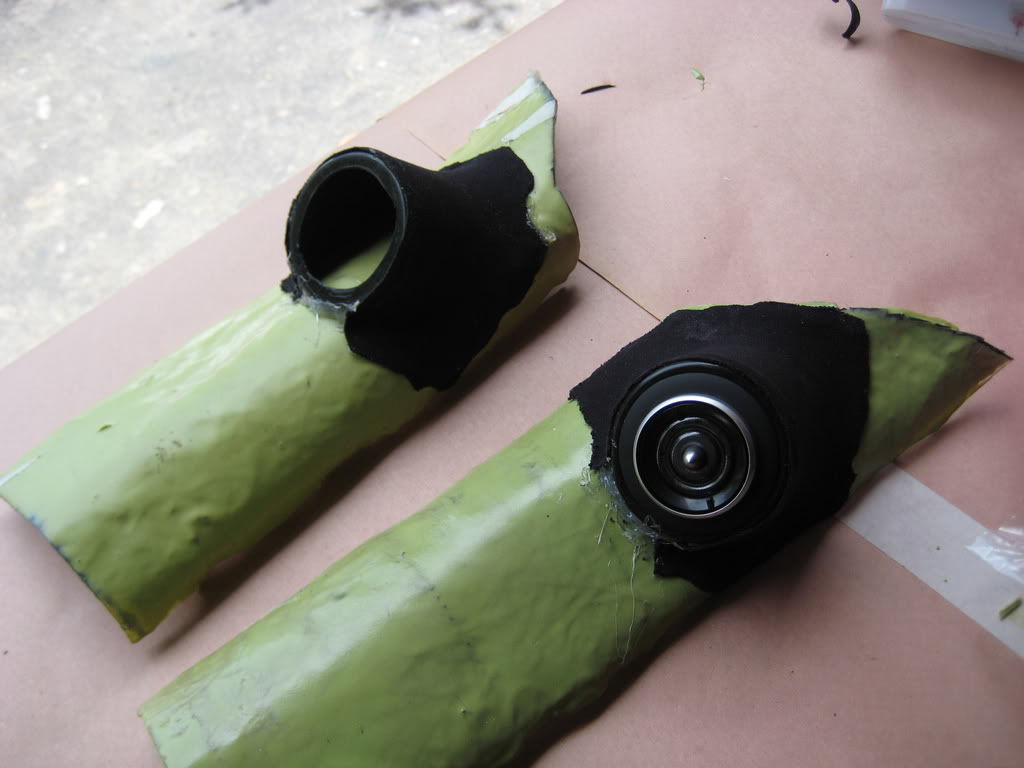
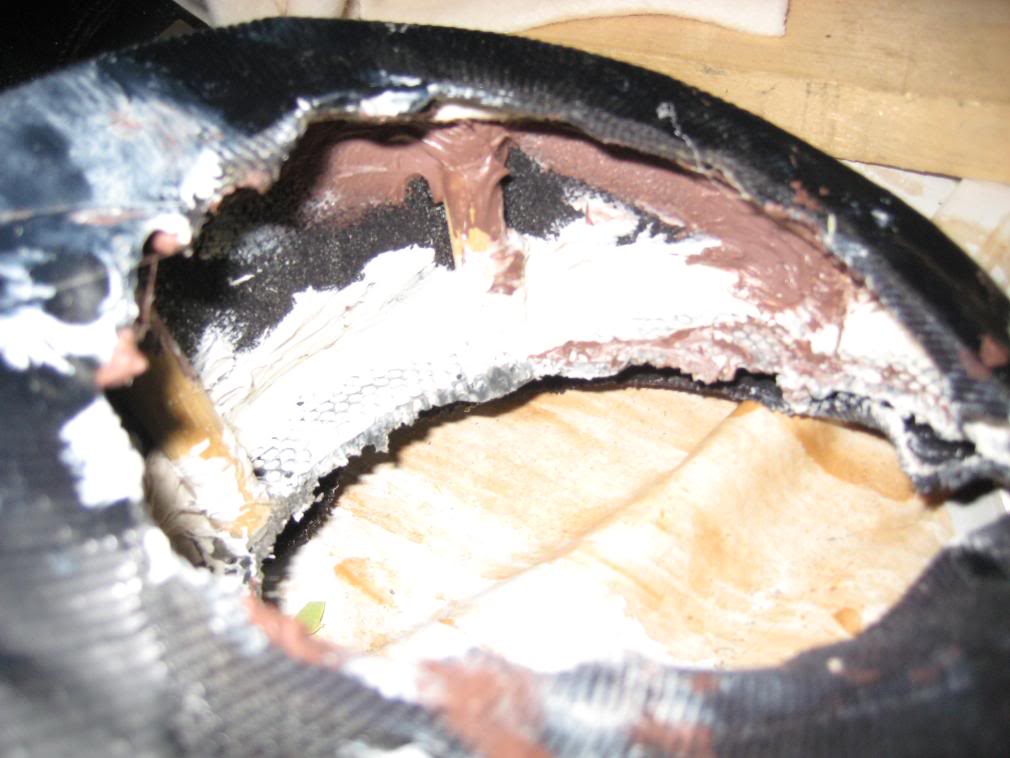
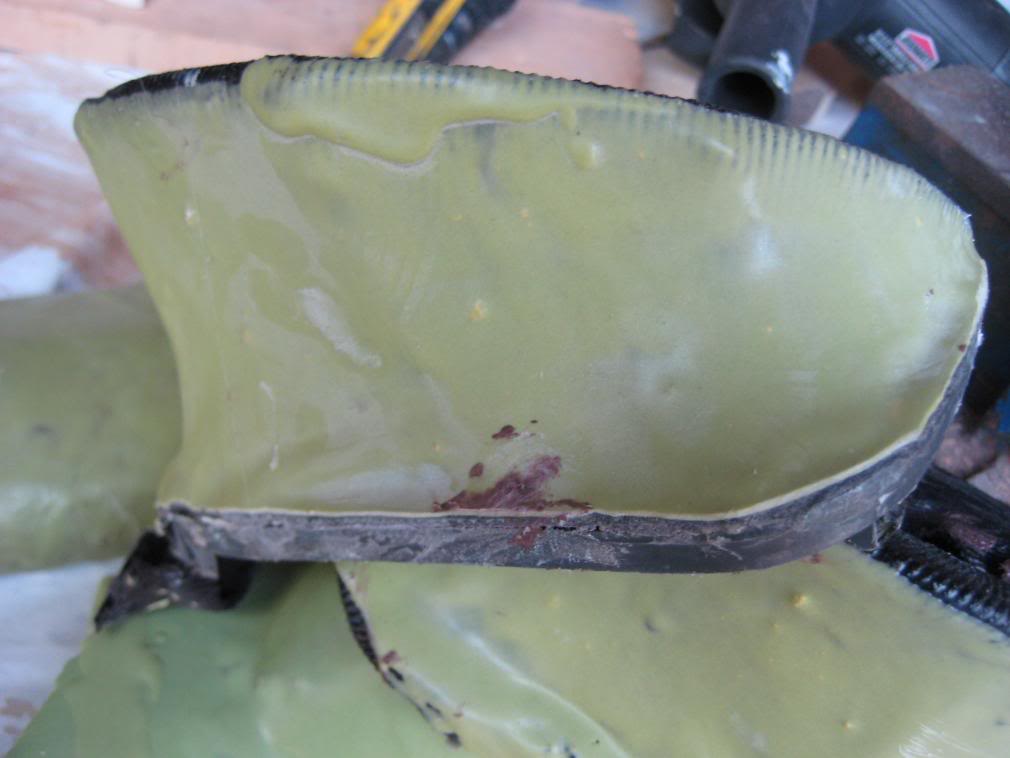
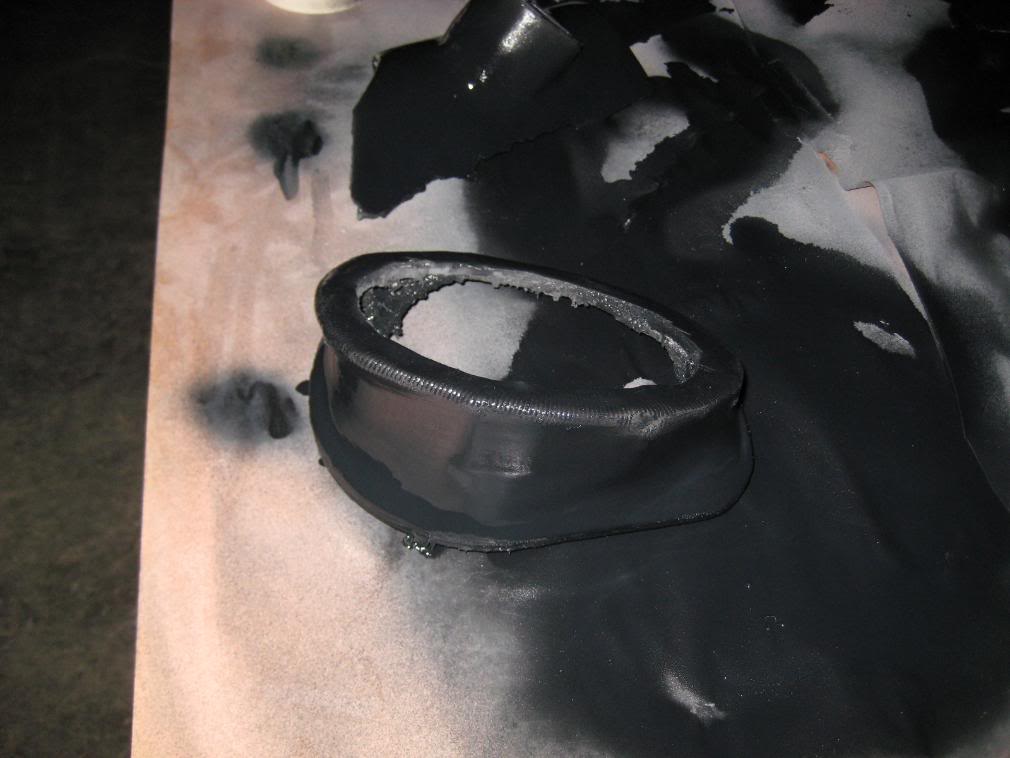
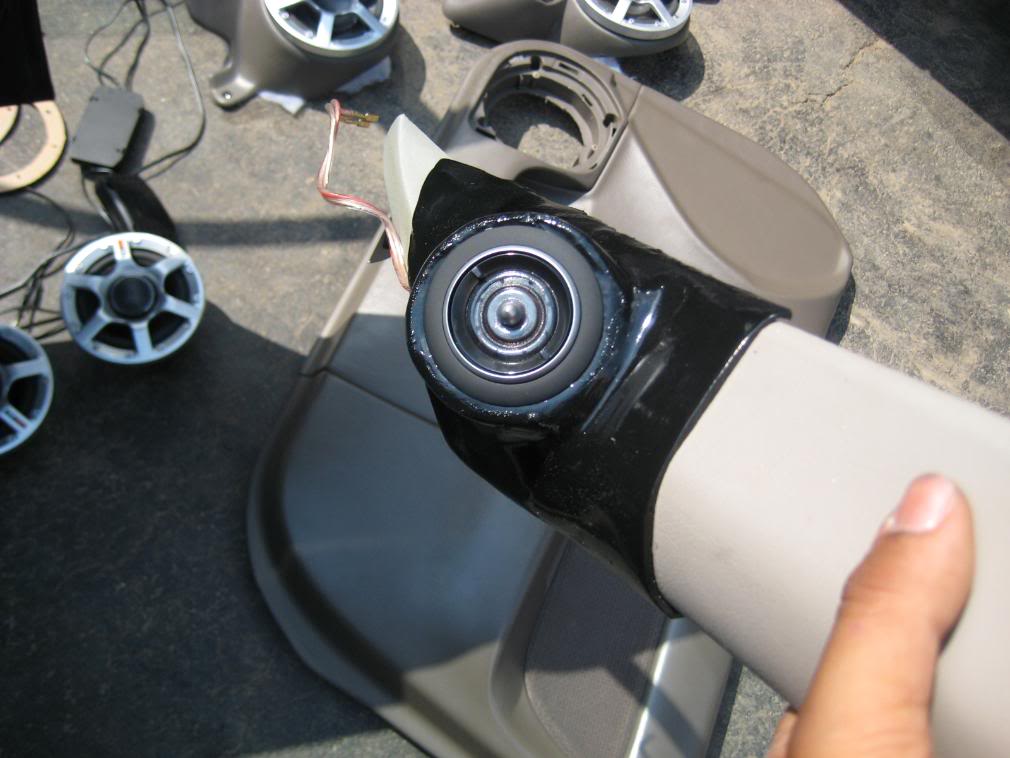
While it was drying I moved back to the a-pillars and essentially did the same thing for the tweeter. It took some playing around and a lot of tape for me to find what I thought was the most ideal place for the tweeter. After I found that location, I used plastic can lids for tweeter mounts:
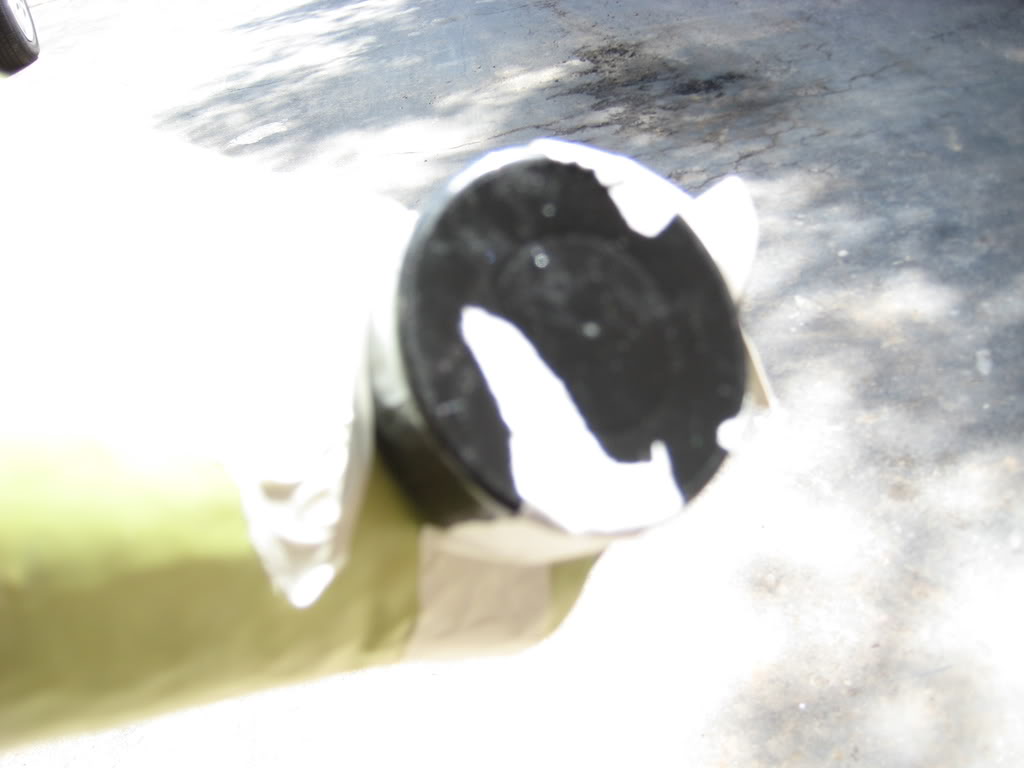
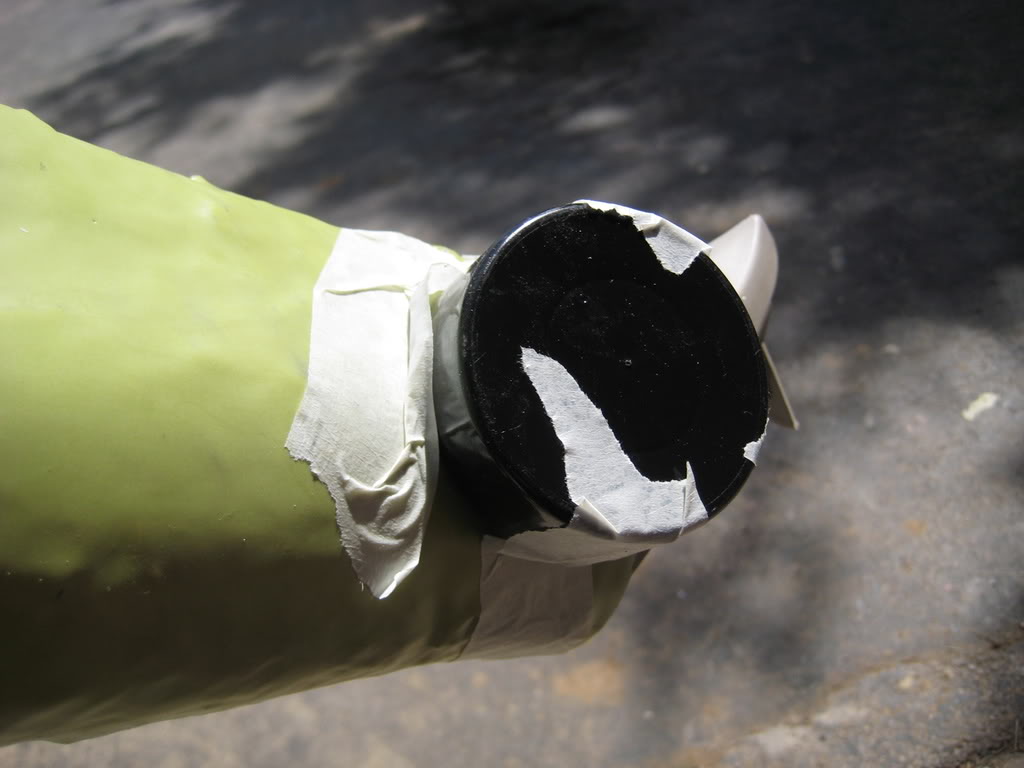
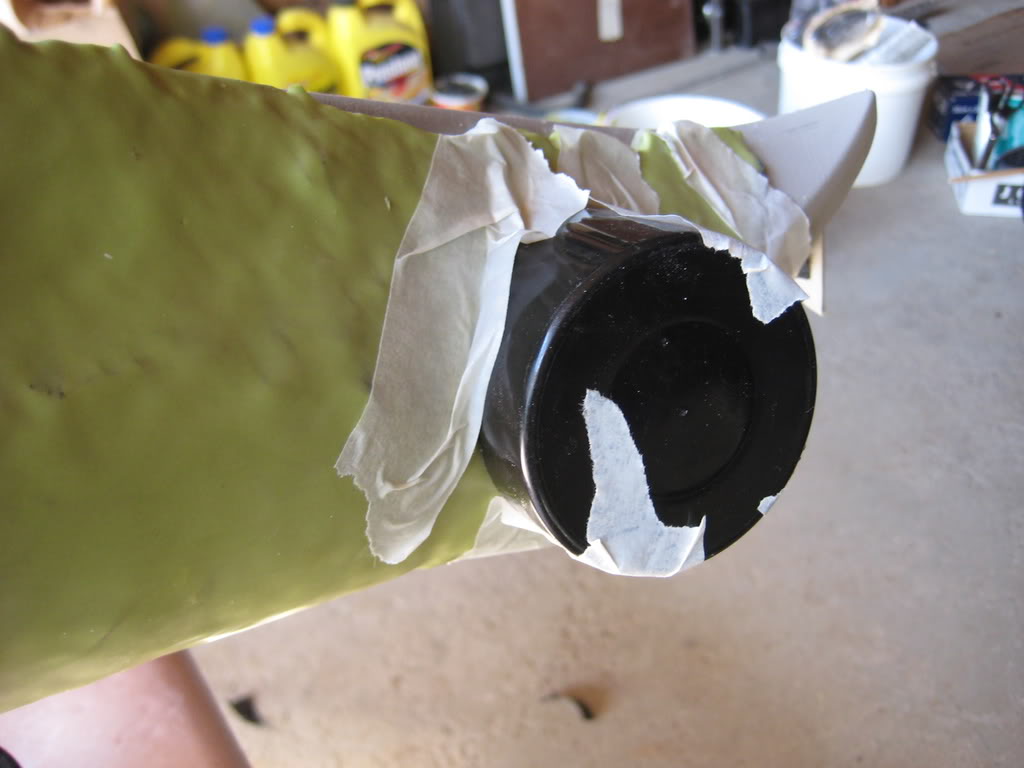
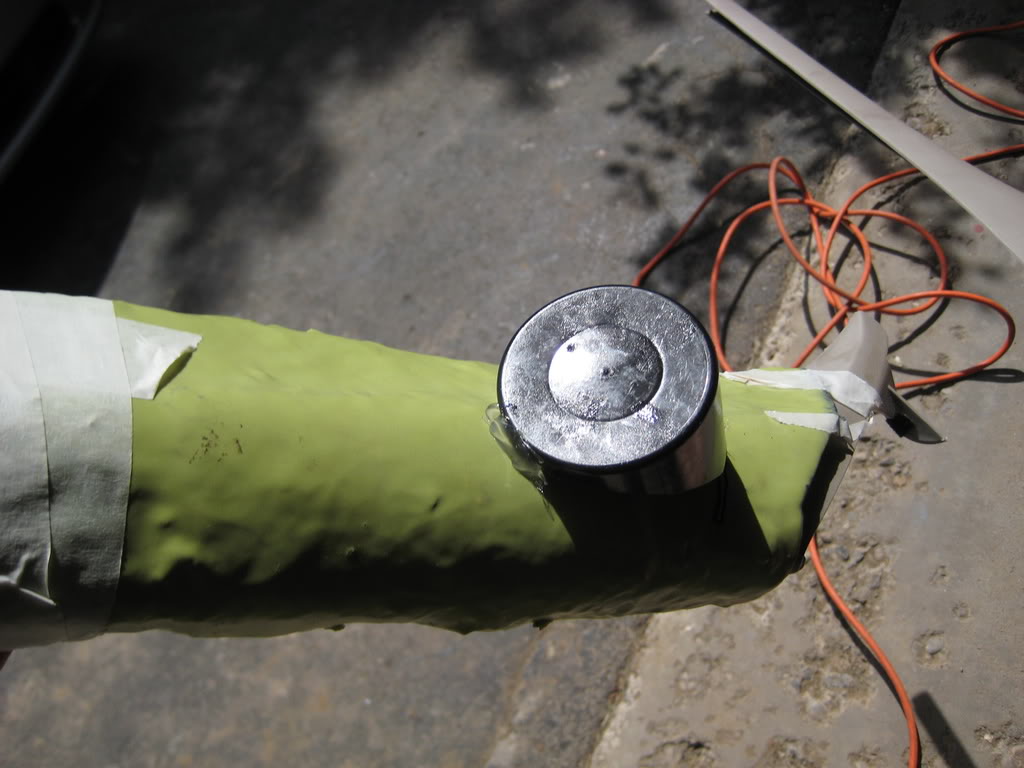
Once I finalized the location of the tweeter, I glued the plastic lids to the a-pillars:
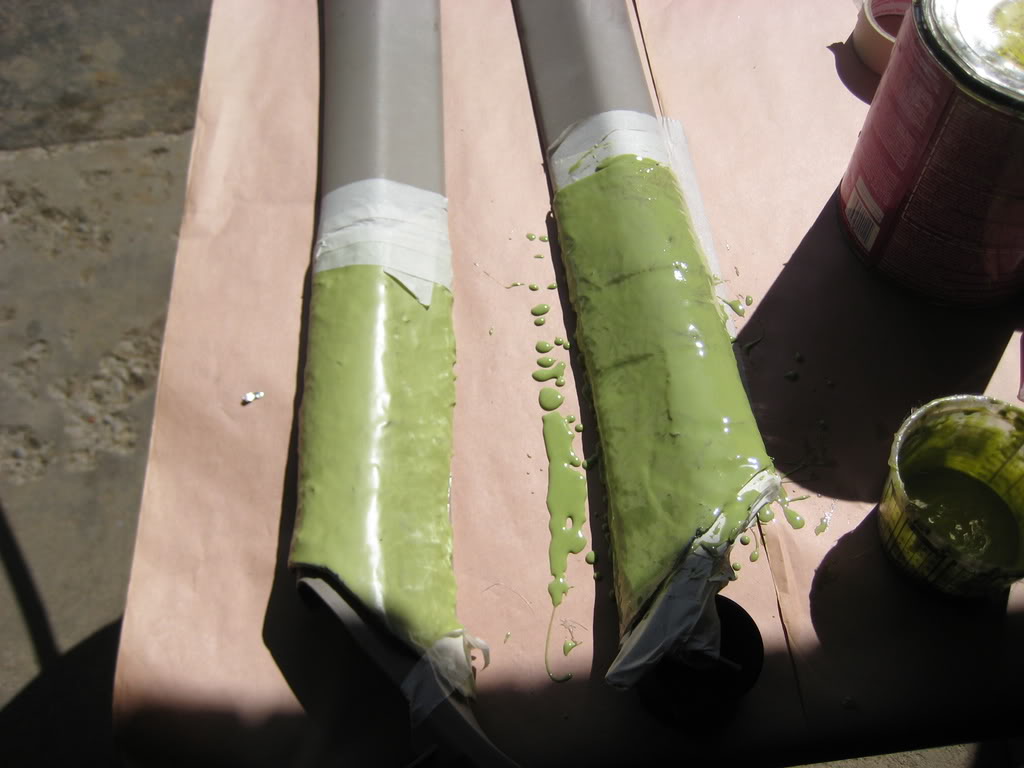
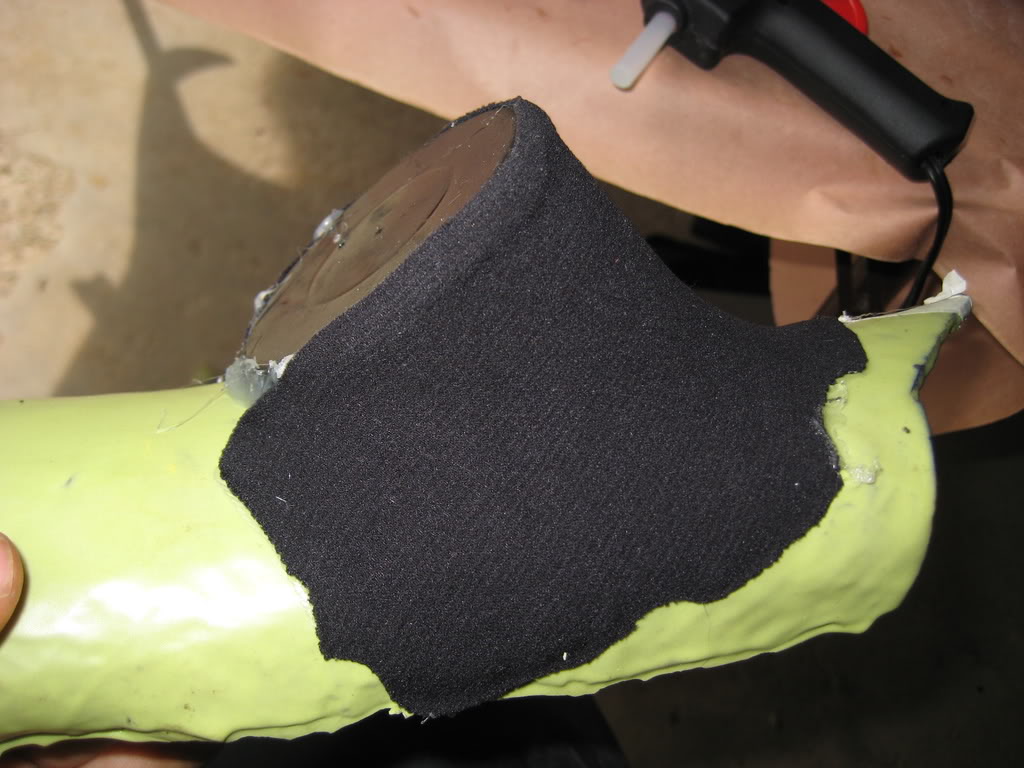
Next, I used the same cloth to cover the pods:
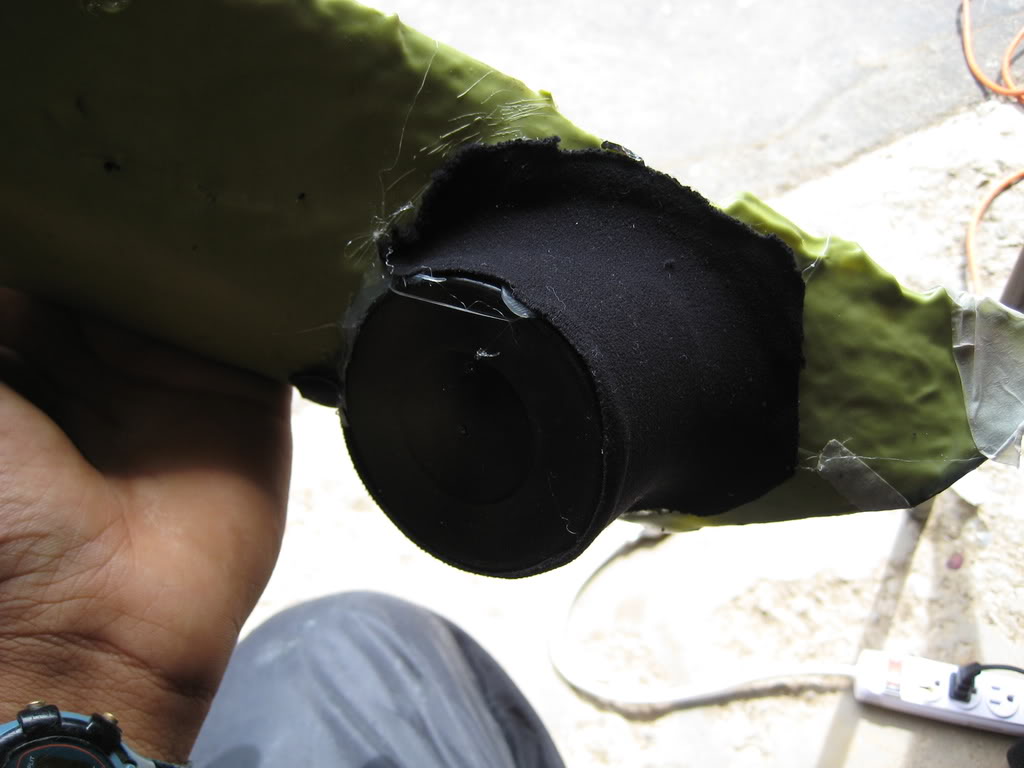
Now it was time to apply the hardener/resin mix just like I did for the speaker pods:
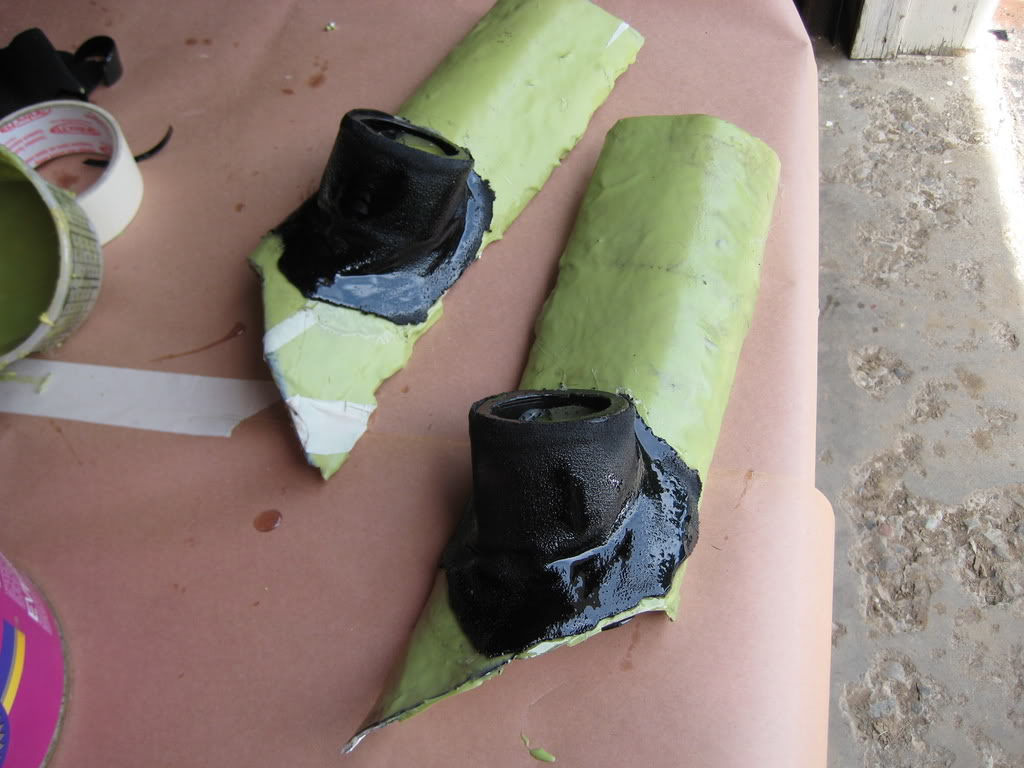
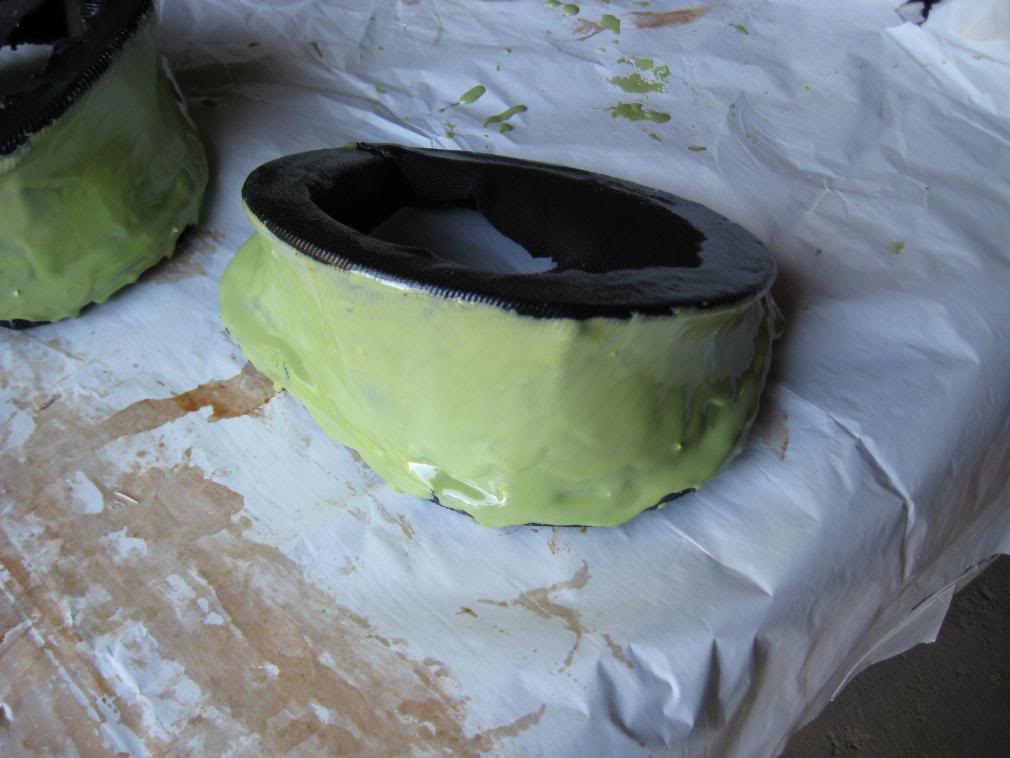
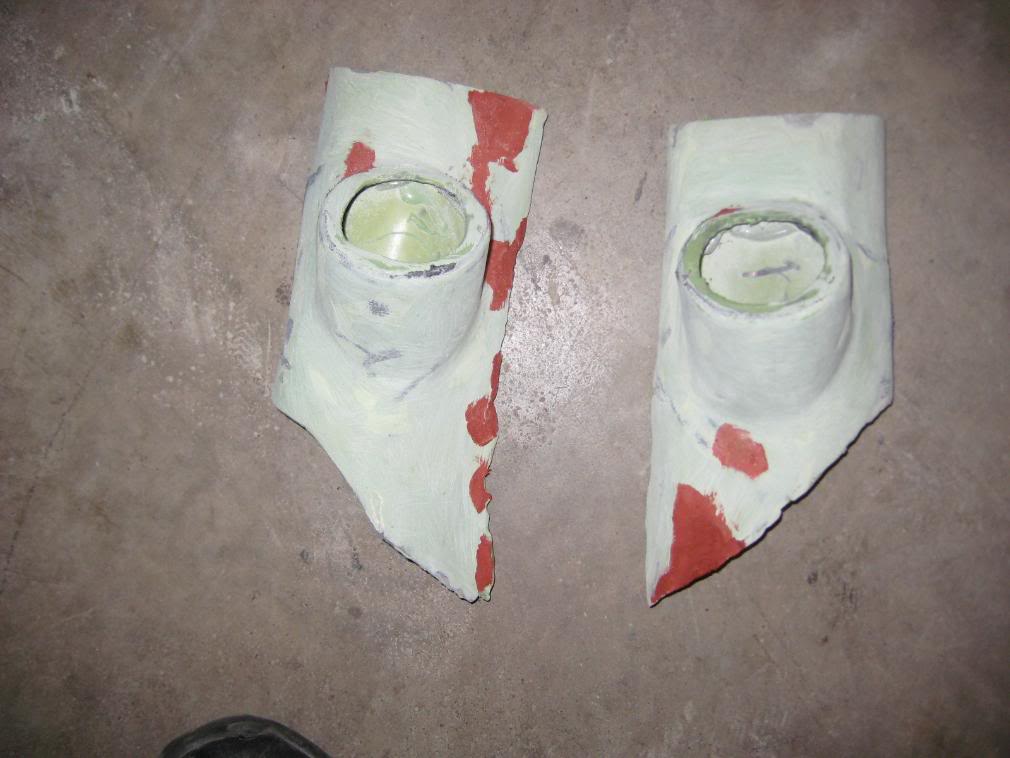
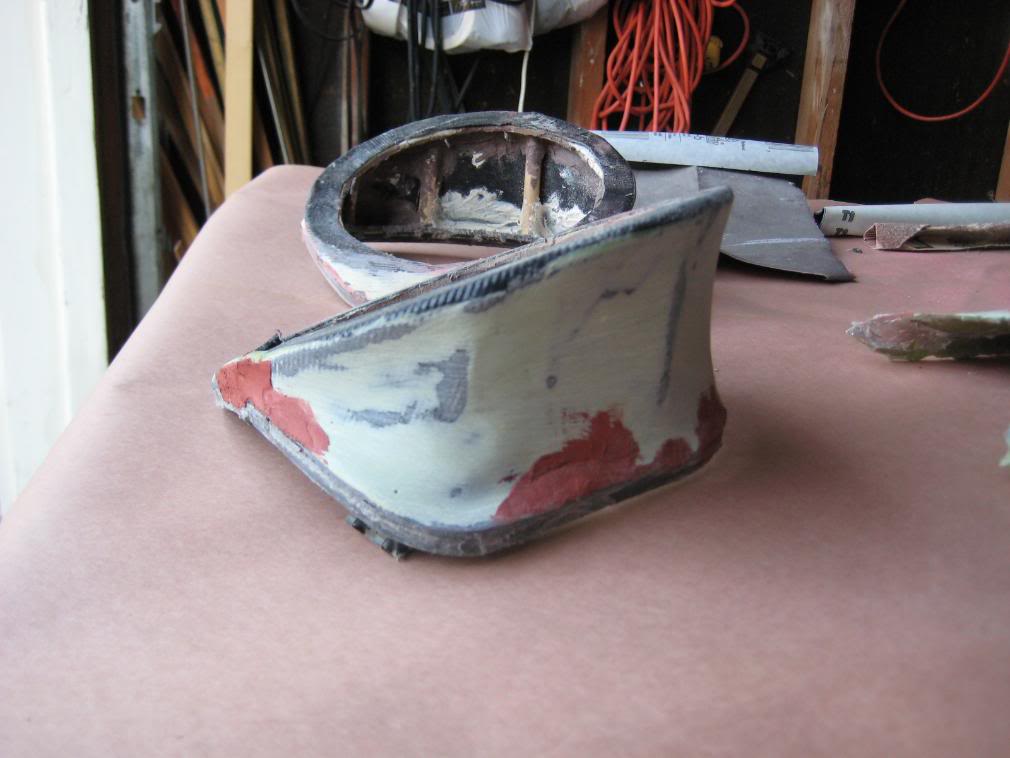
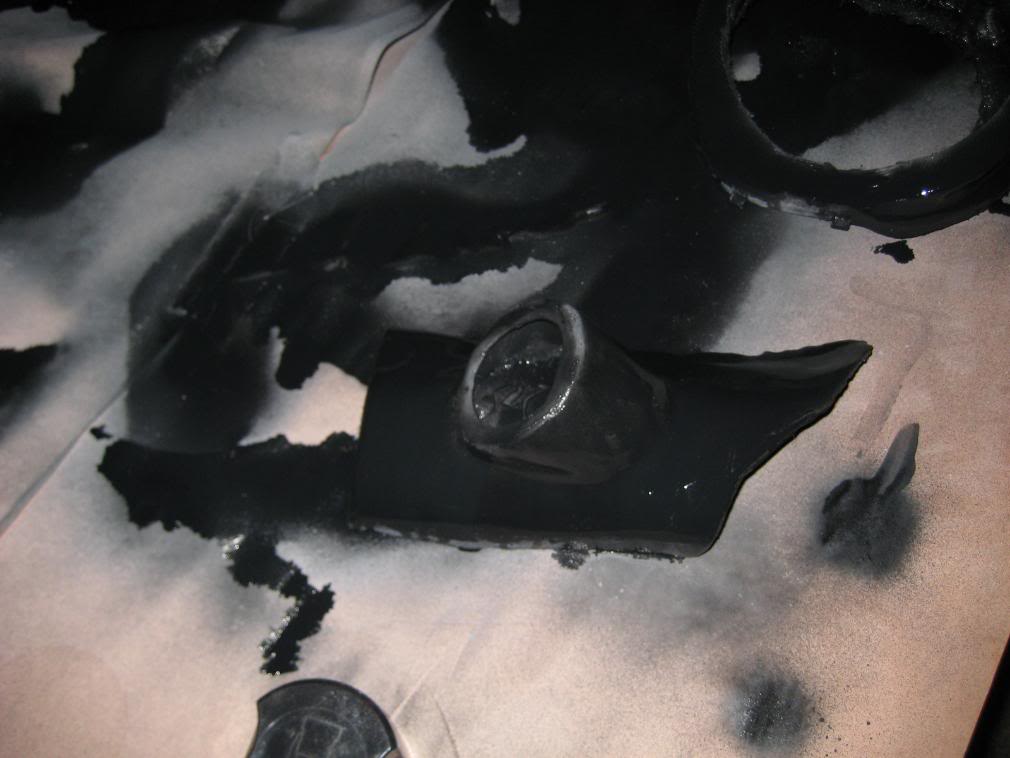
As you can tell from the pictures, I didn't stretch the material enough, so it began sagging a little when I applied the resin. I waiting for it to dry and then I used bodyfiller to even everything down:
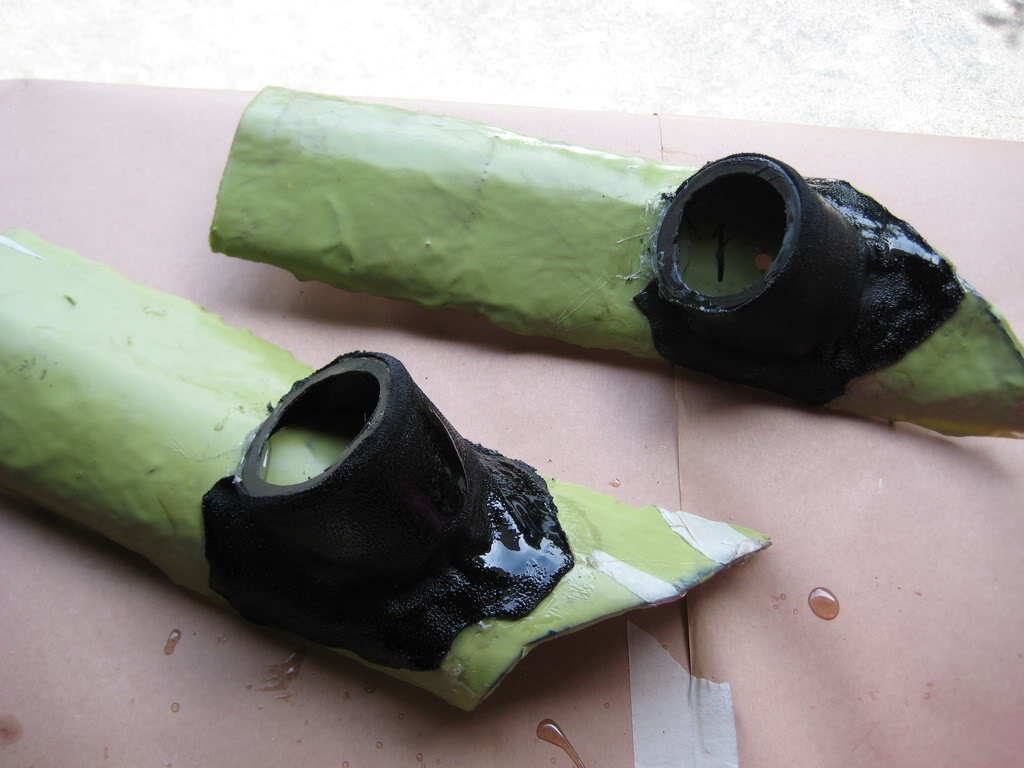
After I sanded it, it became a little more even:
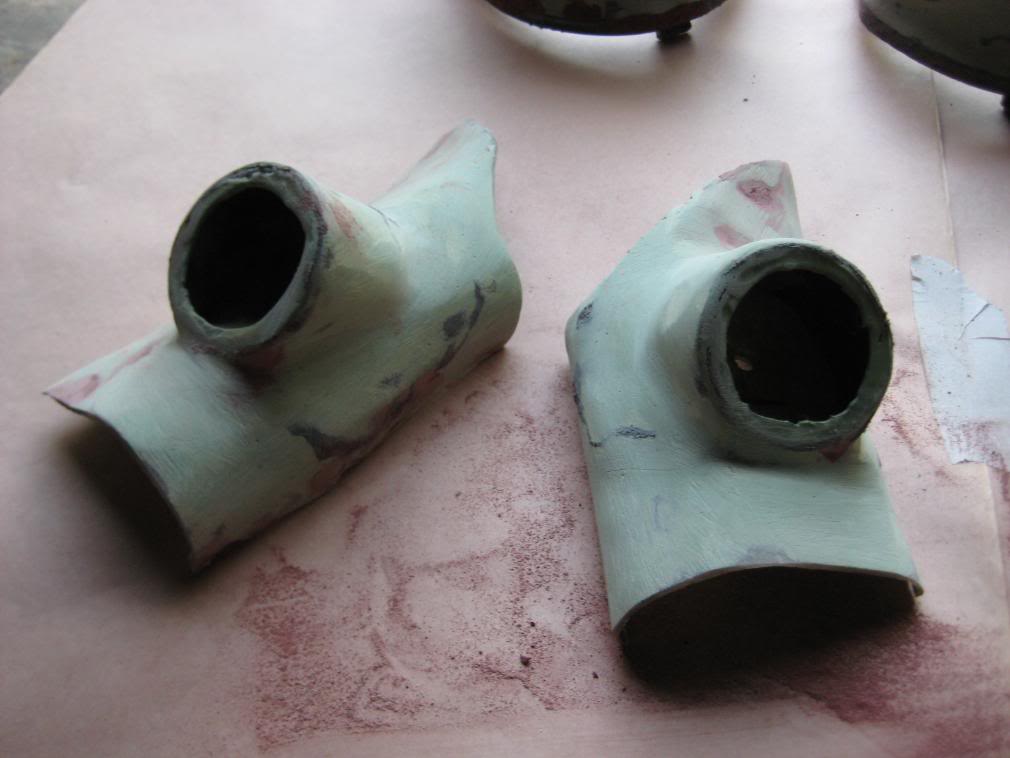
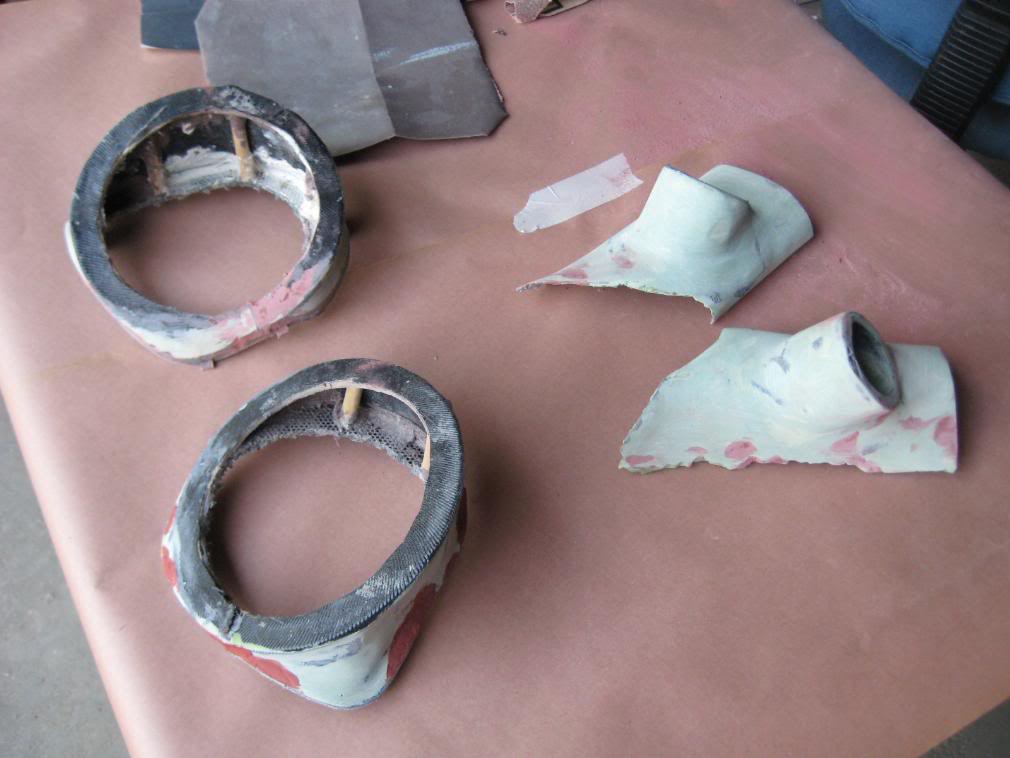
Now both the speaker pods and a-pillars are at the same step of the process
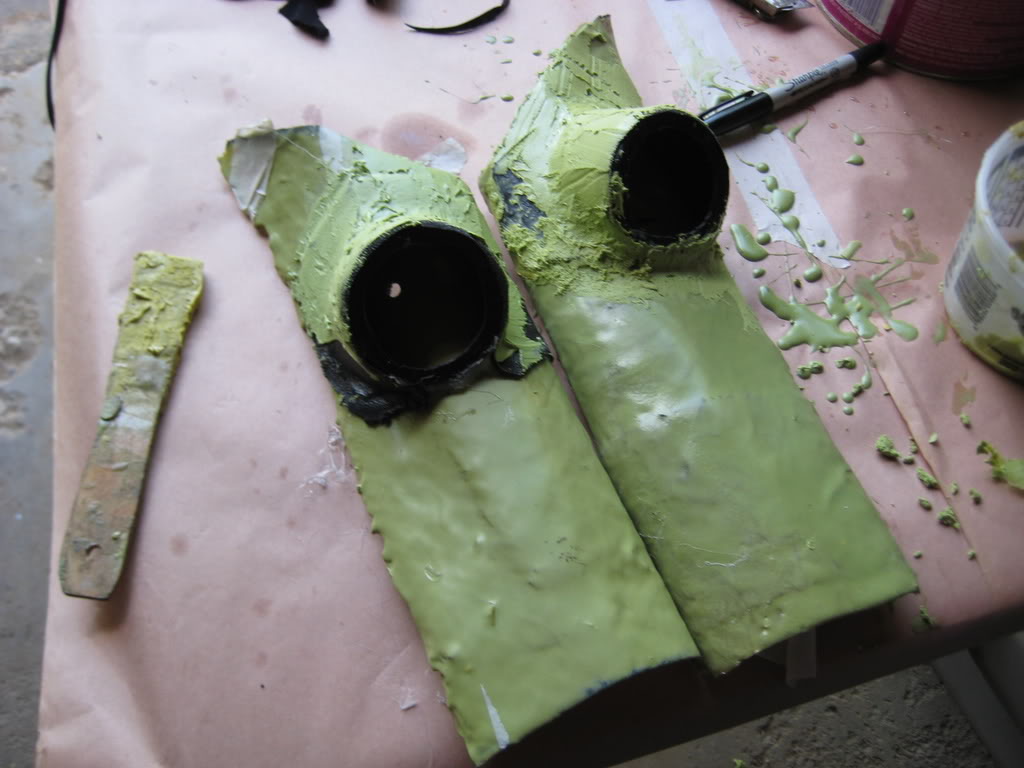
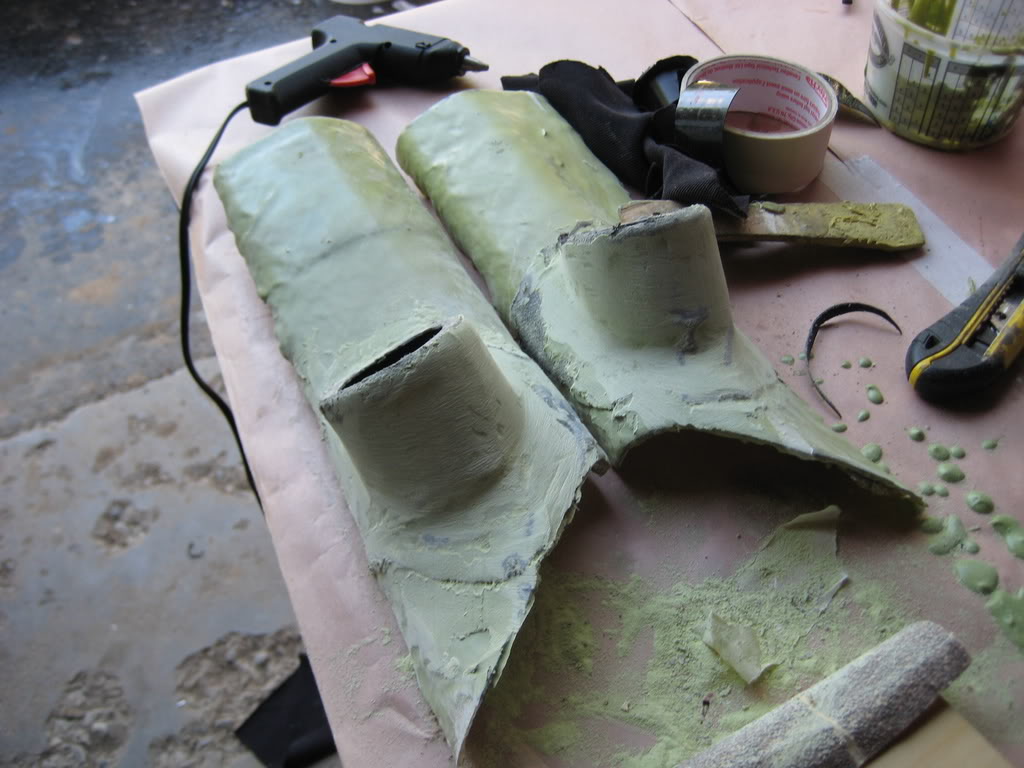
It was now time to apply a coat of bodyfiller and resin/hardener for both the speaker pods and tweeter mounts. You might have also noticed that I cut the a-pillars a little shorter:
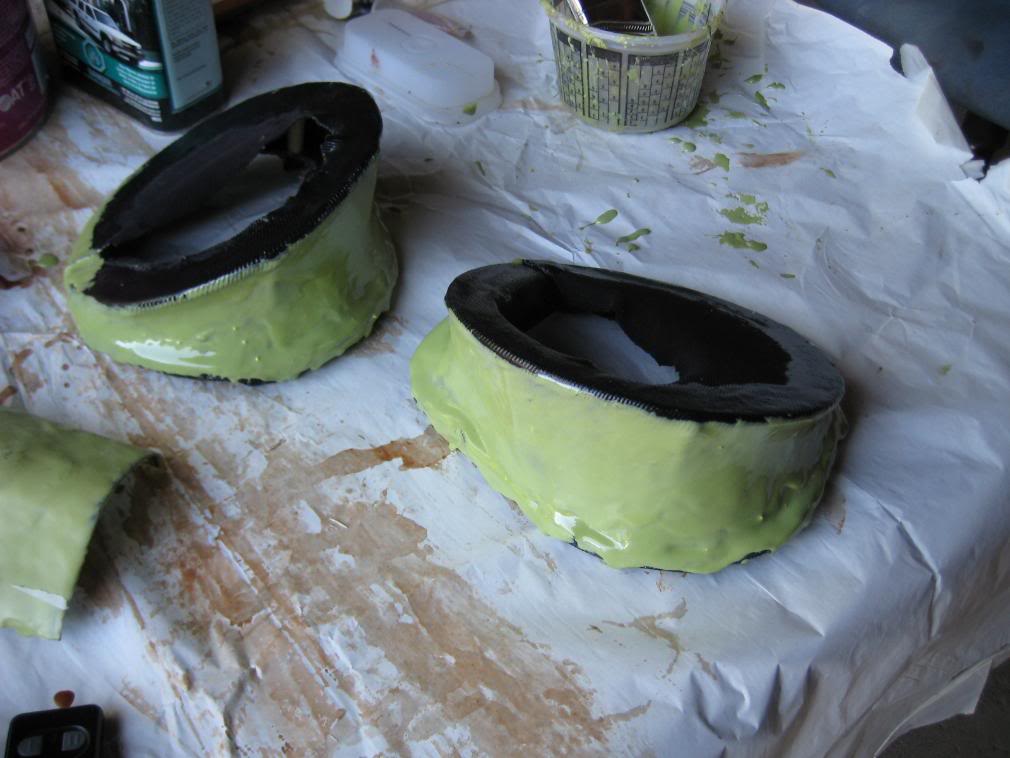
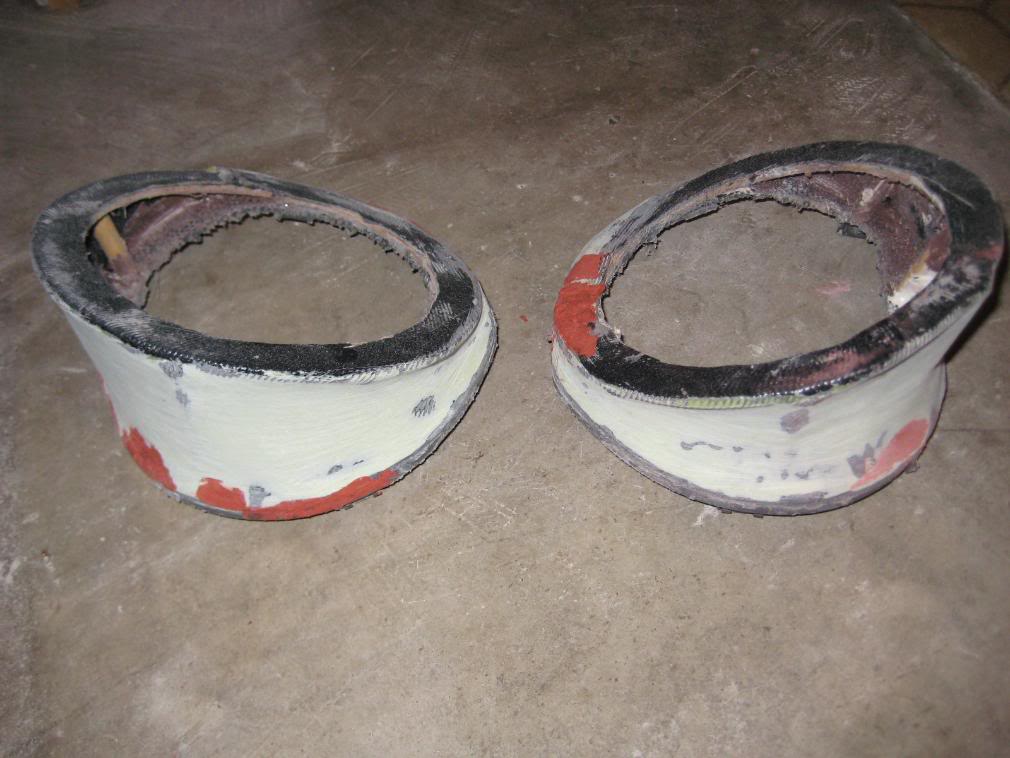
When that cured, I put sealant around the inside of the speaker pods to make them as airtight as possible:
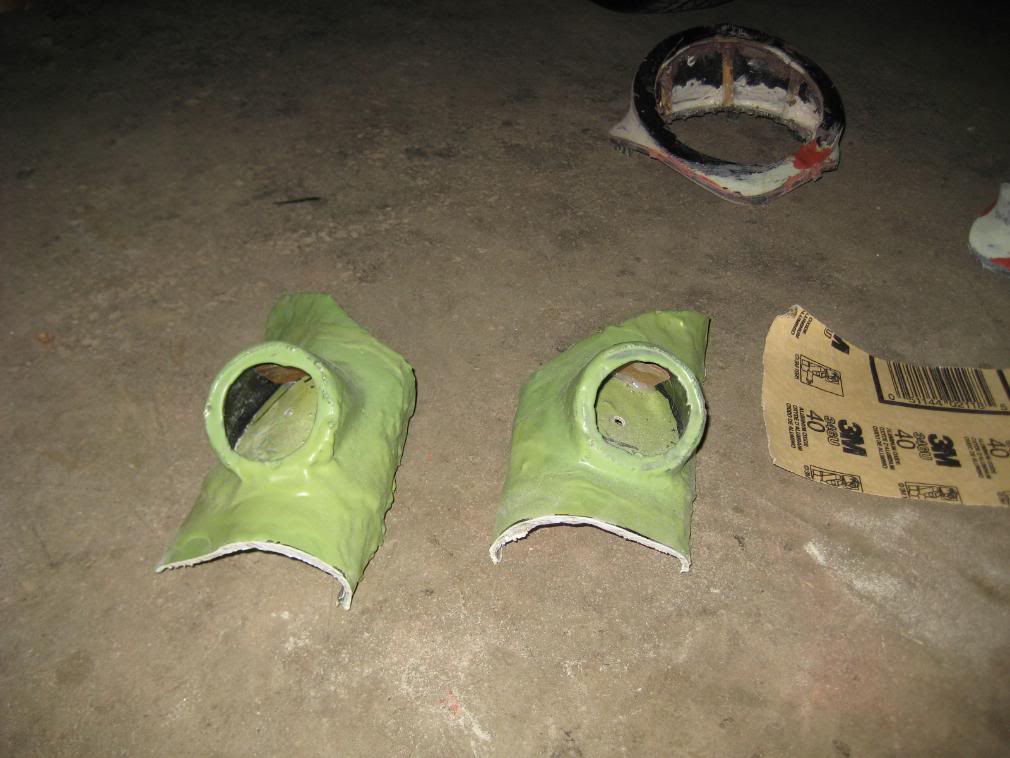
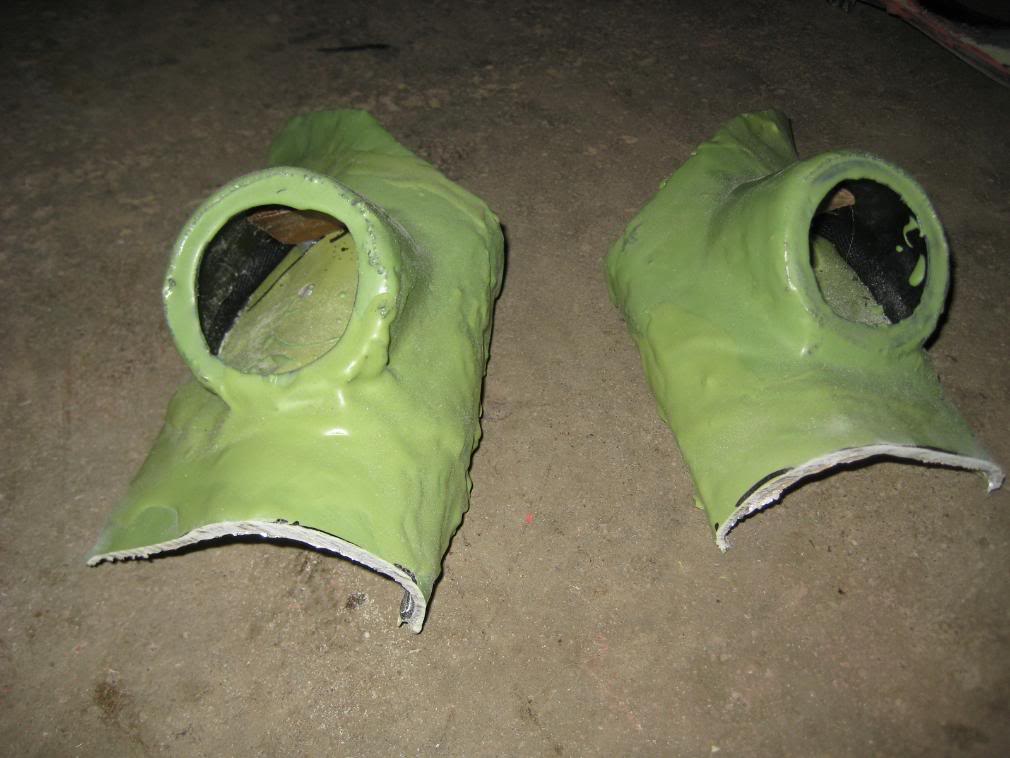
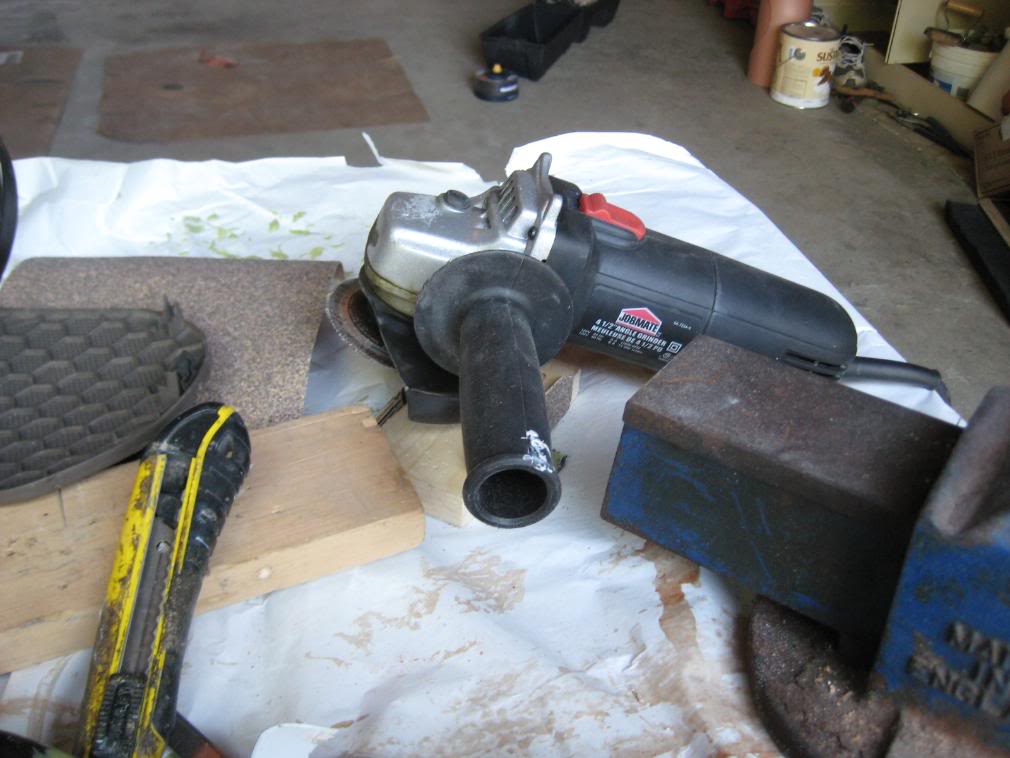
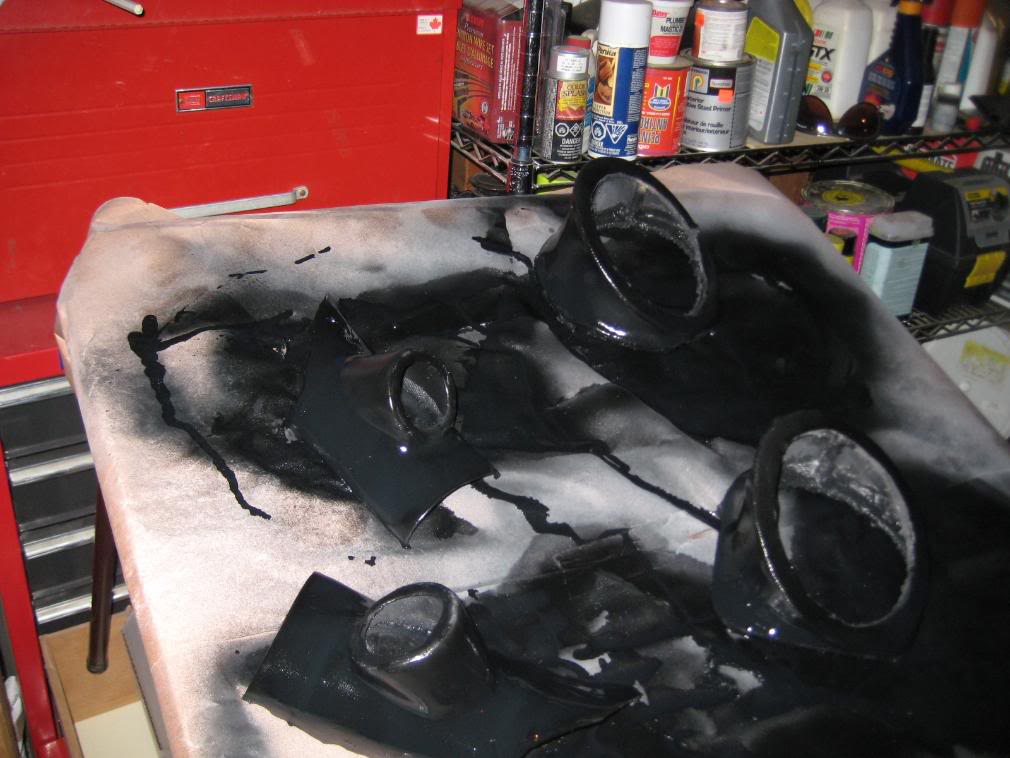
Now the fun part! ... sanding. This probably took the longest. I began by using a dremel to cut/sand the ends of the speaker pods so they fit in the stock location. Then I began with 40 grit sand paper and sanded everything down to 600. I applied some filler as needed and kept sanding.

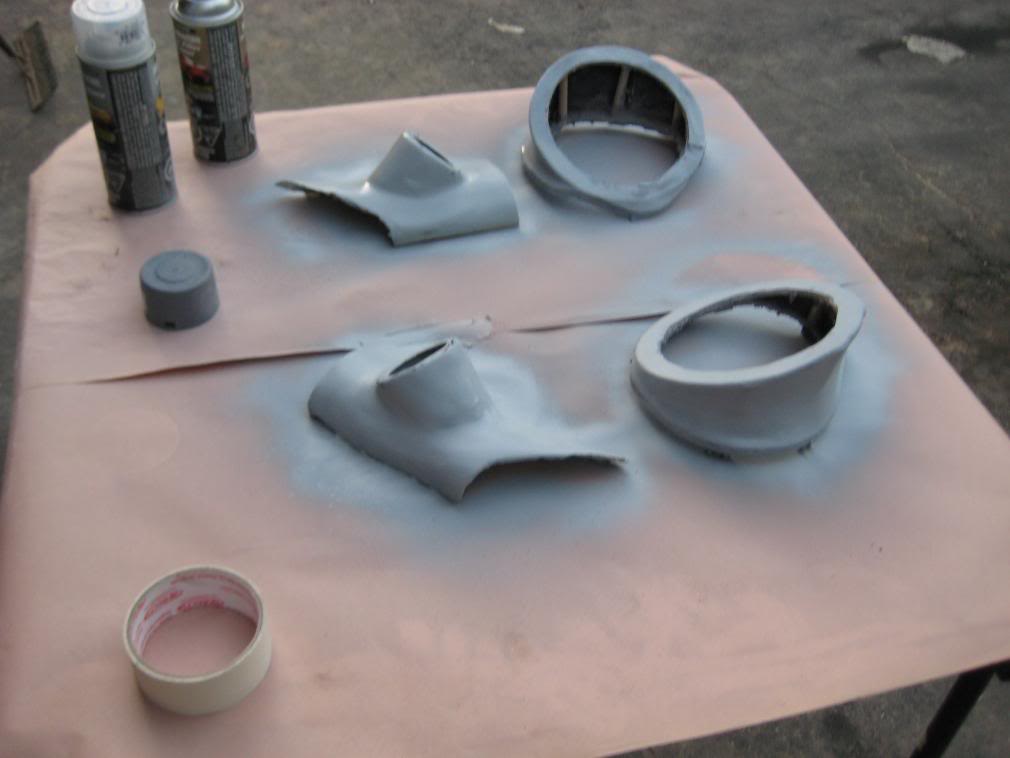
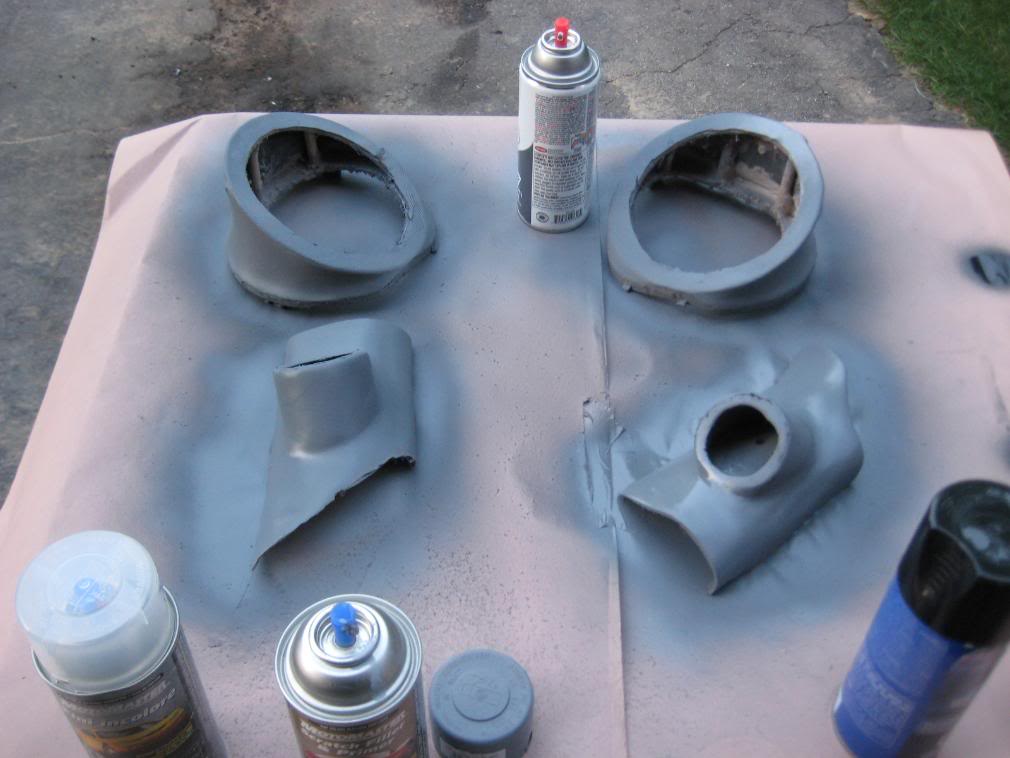
After all the sanding was done, I started applying multiple coasts of scratch filler and primer. I applied thin coats but I made so many layers until it was very smooth:
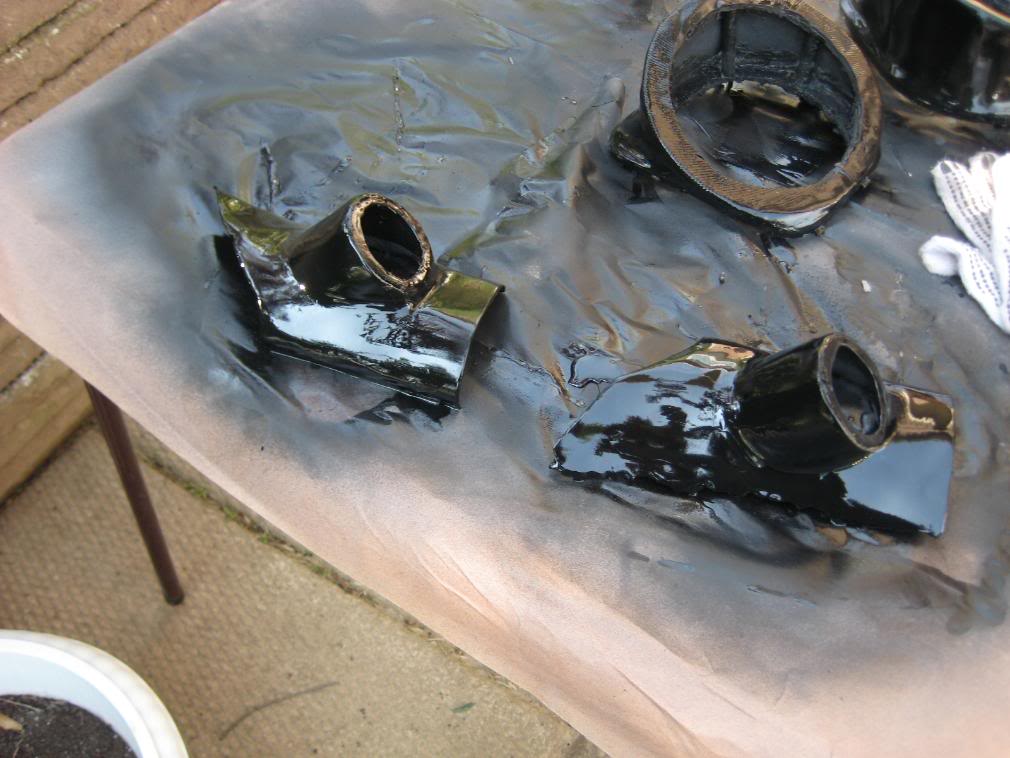
It was now Saturday night. I went out, but as soon as I returned, (it was about 1AM) I started applying coats of paint.
The next morning, I applied a few more layers of paint and 2 thin coats of clear coat (after the paint dried):
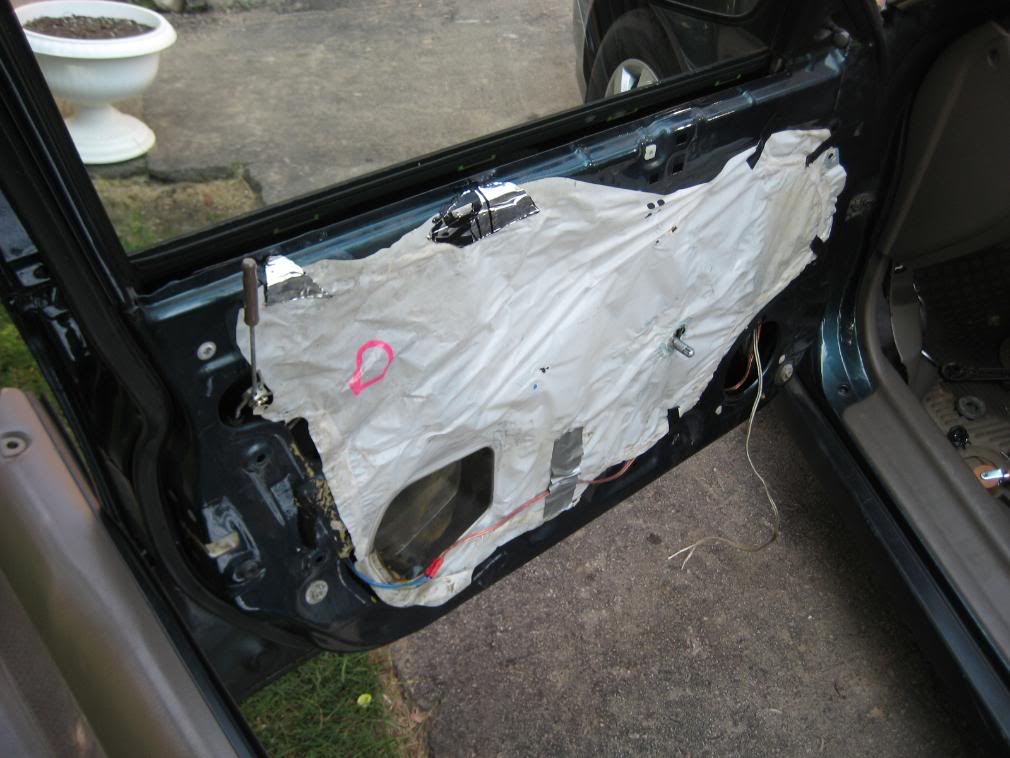
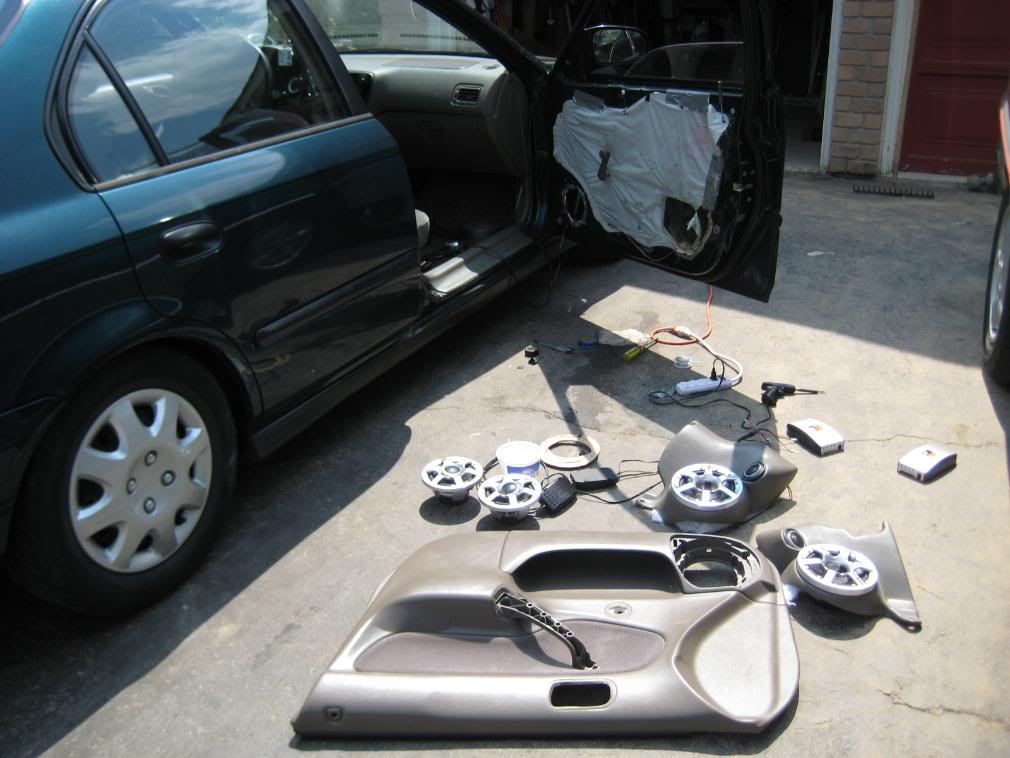
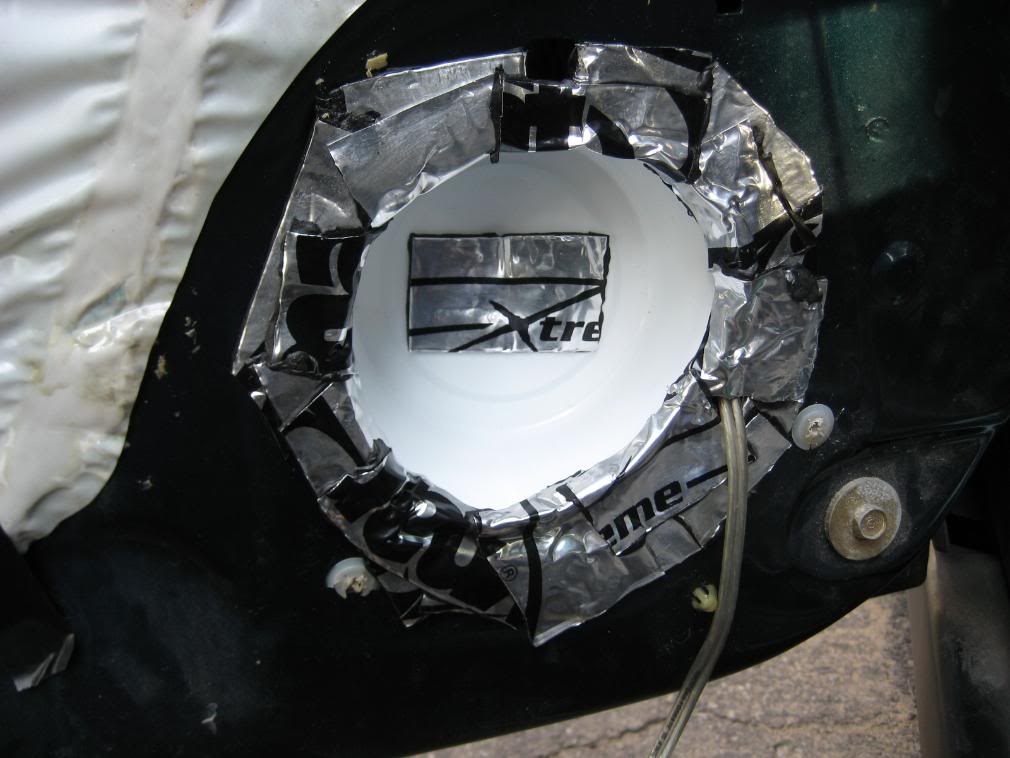
As soon as it dries, its time install everything! I started by taking out my momo components, door panels, and coaxial speakers:

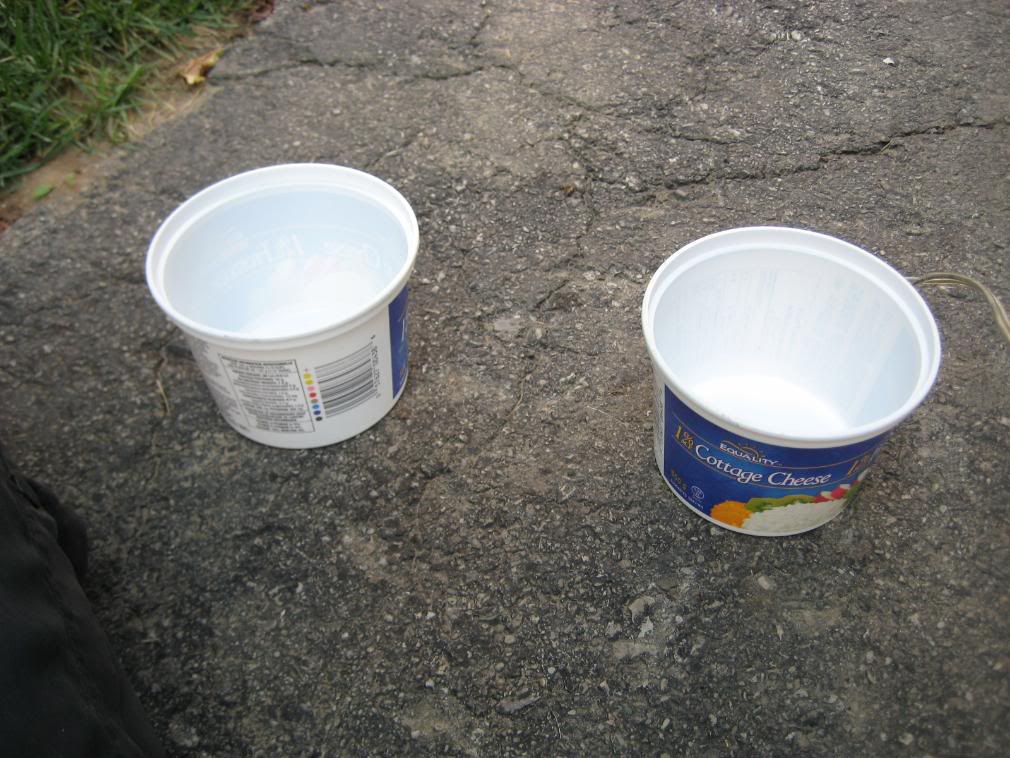
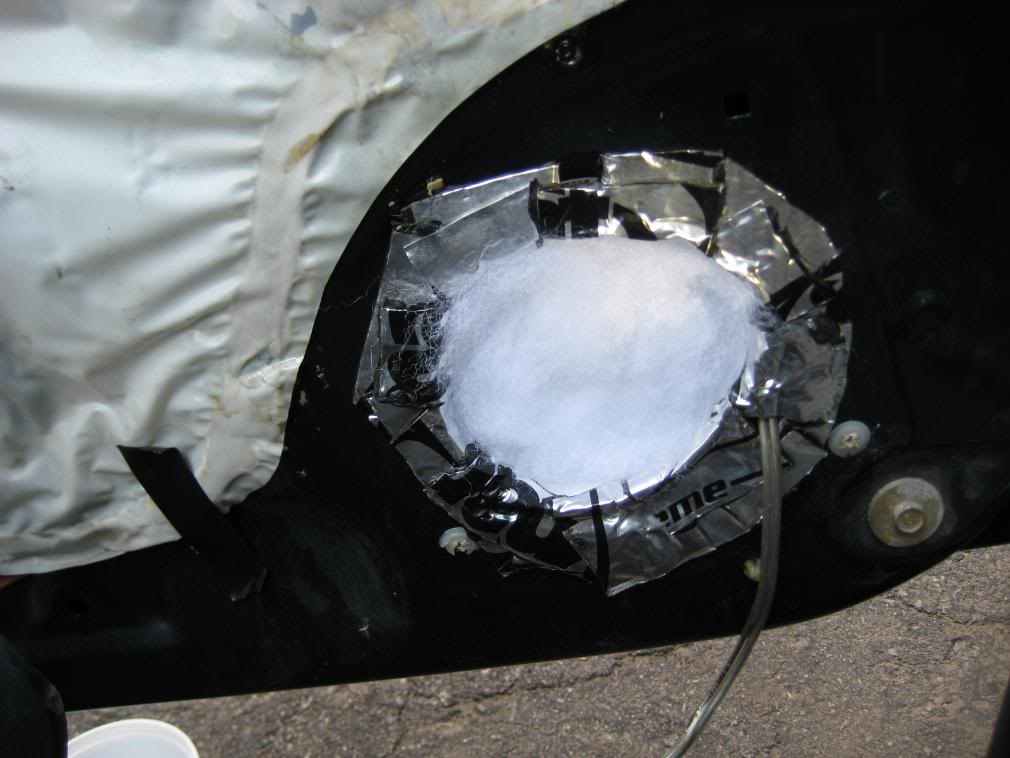
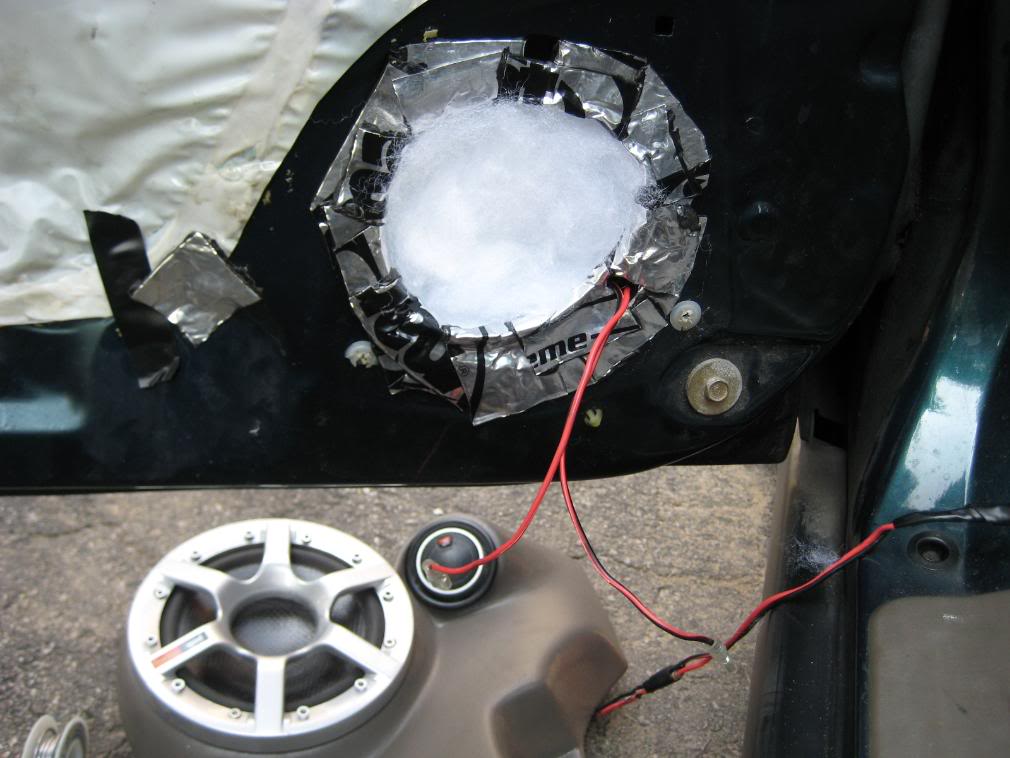
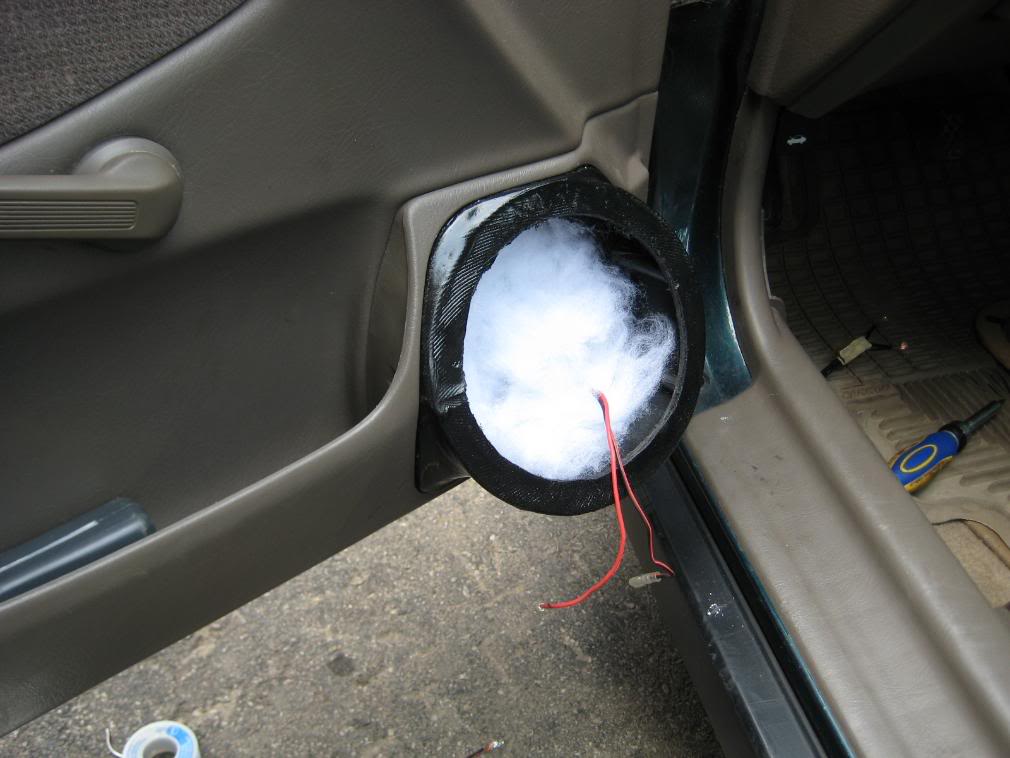
I used two plastic sour cream bins to make a small enclosure for the drivers in the door. I only put a little bit of dynamat around them and put some polyfill in there. As soon as I get some more, I will do the entire doors:
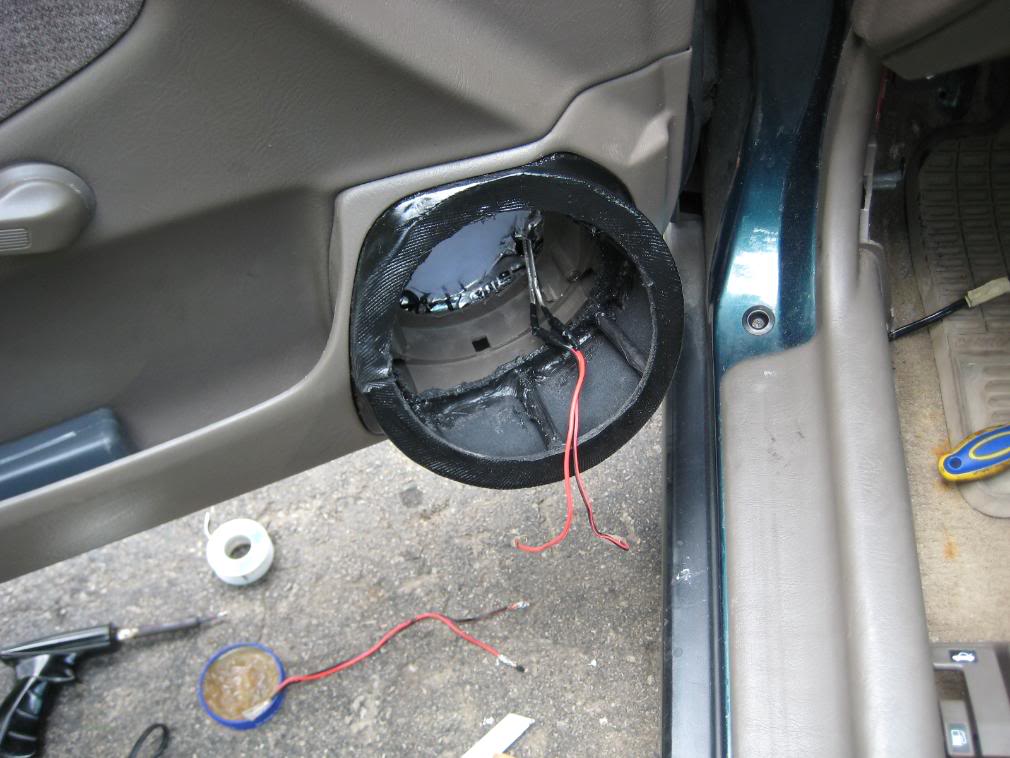
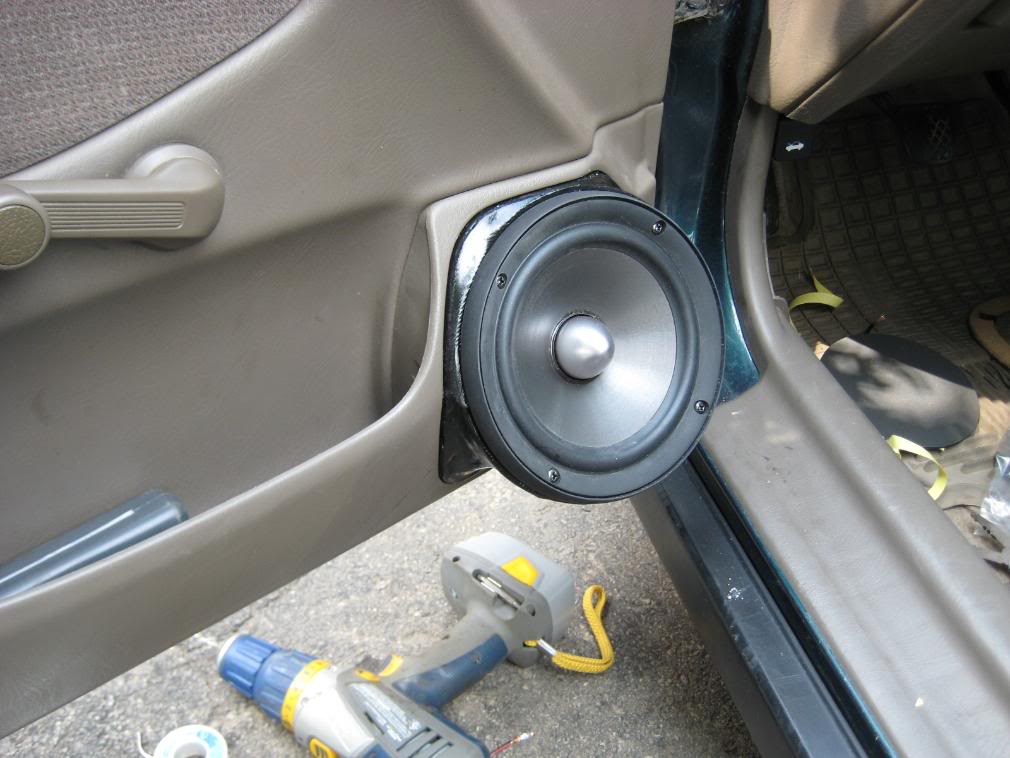
Now it was the moment of truth! ... fitting the speaker pods and drivers! You can clearly see the size of the driver enclosure in the first picture, I also added some additional polyfill:
It fits!
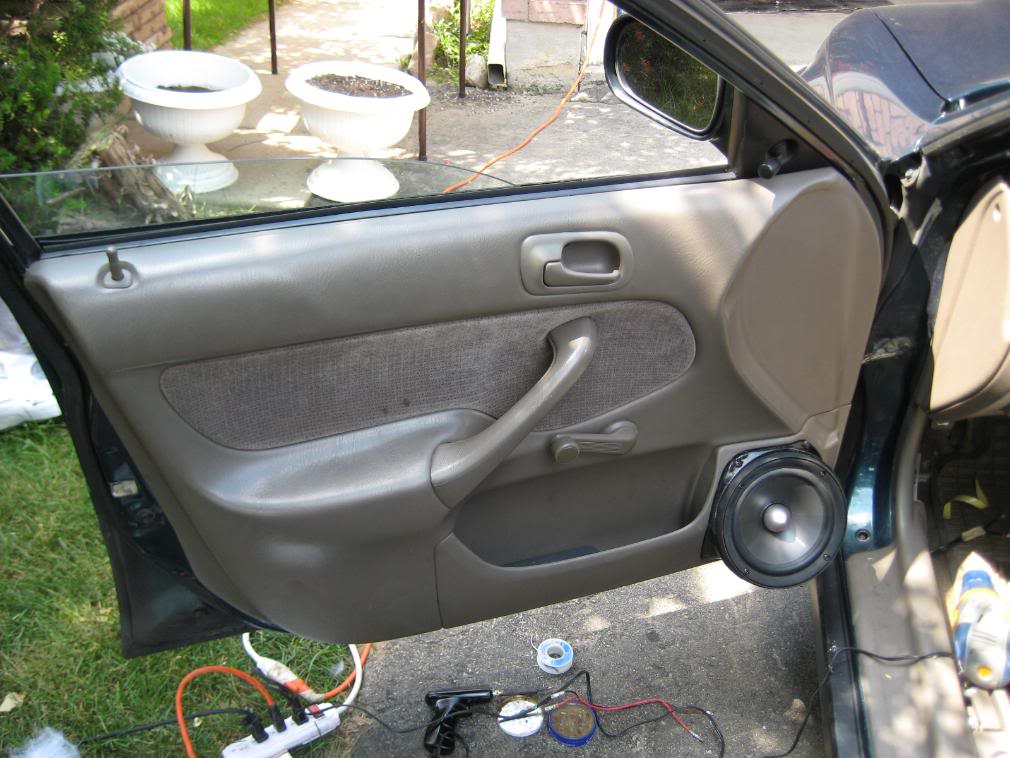
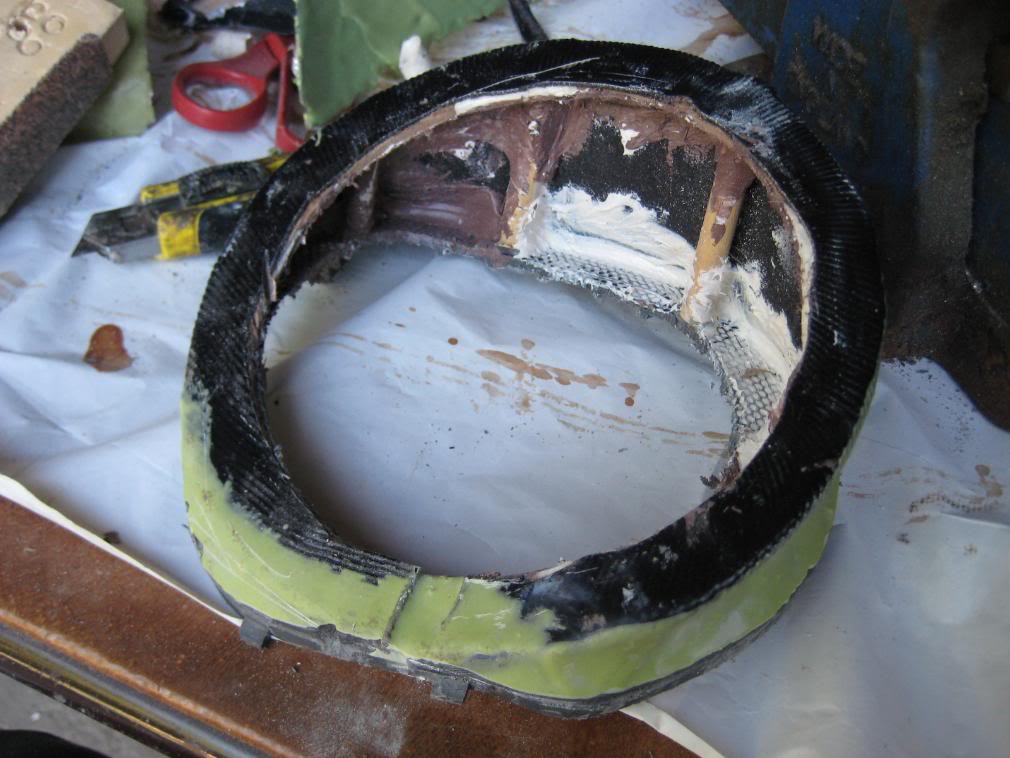
I did the same to both doors and then I moved on to the tweeters. Since I didn't finish the tweeter pods properly, I will have to do that some other time, you find a plastic adapter to fit over them so the edges are a lot more smooth!
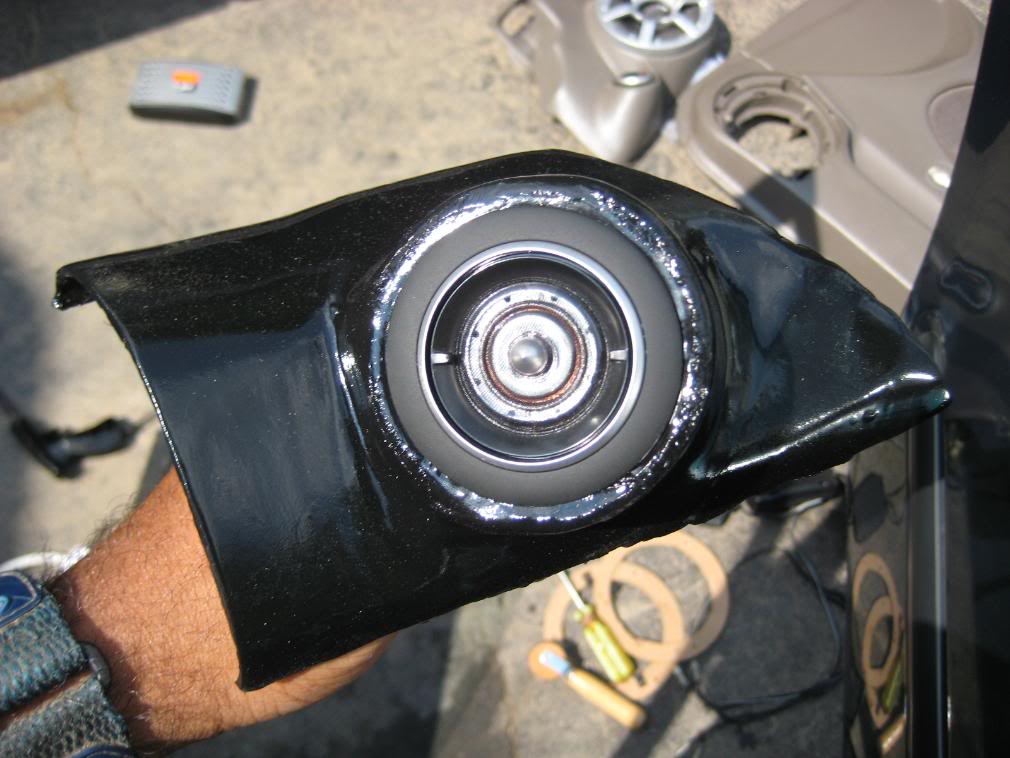
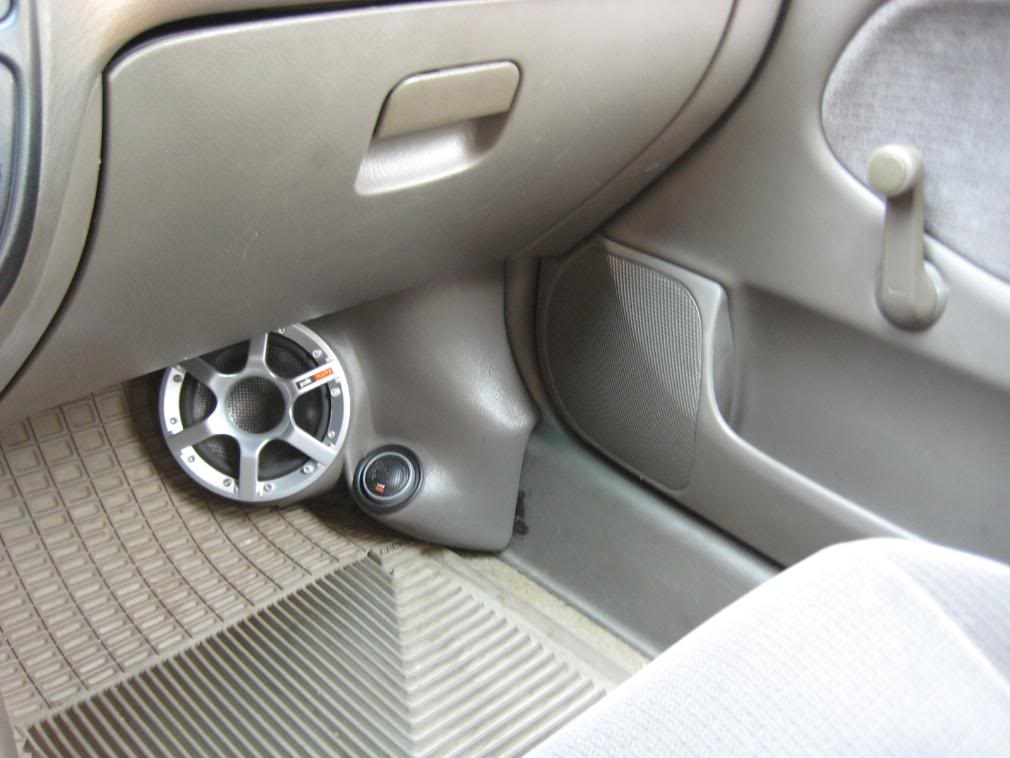
Perfect fit!
I fit the other side as well, and put the door panels, stock kick panels and everything back. As much as I liked my Q-logic kicks, its nice having a little more leg room and my dead pedal back
As you can probably tell, I didn't do such a great job with the speaker pods and tweeter mounts/a-pillars... But given the fact that its my first time, I'm still pretty pleased with the outcome.
Before:
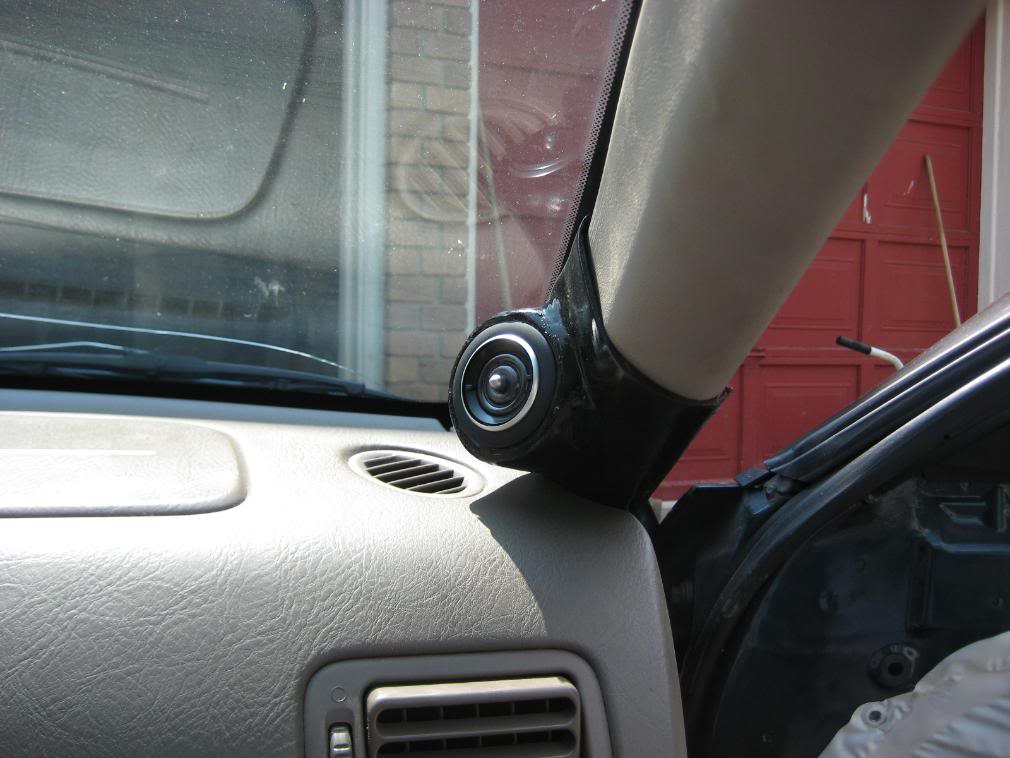
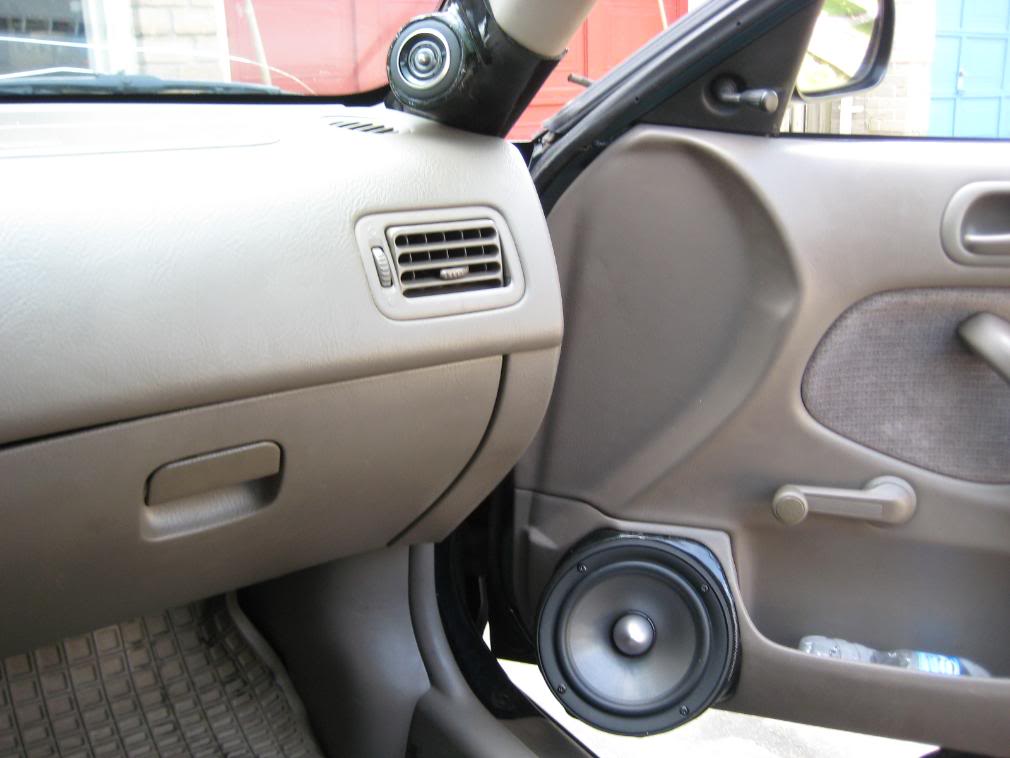
Finished product!
Old momo's taking a rest before I give them to my brother:

Okay, now my opinion on the SR components, In case you can't tell, I have the SR6500's. I was so excited to turn on my stereo and listen to these babies... I kid you not, my heart was beating so fast and I just kept praying that I didn't mess anything up. I've had these components since around October and I've only installed them now, so needless to say I was very happy, and some might even say emotional at the same time
As soon as I started listening to some music, I was sooo amazed... especially by the tweeters. These tweeter are unbelievable. I honestly couldn't believe it. I don't know if it was more because of the tweeter or their new location, but they sounded amazing. They were very detailed, smooth and crisp unlike the momo tweeters which I found to be just a tad bit too bright. A lot of my favorite songs are by Metallica and I just couldn't stop listening. I must have sat there for at least 30 min on my driveway just listening to music. The drivers - even though they aren't broken in - sound very smooth as well. They blend in very nicely with my SR subs and the have a decent amount of punch too them. I expect it to be a little better once they are fully broken in, but to be honest, I am very pleased with the way they perform now. At first, I didn't really know what to expect, but man, Polk really pulled through on this one. I love my old momo's a lot but these are just in a completely different class. I especially love love love this tweeter soooooo much.
Anyways, enough rambling from me for now. This is a long enough post as it is. I hope you guys enjoyed it and find it a little useful... pardon me once again for the sub-par craftsmanship. Feel free to ask me any questions!
As you may or may not know, I've been working on making tweeter and speaker pods for my SR components for the last 3 days. I finished everything yesterday morning, but I didn't want to post anything until I listened to them for a while first.
This is my first attempt at making something like this, so the outcome wasn't the greatest but considering the circumstances, I'm still pleased with the way it turned out.
I'll First I had to take out the a-pillars
Then I had to make a mold of them for the tweeter pods:
I started making the mold using fiberglass. I just followed the instructions by mixing the hardener and resin and then I applied 3 layers of fiberglass matting:
While you are waiting for the fiberglass to cure, I went to admire my SR components:
*drool*
I waited until the next morning. I took the mold off the a-pillars and cut them to my desired size. As you can tell from the pictures, I used a lot of resin.
Then I mixed body filler and fiberglass resin/hardener to apply over the now cured fiberglass
I did the same to both a-pillars:
While I was waiting for the mixture to dry, I started the speaker pods. I bought an extra pair of speaker grills for my Civic in case I ever wanted to go back to stock. I started by making sure they fit and cutting a small adapter for the drivers.
Next, I began gluing the adapter to the speaker grill which I cut out to fit the drivers. I had to test the location of the speakers in different places until I found the right position. After I found the right position, I used tape and glue to hold it in place. Then I used some small wooden supports and glued everything to place.
Then I used a stretchy cloth to cover the speaker pods. I didn't cover the middle since I was going to be cutting it out anyways (for the driver):
Next, I applied the resin/hardener mix to the cloth. I applied 2 or 3 layers and waited for it to harden:
While it was drying I moved back to the a-pillars and essentially did the same thing for the tweeter. It took some playing around and a lot of tape for me to find what I thought was the most ideal place for the tweeter. After I found that location, I used plastic can lids for tweeter mounts:
Once I finalized the location of the tweeter, I glued the plastic lids to the a-pillars:
Next, I used the same cloth to cover the pods:
Now it was time to apply the hardener/resin mix just like I did for the speaker pods:
As you can tell from the pictures, I didn't stretch the material enough, so it began sagging a little when I applied the resin. I waiting for it to dry and then I used bodyfiller to even everything down:
After I sanded it, it became a little more even:
Now both the speaker pods and a-pillars are at the same step of the process
It was now time to apply a coat of bodyfiller and resin/hardener for both the speaker pods and tweeter mounts. You might have also noticed that I cut the a-pillars a little shorter:
When that cured, I put sealant around the inside of the speaker pods to make them as airtight as possible:
Now the fun part! ... sanding. This probably took the longest. I began by using a dremel to cut/sand the ends of the speaker pods so they fit in the stock location. Then I began with 40 grit sand paper and sanded everything down to 600. I applied some filler as needed and kept sanding.
After all the sanding was done, I started applying multiple coasts of scratch filler and primer. I applied thin coats but I made so many layers until it was very smooth:
It was now Saturday night. I went out, but as soon as I returned, (it was about 1AM) I started applying coats of paint.
The next morning, I applied a few more layers of paint and 2 thin coats of clear coat (after the paint dried):
As soon as it dries, its time install everything! I started by taking out my momo components, door panels, and coaxial speakers:
I used two plastic sour cream bins to make a small enclosure for the drivers in the door. I only put a little bit of dynamat around them and put some polyfill in there. As soon as I get some more, I will do the entire doors:
Now it was the moment of truth! ... fitting the speaker pods and drivers! You can clearly see the size of the driver enclosure in the first picture, I also added some additional polyfill:
It fits!
I did the same to both doors and then I moved on to the tweeters. Since I didn't finish the tweeter pods properly, I will have to do that some other time, you find a plastic adapter to fit over them so the edges are a lot more smooth!
Perfect fit!
I fit the other side as well, and put the door panels, stock kick panels and everything back. As much as I liked my Q-logic kicks, its nice having a little more leg room and my dead pedal back
As you can probably tell, I didn't do such a great job with the speaker pods and tweeter mounts/a-pillars... But given the fact that its my first time, I'm still pretty pleased with the outcome.
Before:
Finished product!
Old momo's taking a rest before I give them to my brother:
Okay, now my opinion on the SR components, In case you can't tell, I have the SR6500's. I was so excited to turn on my stereo and listen to these babies... I kid you not, my heart was beating so fast and I just kept praying that I didn't mess anything up. I've had these components since around October and I've only installed them now, so needless to say I was very happy, and some might even say emotional at the same time
As soon as I started listening to some music, I was sooo amazed... especially by the tweeters. These tweeter are unbelievable. I honestly couldn't believe it. I don't know if it was more because of the tweeter or their new location, but they sounded amazing. They were very detailed, smooth and crisp unlike the momo tweeters which I found to be just a tad bit too bright. A lot of my favorite songs are by Metallica and I just couldn't stop listening. I must have sat there for at least 30 min on my driveway just listening to music. The drivers - even though they aren't broken in - sound very smooth as well. They blend in very nicely with my SR subs and the have a decent amount of punch too them. I expect it to be a little better once they are fully broken in, but to be honest, I am very pleased with the way they perform now. At first, I didn't really know what to expect, but man, Polk really pulled through on this one. I love my old momo's a lot but these are just in a completely different class. I especially love love love this tweeter soooooo much.
Anyways, enough rambling from me for now. This is a long enough post as it is. I hope you guys enjoyed it and find it a little useful... pardon me once again for the sub-par craftsmanship. Feel free to ask me any questions!
Thread Starter
50 Watt CAFz'r
Joined: Oct 2007
Posts: 69
Thanks. lol, yeah. I always put too much hardener so its starts getting all clay like really quickly. I need a lot more practice. This was my first time doing something like this, and I'm not terribly disappointed with the way it came out.


I would suggest using a combo fiberglass matt with resin inside your speaker pods and even for the tweeter mounts. It would add regidity and would prevent it from cracking and breaking over time.
Defenetly do the same to the interior of the plastic enclosure you used, you would get good results if it was stiffer, you might even make a little hole and have it vent into the door.
Nice equipement.
Defenetly do the same to the interior of the plastic enclosure you used, you would get good results if it was stiffer, you might even make a little hole and have it vent into the door.
Nice equipement.
Thread Starter
50 Watt CAFz'r
Joined: Oct 2007
Posts: 69
Thanks everyone for your kind words. When I re-do my trunk hopefully this month or next month, I think I am going to re-finish the speaker pods and a-pillars with suede or leather. That'll hide my poor craftsman ship and match better with the interior. I find the paint too glossy to match with the dull interior.
AAAAAAA, thanks for the suggestion. I will definitely look into that.
AAAAAAA, thanks for the suggestion. I will definitely look into that.


