


........................2007 sq fit...........................

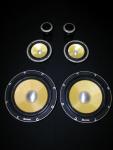

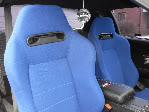


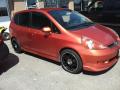
Not gonna happen, these grills are the second pair on the planet, according to the designer. You can own yours for about $700 with taxes and shipping
Last edited by avidedtr; Feb 14, 2010 at 05:42 PM.

Since time isn't on my side and I'm at work right now doing Olympic monitoring, I'll give a description of what was done instead of posting photos
Engine battery is a Kinetik 1400HC. I designed a battery cover in Adobe Illustrator, then had it cut with a waterjet. 6061 aircraft aluminum was used for its strength and flat finish. All wires were labeled accordingly and secured to the aluminum plate with Streetwires clips.
Grounds from Engine to chassis battery and NEG to chassis was upgraded to 0/1. Alternator positive is OEM/factory and will remain, since I tested 0/1 vs. factory and the difference was small.
Two techflexed 18ft-0/1 welding wires were ran under the car covered with an exterior plastic electrical conduit. They were then secured to the vehicle using the appropriate clips. At the rear drivers side of the vehicle is a brace that connects the frame to the body. I fabricated an aluminum brace that utilizes the factory bolts to secure the electrical conduit. This reduces the stress on the cable going into the cabin. Two holes were punched inside the spare tire well and streetwire 0/1 firewall bushings were used to keep the water outside.
The entire audio system shares the same 12vDC constant and ground. I chose to do this due to previous noise problem. Only 3 wires from factory were utilized. ACC for the radio and the light + & - for the hatch.
Behind the radio I used a barrier strip to simplify the mess of wires that usually gets the least amount of attention. Fused 8 gauge positive and negative was ran right from the engine battery and are hard soldered and heat shrinked to a pair of 16gauge wires. The barrier strip feeds the relay, antenna, remote, accessory, 12vDC and ground. All wires were covered in techflex and secure to the vehicle.
The relay is located behind the glove box which feeds the remote signal to the fuse panel then to the three ARC amps.
Each remote wire is fused with 1amp ATC fuse, located in front of the shift ****. Fusing the remote wire is uncommon but since they are the only 3 wires that could ever be compromised due to human traffic and cargo - I wanted to be safe then sorry. Each remote wire is covered with techflex then techflexed again as a gang of three and labeled.
The battery in the hatch is fused from battery to battery and a second fuse was added for the amplifiers. Three 4 gauge wires were hard solder together since the amplifiers have built in fusing - there was no need for a distribution block. The fuses are fully accessible within seconds of opening the hatch. Brass battery terminals were used with a secondary bolt on location for easy power supply connection.
Speaker wires and the custom Kimber RCA cable were ran above the headliner and secured 6" or less with electrical square tabs. All wires wire labeled for easy identification and service/installation.
Apillars were fabricted by utilizing the factory panel, along with fleece, fiberglass filler, 4oz mat and bondo. The process to create these pods took quite a bit of time and one panel was tossed in garbage can.
The kick panels started out by cutting a 4" hole in the fender well. A scan Speak AP vent was Polyurethaned in place then coated with truck bed liner. A welding rubber mat was cut to fit and riveted to car. More polyurethane was used to seal up the edges and a final coat of truck bed liner was applied. Then I fabricated two fiberglass molds with an Aluminum 1/2" baffle, chopped mat, fiberglass filler and fleece. A hole was cut in the rear to match the AP vent then covered in matching factory carpet. Acoustic Sealant was used to close the small air gaps between the kick panel and vehicle.
Sub box was fabricated with wood base that secured to the vehicles factory cargo net bolt holes. A 6061 aircraft aluminum 1/2" baffle was fabricated using a waterjet then secured to the mold with wood braces. Fleece was then stapled to the factory panel and glassed in place. 10 layers of 6oz woven mat was applied to the mold for strength. Fiberglass filler was used inside the mold for more added strength. Once the everything had cured I removed the wood braced and filled those sections with more filler. About 4 boxes of lead mass was applied inside the entire cabinet. This helped reduce the OEM panel from resonating and rattling. To finish everything off about 6 cups of milkshake was applied, then a thick layer of truck bed liner.
Amp rack was initially designed with 3003 1/2" aluminum square tubing. Unfortunately I had to scrap the amp rack and use wood. A solid piece of Baltic birch was cut to fit and the factory cargo net bolt were utilized to hold the rack in place. Also two L brackets were fastened behind amp rack then screwed to the metal of the vehicle. Tnuts were used to hold the amps in place.
A custom cover was fabricated with a 10" sono tube to enclose the second battery and wiring. Fiberglass filler and mat was used to bring it all together. The panel clips into the factory holes and is removable within seconds.
Anyways as you can see a boat load of time and effort went into this. I'm looking forward to the completion of this build and some time off with my wife.
Cheers Ju
Engine battery is a Kinetik 1400HC. I designed a battery cover in Adobe Illustrator, then had it cut with a waterjet. 6061 aircraft aluminum was used for its strength and flat finish. All wires were labeled accordingly and secured to the aluminum plate with Streetwires clips.
Grounds from Engine to chassis battery and NEG to chassis was upgraded to 0/1. Alternator positive is OEM/factory and will remain, since I tested 0/1 vs. factory and the difference was small.
Two techflexed 18ft-0/1 welding wires were ran under the car covered with an exterior plastic electrical conduit. They were then secured to the vehicle using the appropriate clips. At the rear drivers side of the vehicle is a brace that connects the frame to the body. I fabricated an aluminum brace that utilizes the factory bolts to secure the electrical conduit. This reduces the stress on the cable going into the cabin. Two holes were punched inside the spare tire well and streetwire 0/1 firewall bushings were used to keep the water outside.
The entire audio system shares the same 12vDC constant and ground. I chose to do this due to previous noise problem. Only 3 wires from factory were utilized. ACC for the radio and the light + & - for the hatch.
Behind the radio I used a barrier strip to simplify the mess of wires that usually gets the least amount of attention. Fused 8 gauge positive and negative was ran right from the engine battery and are hard soldered and heat shrinked to a pair of 16gauge wires. The barrier strip feeds the relay, antenna, remote, accessory, 12vDC and ground. All wires were covered in techflex and secure to the vehicle.
The relay is located behind the glove box which feeds the remote signal to the fuse panel then to the three ARC amps.
Each remote wire is fused with 1amp ATC fuse, located in front of the shift ****. Fusing the remote wire is uncommon but since they are the only 3 wires that could ever be compromised due to human traffic and cargo - I wanted to be safe then sorry. Each remote wire is covered with techflex then techflexed again as a gang of three and labeled.
The battery in the hatch is fused from battery to battery and a second fuse was added for the amplifiers. Three 4 gauge wires were hard solder together since the amplifiers have built in fusing - there was no need for a distribution block. The fuses are fully accessible within seconds of opening the hatch. Brass battery terminals were used with a secondary bolt on location for easy power supply connection.
Speaker wires and the custom Kimber RCA cable were ran above the headliner and secured 6" or less with electrical square tabs. All wires wire labeled for easy identification and service/installation.
Apillars were fabricted by utilizing the factory panel, along with fleece, fiberglass filler, 4oz mat and bondo. The process to create these pods took quite a bit of time and one panel was tossed in garbage can.
The kick panels started out by cutting a 4" hole in the fender well. A scan Speak AP vent was Polyurethaned in place then coated with truck bed liner. A welding rubber mat was cut to fit and riveted to car. More polyurethane was used to seal up the edges and a final coat of truck bed liner was applied. Then I fabricated two fiberglass molds with an Aluminum 1/2" baffle, chopped mat, fiberglass filler and fleece. A hole was cut in the rear to match the AP vent then covered in matching factory carpet. Acoustic Sealant was used to close the small air gaps between the kick panel and vehicle.
Sub box was fabricated with wood base that secured to the vehicles factory cargo net bolt holes. A 6061 aircraft aluminum 1/2" baffle was fabricated using a waterjet then secured to the mold with wood braces. Fleece was then stapled to the factory panel and glassed in place. 10 layers of 6oz woven mat was applied to the mold for strength. Fiberglass filler was used inside the mold for more added strength. Once the everything had cured I removed the wood braced and filled those sections with more filler. About 4 boxes of lead mass was applied inside the entire cabinet. This helped reduce the OEM panel from resonating and rattling. To finish everything off about 6 cups of milkshake was applied, then a thick layer of truck bed liner.
Amp rack was initially designed with 3003 1/2" aluminum square tubing. Unfortunately I had to scrap the amp rack and use wood. A solid piece of Baltic birch was cut to fit and the factory cargo net bolt were utilized to hold the rack in place. Also two L brackets were fastened behind amp rack then screwed to the metal of the vehicle. Tnuts were used to hold the amps in place.
A custom cover was fabricated with a 10" sono tube to enclose the second battery and wiring. Fiberglass filler and mat was used to bring it all together. The panel clips into the factory holes and is removable within seconds.
Anyways as you can see a boat load of time and effort went into this. I'm looking forward to the completion of this build and some time off with my wife.
Cheers Ju
Last edited by avidedtr; Feb 17, 2010 at 07:09 PM.

A pillars are done and are going to upholsterer in the morning. All the fabrication is 100% complete and I'm on the home stretch. Still no sound but that will change tomorrow or Wednesday.


