
FS's Build thread... lots of pics!


Thread Starter
50 Watt CAFz'r
Joined: Aug 2003
Posts: 221
Just a note, I did infact cut the passenger side too wide. Won't really affect anything other than creating more work for me once I start fiberglassing...
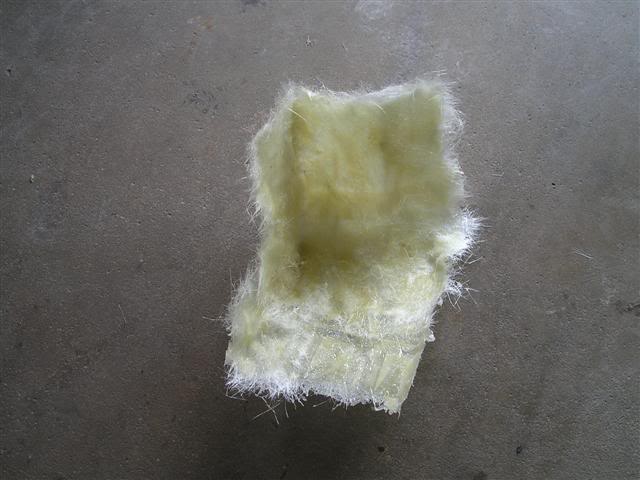
Had to make another supply run. You can never get everything in one shot, always forget somthing... I now have latex gloves and ers for the fiberglass...
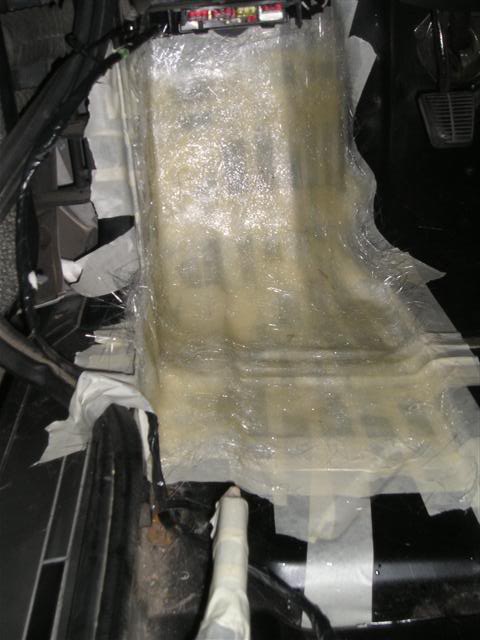
Here is where I sit as of 5 minutes ago, foam is getting hard:
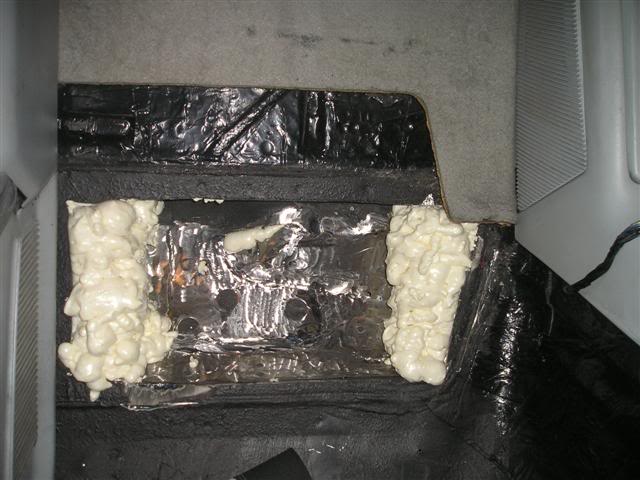
Passenger Kick is masked off and ready for glassing:
Going to go cook myself some steak, then back to work.
Still waiting for the foam to be completely hardned.. Probably going to have to wait overnight.
Got a good 6 layers of fiberglass down for the kick... These things are going to be solid!
 [/
[/
Had to make another supply run. You can never get everything in one shot, always forget somthing... I now have latex gloves and ers for the fiberglass...
Here is where I sit as of 5 minutes ago, foam is getting hard:
Passenger Kick is masked off and ready for glassing:
Going to go cook myself some steak, then back to work.
Still waiting for the foam to be completely hardned.. Probably going to have to wait overnight.
Got a good 6 layers of fiberglass down for the kick... These things are going to be solid!
[/
Thread Starter
50 Watt CAFz'r
Joined: Aug 2003
Posts: 221
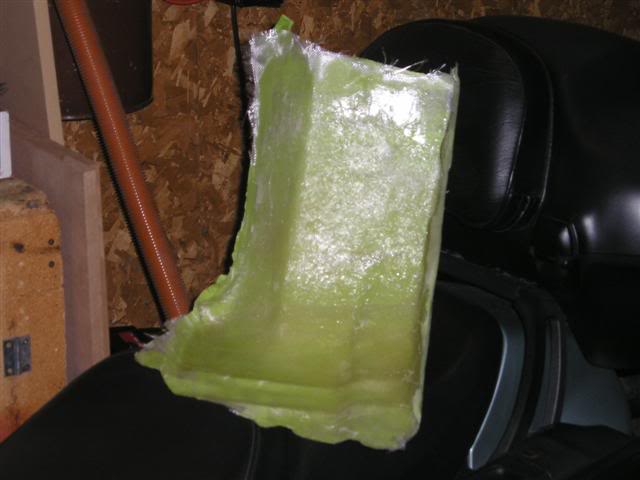
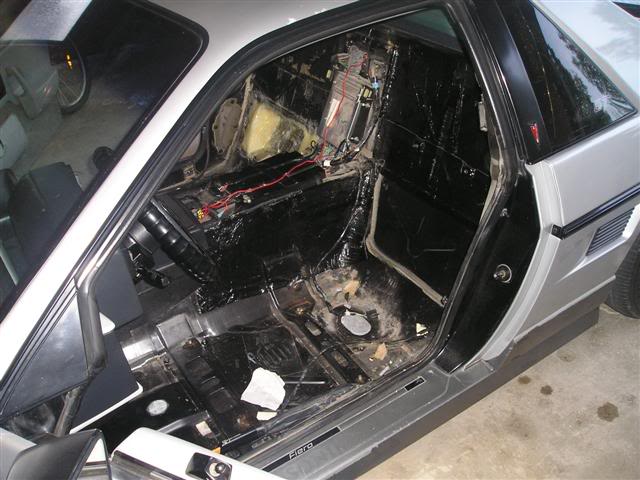
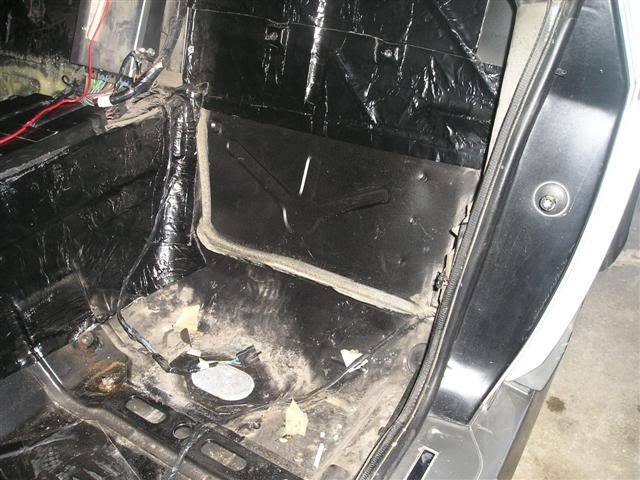
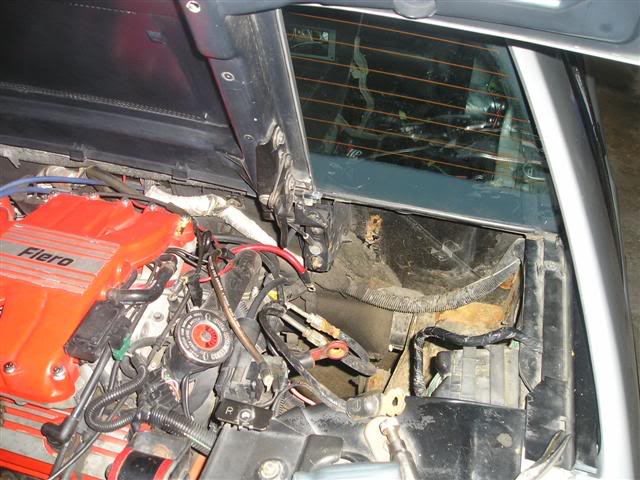
Well, passenger side kick is out of the car. Drivers side is glassed a well. Car is stripped, time to cut out the drivers side firewall.
Passenger side out:
Drivers side drying:
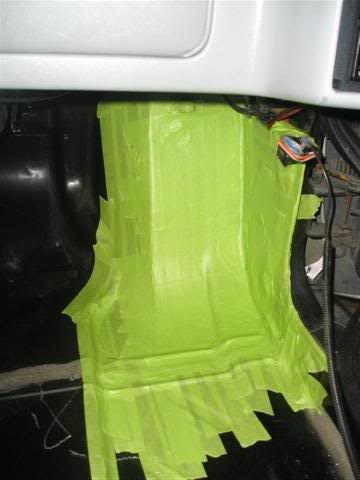
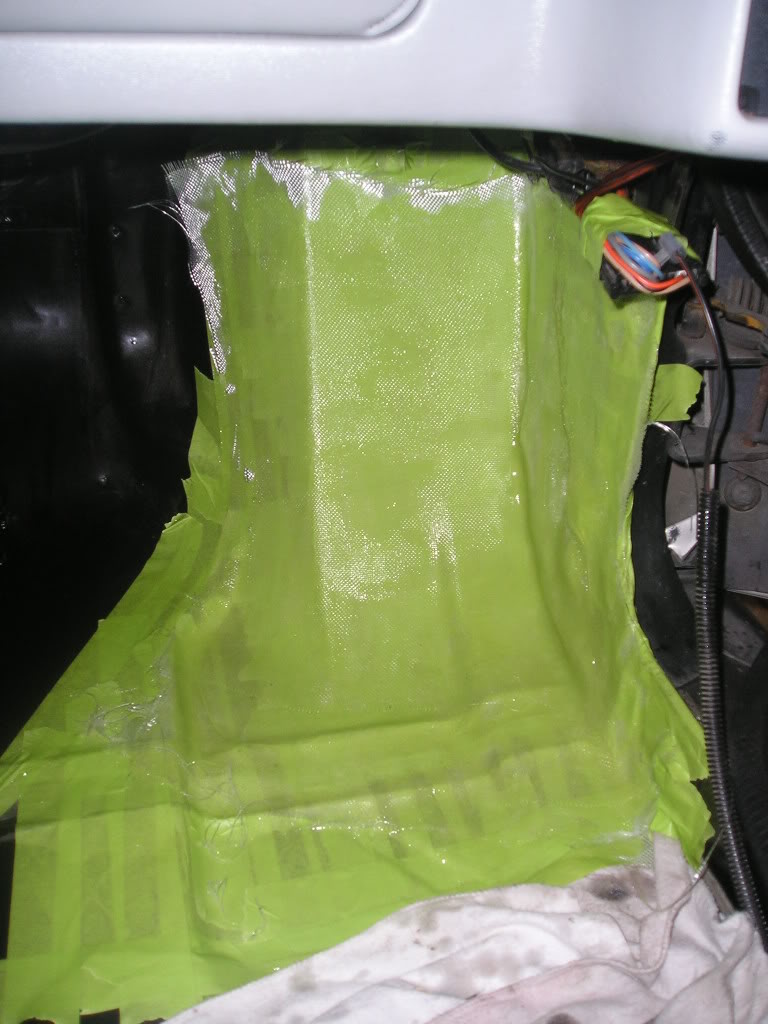
Note to self: Green masking tape is a ***** to get out of the car, it also is a ***** to get off of the fiberglass after. White masking tape is way easier to get off the fiberglass and to get out of the car.
Passenger side out:
Drivers side drying:
Note to self: Green masking tape is a ***** to get out of the car, it also is a ***** to get off of the fiberglass after. White masking tape is way easier to get off the fiberglass and to get out of the car.
Thread Starter
50 Watt CAFz'r
Joined: Aug 2003
Posts: 221
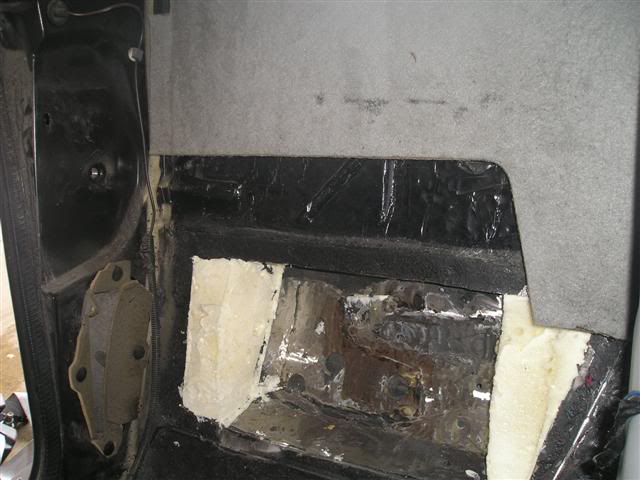
Progress on the passenger side firewall. Cut the foam to shape, now I have a nice square section to work with:
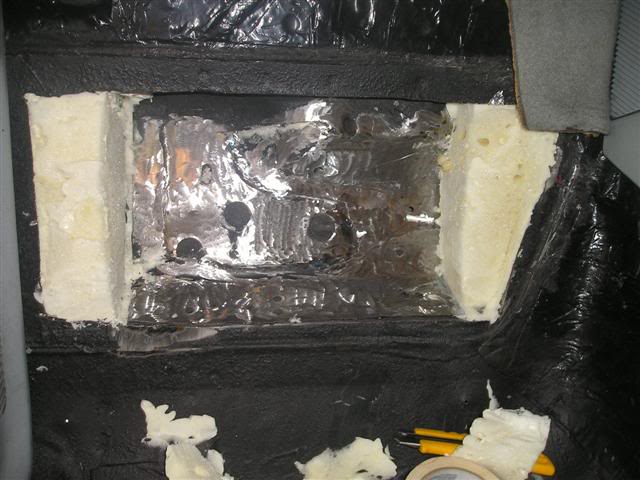
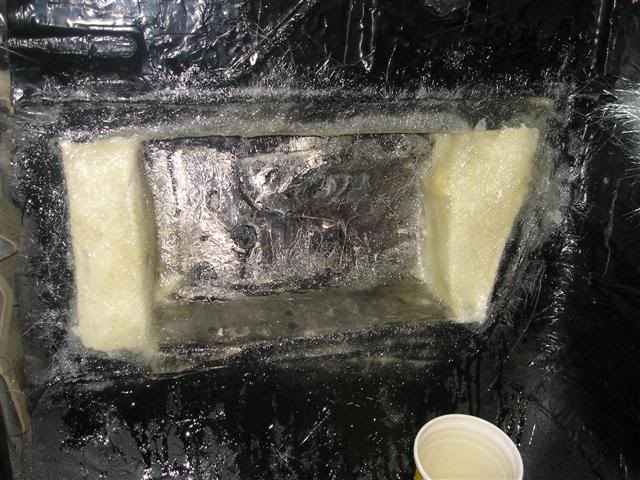
A few layers of glass on the passenger side:
This is what the car looks like right now:
Time to go out and cut the drivers side firewall.. Wish me luck, I'll be cutting literally 1/2" away from my fuel filler tube with a cut off wheel... There is really no other way to do it. I'll have the hose and plenty of wet towels handy just incase.
Thread Starter
50 Watt CAFz'r
Joined: Aug 2003
Posts: 221
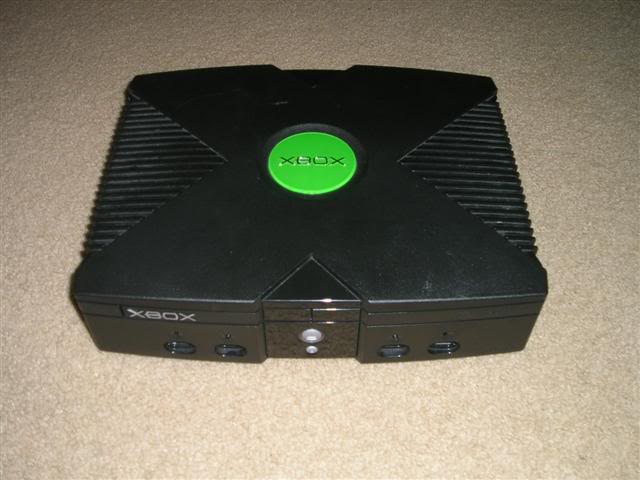
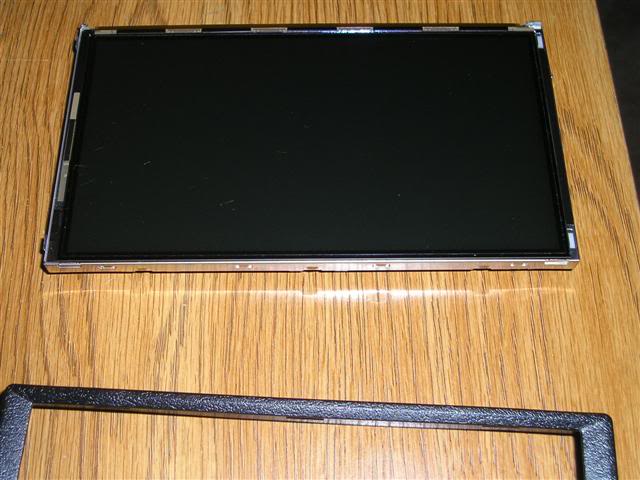
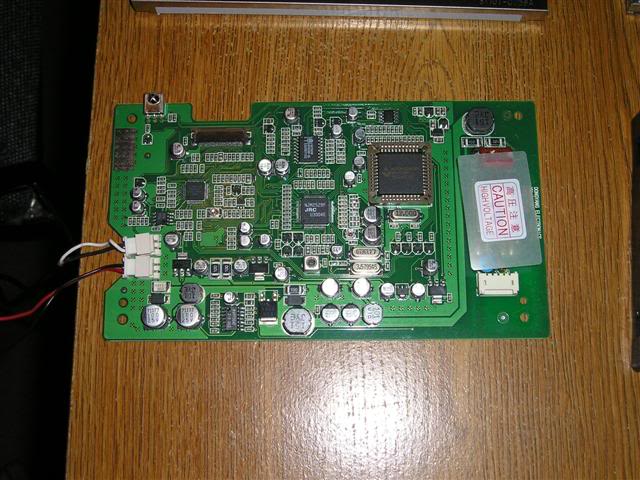
A new toy for the car. It still needs to get modded, but this will be my DVD source. Of course, it won't look nearly like that once it makes it into the car.:
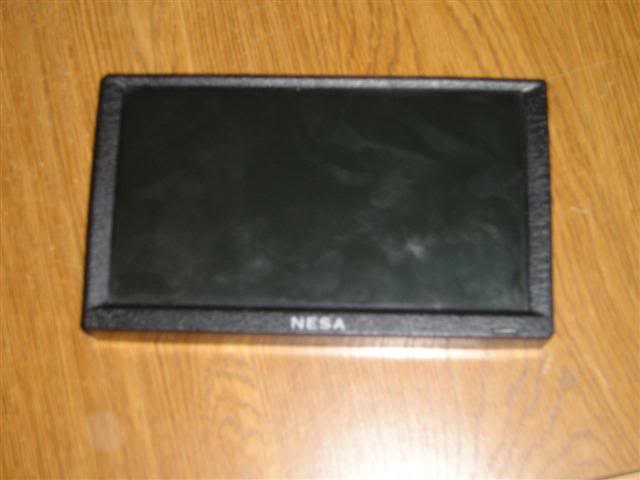
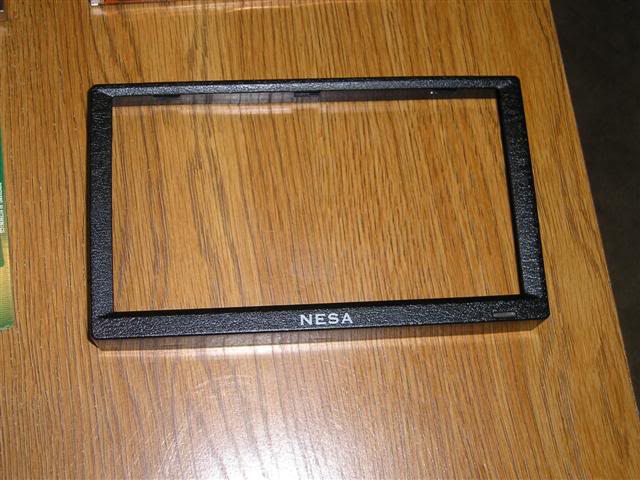
And with an XBOX, you obviously need a screen. Here is one of one or many, not sure yet...
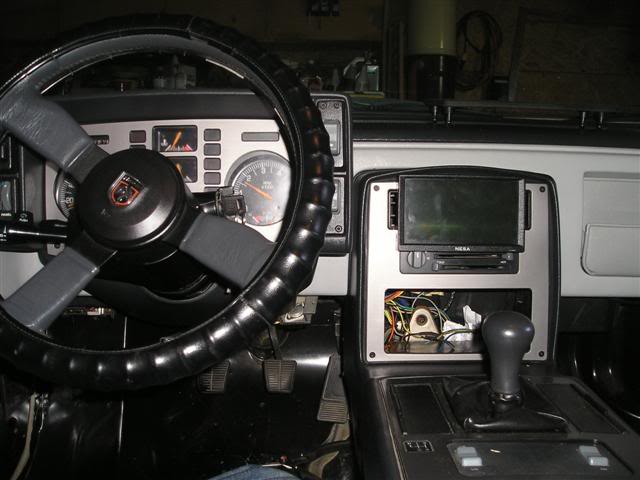
An idea of where it will end up. It is currently covering the dash vents, but the vents will be moved. On some fiero GT's there was a factory aux gauge pod that sat just above where the screen it and had two square gauges in it. I'm getting a factory gauge pod and I'm going to mould the factory vents into the factory gauge pod. Then mould the screen into the dash where the vents were. Of course the heater controls are going down about 1" and the deck opening is going to be re-worked to be a single din hole instead of a din 1/2" hole. Nice and clean looking :cheers
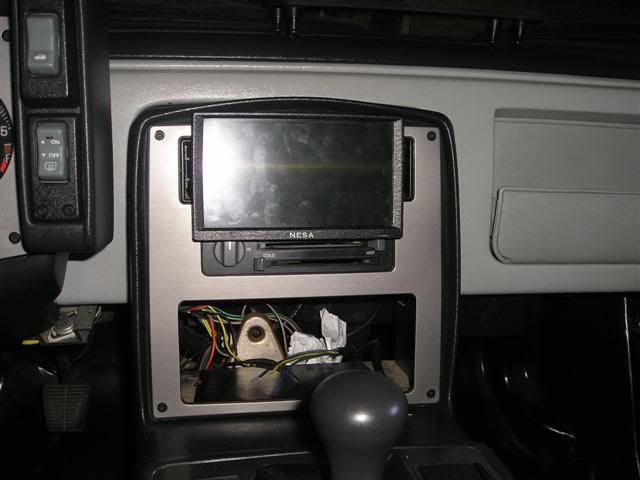
And no, the screen is not mounted there at the moment. It was just hanging on a popsicle stick wedged in the vents for the pics
And with an XBOX, you obviously need a screen. Here is one of one or many, not sure yet...
An idea of where it will end up. It is currently covering the dash vents, but the vents will be moved. On some fiero GT's there was a factory aux gauge pod that sat just above where the screen it and had two square gauges in it. I'm getting a factory gauge pod and I'm going to mould the factory vents into the factory gauge pod. Then mould the screen into the dash where the vents were. Of course the heater controls are going down about 1" and the deck opening is going to be re-worked to be a single din hole instead of a din 1/2" hole. Nice and clean looking :cheers
And no, the screen is not mounted there at the moment. It was just hanging on a popsicle stick wedged in the vents for the pics
Thread Starter
50 Watt CAFz'r
Joined: Aug 2003
Posts: 221
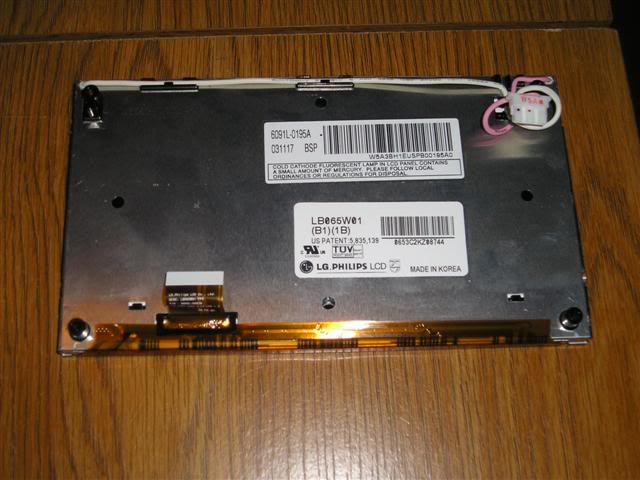
Well, ripped the LCD appart so I can glass it into the dash:
Driver's side kick is out. Had some issues glassing it. Not sure if I'll use it or do it over yet...
Well, I decided to relocate the battery for a few reasons:
1. The stock battery tray was in rough condition
2. I'll be adding a fair amount of weight behind the wheels with the amps and fiberglass in the trunk, so moving the battery up front will help balance it out a bit. I still want to be able to enjoy the good handling the car has.
3. Because once I get a nice battery, I can fiberglass a nice trim piece and have the battery looking all nice up front to go along with the rest of the install.
Battery tray:
Gone. Going to need a bit of touch up paint and some cleaning....
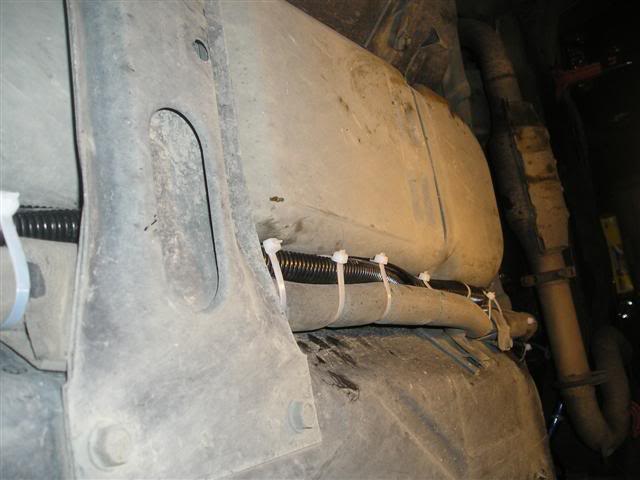
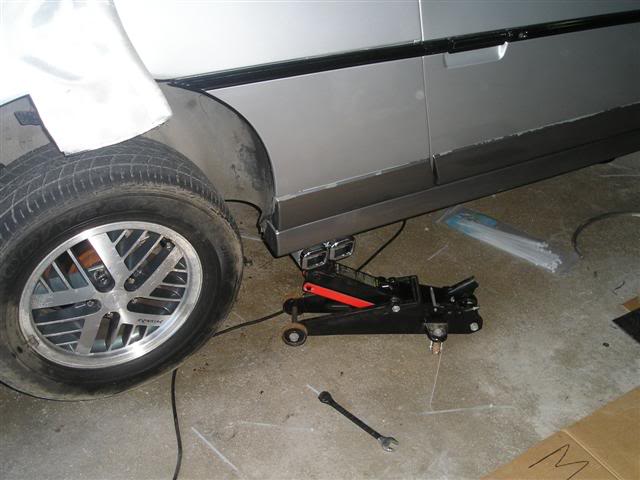
A nice fat run of 0 awg under the car:
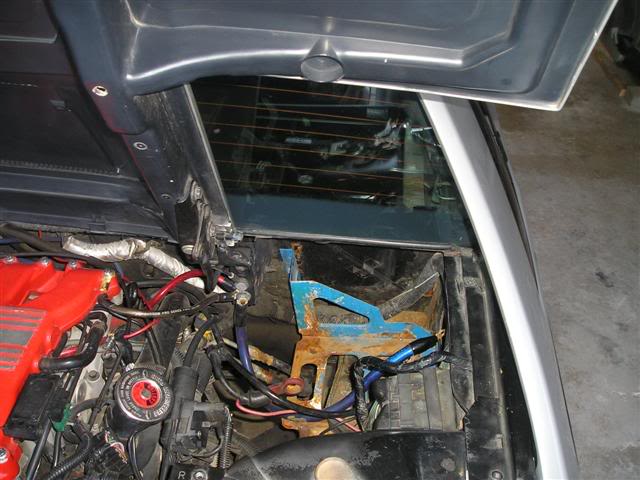
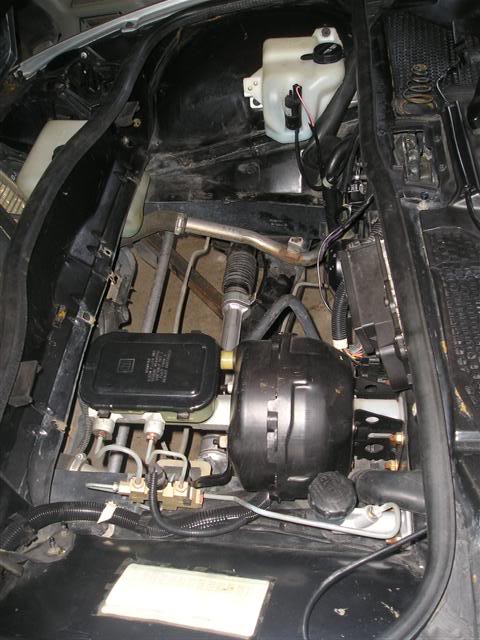
The front before:
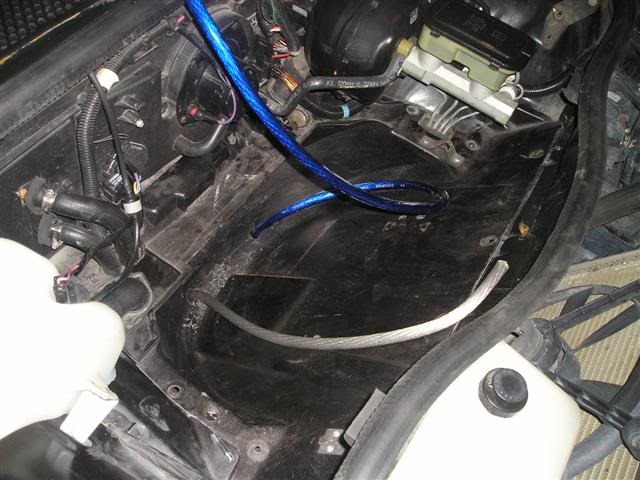
The front with the stock spare tire well back in and the 0g coming through:
Driver's side kick is out. Had some issues glassing it. Not sure if I'll use it or do it over yet...
Well, I decided to relocate the battery for a few reasons:
1. The stock battery tray was in rough condition
2. I'll be adding a fair amount of weight behind the wheels with the amps and fiberglass in the trunk, so moving the battery up front will help balance it out a bit. I still want to be able to enjoy the good handling the car has.
3. Because once I get a nice battery, I can fiberglass a nice trim piece and have the battery looking all nice up front to go along with the rest of the install.
Battery tray:
Gone. Going to need a bit of touch up paint and some cleaning....
A nice fat run of 0 awg under the car:
The front before:
The front with the stock spare tire well back in and the 0g coming through:
Thread Starter
50 Watt CAFz'r
Joined: Aug 2003
Posts: 221
A couple more hours in tonight:
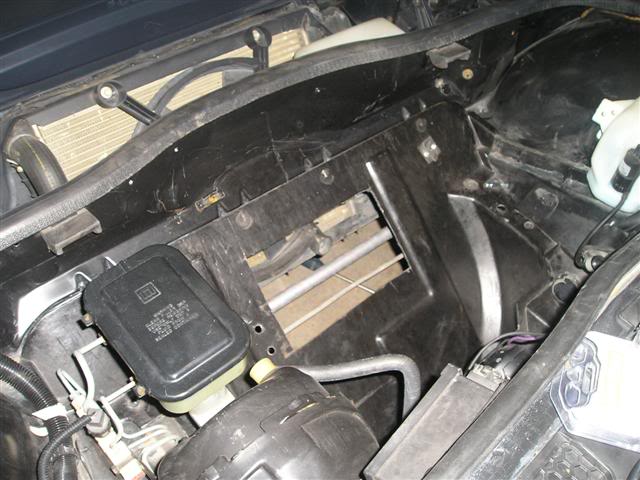
Step 1: Cut hole. That shroud is actually some type of composite material and not just plastic like I thought.... Anyways.. The hole is 10"x6" iirc incase anybody want's to do the same with their car.
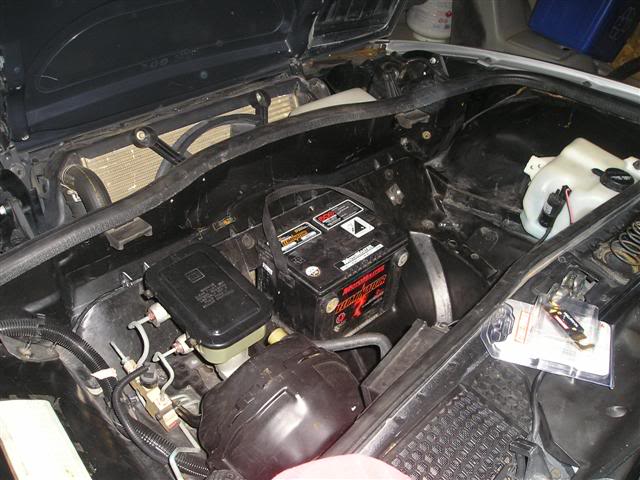
Test fit battery:
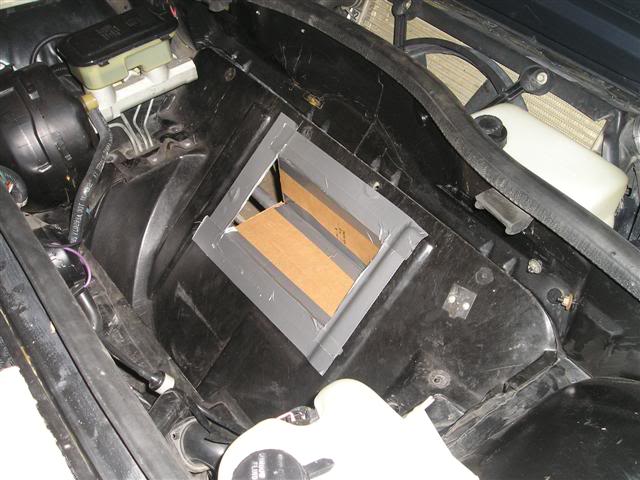
Using my highly advanced composite manufacturing techniques I made this extremely high tech mold for the battery tray out of cardboard I got from work, and duct tape I had lying around:
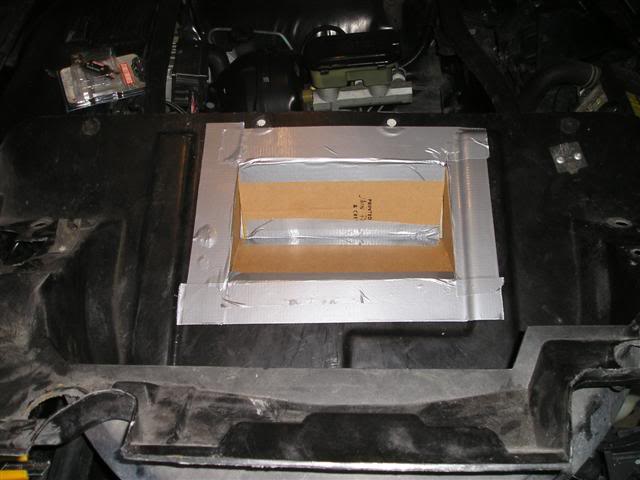
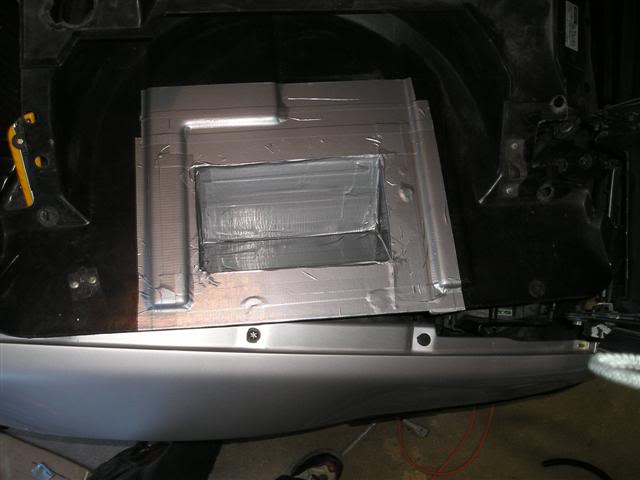
And, after a few minutes of glassing, we have 6 layers of fiberglass cloth layed down in the mold:
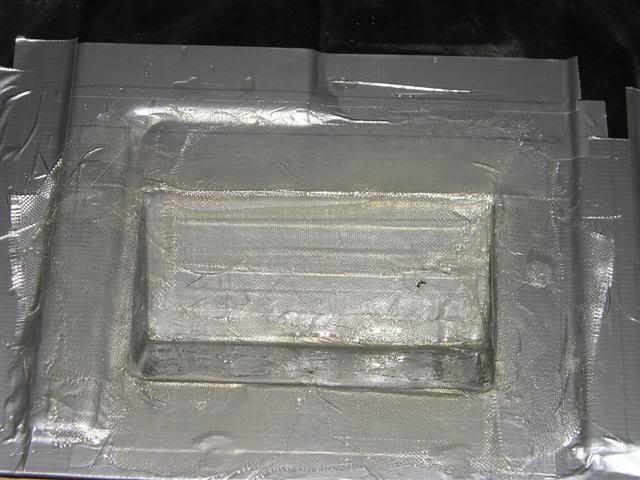
Going to pop her out tomorow night. Rough up the shroud so the tray is flush and not sticking up. Then glass the front on and reinforce the back with fiberglass matt. Once that is all hardened, it will get sanded down smooth, and then painted... Nice, clean and almost stock looking
Also, when I went in to Princess Auto last night to pick up some wire loom for the 0g battery wire I ended up leaving with about $100 of stuff and a few more ideas
What do you guys think, stock location:
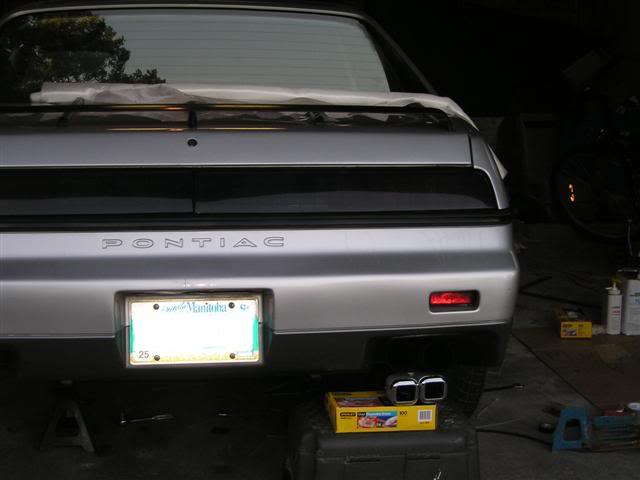
Center exit, and the do somthing with the stock exhaust cut-outs. The bumper would get notched and the tips would sit literally 1/2" below the plate:
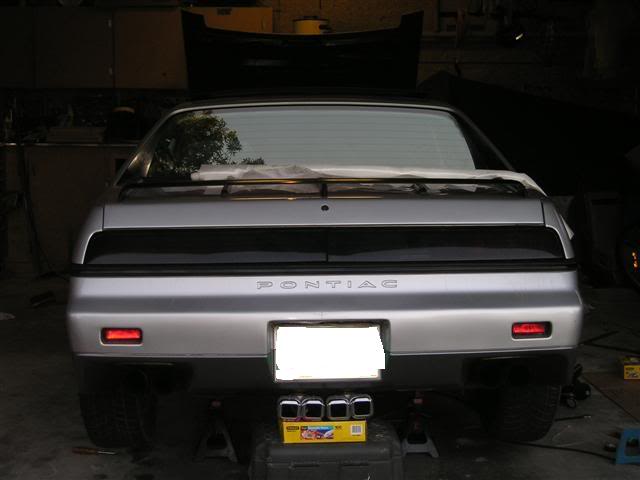
Side exit, the rockers would get notched out, and the tips would come through the rocker and stick out maybe a 1/2":
Or under the rocker, like the pic.
The only major work for either of those would be re-working the bumper. Which really isn't an issue, just time consuming.
Step 1: Cut hole. That shroud is actually some type of composite material and not just plastic like I thought.... Anyways.. The hole is 10"x6" iirc incase anybody want's to do the same with their car.
Test fit battery:
Using my highly advanced composite manufacturing techniques I made this extremely high tech mold for the battery tray out of cardboard I got from work, and duct tape I had lying around:
And, after a few minutes of glassing, we have 6 layers of fiberglass cloth layed down in the mold:
Going to pop her out tomorow night. Rough up the shroud so the tray is flush and not sticking up. Then glass the front on and reinforce the back with fiberglass matt. Once that is all hardened, it will get sanded down smooth, and then painted... Nice, clean and almost stock looking
Also, when I went in to Princess Auto last night to pick up some wire loom for the 0g battery wire I ended up leaving with about $100 of stuff and a few more ideas
What do you guys think, stock location:
Center exit, and the do somthing with the stock exhaust cut-outs. The bumper would get notched and the tips would sit literally 1/2" below the plate:
Side exit, the rockers would get notched out, and the tips would come through the rocker and stick out maybe a 1/2":
Or under the rocker, like the pic.
The only major work for either of those would be re-working the bumper. Which really isn't an issue, just time consuming.
Thread Starter
50 Watt CAFz'r
Joined: Aug 2003
Posts: 221
Phew... That was a lot of posting... Now you guys are up to date
Of course, there are people on here who know a heck of a lot more than I do about this stuff, feel free to offer tips, advice and/or hate mail
And just for the record, YES, I do have ADD and I tend to jump from one thing to another pretty often
Of course, there are people on here who know a heck of a lot more than I do about this stuff, feel free to offer tips, advice and/or hate mail
And just for the record, YES, I do have ADD and I tend to jump from one thing to another pretty often

Thread Starter
50 Watt CAFz'r
Joined: Aug 2003
Posts: 221
And just for the record:
I'm out of the house at about 7am every day, home at 6pm. After supper, a bit more work ect it's usually 8pm. Work on the car untill 10-11. So really, weeknights I only get about 2-3 hours a day working on it. Weekends I will maybe get 8 hours total working on it. I'm usually busy having a social life, or working on other people's cars (to fund this project)... So yah, this is going to take a while so don't expect it to be done next week
I'm out of the house at about 7am every day, home at 6pm. After supper, a bit more work ect it's usually 8pm. Work on the car untill 10-11. So really, weeknights I only get about 2-3 hours a day working on it. Weekends I will maybe get 8 hours total working on it. I'm usually busy having a social life, or working on other people's cars (to fund this project)... So yah, this is going to take a while so don't expect it to be done next week


